Drone Regulations 2026: What FAA Part 107 Pilots Need to Know Before Their Next Flight

The drone industry is soaring, but with great power comes great responsibility: and a whole lot of regulations. If you’re flying commercially in 2026, staying compliant with FAA Part 107 isn’t just about avoiding fines; it’s about building a sustainable, professional drone operation that clients can trust.

Whether you’re capturing stunning real estate footage, conducting infrastructure inspections, or expanding your drone services portfolio, understanding the latest regulatory landscape is crucial for every commercial pilot. Let’s dive into what you need to know to keep your operations legal, safe, and profitable.

Who Actually Needs a Part 107 Certificate?

Here’s the reality: if you’re making any money from drone flights: even indirectly: you need Part 107 certification. This includes YouTube monetization, social media campaigns, real estate photography, construction site inspections, and agricultural surveys. Even flying a sub-250g drone for commercial purposes requires certification.

The requirements are straightforward:

  • Be at least 16 years old
  • Pass the Part 107 knowledge test
  • Complete a Transportation Security Administration (TSA) background check
  • Demonstrate safe operation capabilities

Important note: This article provides general information only. Always consult the official FAA website and qualified legal professionals for specific regulatory guidance related to your operations.

image_1

Core Operational Restrictions You Can’t Ignore

Part 107 establishes clear operational boundaries that every commercial pilot must respect:

Altitude and Speed Limits

  • Maximum altitude: 400 feet above ground level (AGL)
  • Maximum speed: 100 mph (87 knots)
  • Exception: You can fly higher than 400 feet when operating within a 400-foot radius of a structure, but you cannot exceed 400 feet above that structure’s highest point

Visual Line of Sight (VLOS) Requirements

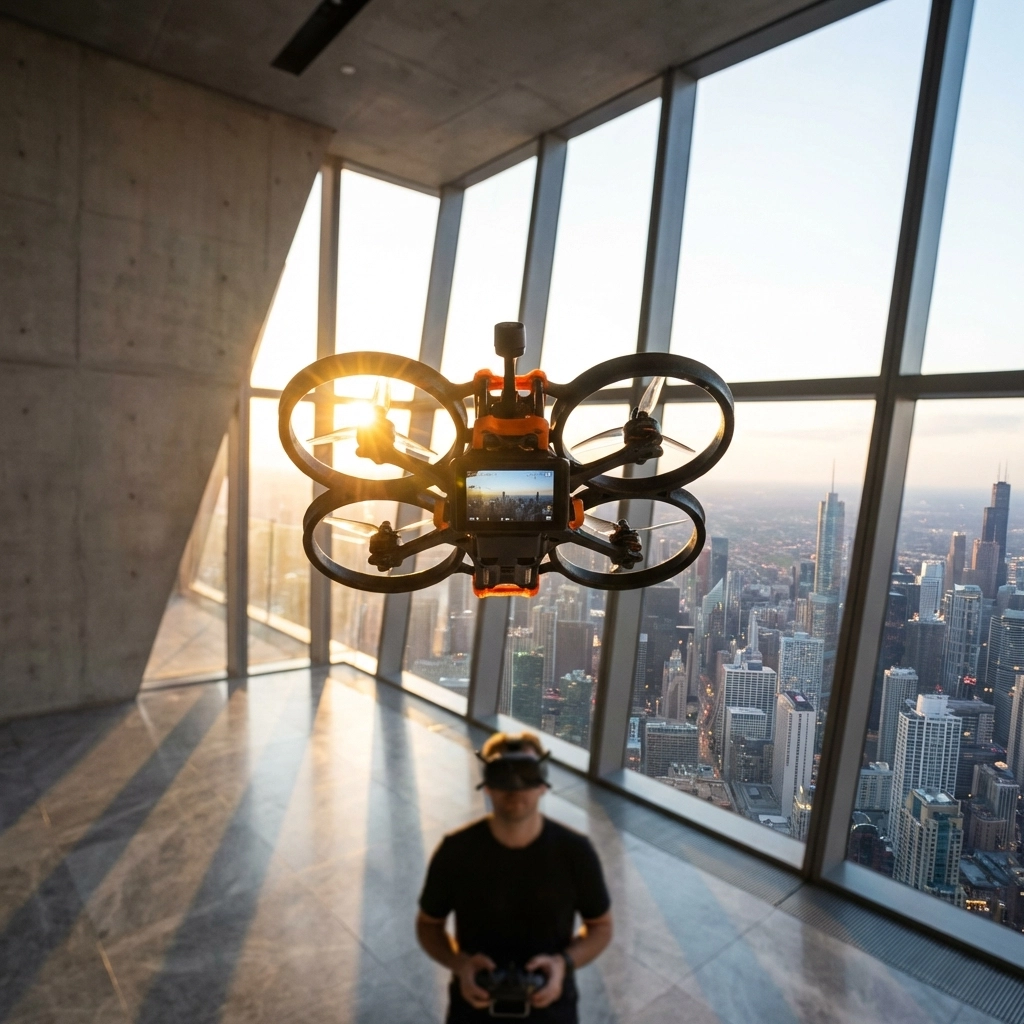
This is non-negotiable: you must maintain direct visual contact with your drone at all times. FPV goggles don’t count as VLOS: they’re considered a tool to enhance operations, not replace visual contact. If you’re using FPV equipment for cinematic work, ensure you have a visual observer maintaining VLOS while you operate through the goggles.

Night Operations and Lighting

Night flights are permitted under Part 107, but only with proper anti-collision lighting visible for at least 3 statute miles. Pilots must also complete additional training or pass a recurrent knowledge test to maintain night flight privileges.

What’s New in 2026: Part 108 and BVLOS Operations

The regulatory landscape has evolved significantly with the introduction of Part 108, which governs Beyond Visual Line of Sight (BVLOS) operations. This represents a massive opportunity for commercial operators looking to expand their capabilities.

Part 108 Key Changes

  • Weight limit increase: Drones up to 110 pounds (compared to Part 107’s 55-pound limit)
  • BVLOS authorization: Two pathways: permits (24-month validity) for pilot projects, or certificates (no expiration) for established operations
  • Enhanced operational flexibility: Ideal for large-scale inspections, mapping, and agricultural applications

However, Part 108 operations still require:

  • Specific area authorization
  • Operations typically below 400 feet AGL unless otherwise approved
  • Advanced safety management systems
  • Comprehensive risk assessments

image_2

Pre-Flight Compliance: Your Essential Checklist

Before every commercial flight, run through this compliance checklist to ensure you’re operating legally:

Airspace Authorization

  • Check airspace classification: Use tools like LAANC (Low Altitude Authorization and Notification Capability) for controlled airspace
  • Obtain necessary approvals: Some areas require advance authorization from ATC
  • Verify Temporary Flight Restrictions (TFRs): These can appear suddenly due to emergencies, VIP movements, or special events

Aircraft and Equipment Status

  • Registration verification: Ensure your drone is properly registered with the FAA
  • Remote ID compliance: Verify broadcast functionality is enabled
  • Battery and hardware check: Inspect propellers, motors, sensors, and camera systems
  • Insurance status: While not legally required, commercial liability insurance is highly recommended

Environmental and Operational Planning

  • Weather assessment: Avoid operations in high winds, precipitation, or low visibility
  • People and property: Maintain safe distances from uninvolved persons and buildings
  • Flight path planning: Establish clear operational boundaries and emergency procedures

Registration and Remote ID: The Non-Negotiables

Aircraft Registration

Every commercial drone must be individually registered with the FAA at $5 per aircraft (valid for three years). This applies even to lightweight drones under 250 grams when used commercially.

Remote ID Compliance

Remote ID is now fully enforced nationwide and serves as the “digital license plate” for drones. Your aircraft must:

  • Broadcast identification and location information
  • Transmit operator location data
  • Provide real-time status updates to authorities

Non-compliance can result in significant penalties, so ensure your equipment meets Remote ID standards before every flight.

image_3

Airspace Navigation and Flight Planning

Understanding airspace is crucial for legal operations. The United States airspace system includes:

Controlled Airspace (Classes B, C, D)

  • Requires authorization: Use LAANC for most routine operations
  • Processing times: Can range from immediate approval to several days
  • Altitude restrictions: May be more restrictive than the standard 400-foot ceiling

Uncontrolled Airspace (Class G)

  • Generally more flexible: Still subject to Part 107 operational rules
  • Due diligence required: Check for local restrictions and temporary flight restrictions

Special Use Airspace

  • Military operations areas: May have specific restrictions or prohibited operations
  • National parks and wilderness areas: Generally prohibited for commercial operations
  • Stadium and venue restrictions: Temporary flight restrictions around major events

Building Compliance Into Your Business Operations

Successful drone service providers build compliance into every aspect of their operations. This includes:

Documentation and Record Keeping

  • Maintain flight logs with dates, times, locations, and operational details
  • Keep current copies of all certifications and authorizations
  • Document pre-flight inspections and equipment maintenance

Client Education and Communication

Help your clients understand regulatory requirements that might affect their projects. This builds trust and demonstrates professionalism while protecting both parties from potential violations.

Staying Current with Regulatory Changes

The drone regulatory environment continues evolving rapidly. Subscribe to FAA updates, join professional organizations, and consider working with drone service providers who maintain current expertise in regulatory compliance.

Insurance and Risk Management Considerations

While not legally mandated, commercial drone insurance is essential for protecting your business. Consider coverage that includes:

  • General liability protection
  • Equipment coverage for drone hardware
  • Professional liability for service-related issues
  • Data breach protection for sensitive client information

The Future of Drone Regulations

Looking ahead, expect continued evolution in drone regulations, particularly around:

  • Automated operations: Increased autonomy and reduced pilot intervention
  • Urban air mobility: Integration with traditional aircraft operations
  • Advanced airspace management: Dynamic routing and real-time conflict resolution
  • International harmonization: Standardized approaches across different countries

Final Thoughts on Compliance

Regulatory compliance isn’t just about avoiding penalties: it’s about building a professional, trustworthy drone operation that clients can rely on. By staying current with Part 107 requirements, understanding new developments like Part 108, and maintaining rigorous operational standards, you’re positioning your business for long-term success in an increasingly competitive market.

Remember that regulations can change, and interpretations may vary based on specific circumstances. This article provides general guidance only and should not be considered legal advice. Always consult the official FAA website, current regulations, and qualified aviation attorneys for specific questions about your operations.

Disclaimer: This information is current as of January 2026 but regulations may change. Always verify current requirements with official FAA sources and consult with qualified legal professionals for specific regulatory compliance questions related to your drone operations.

Whether you’re just getting started or looking to expand your commercial drone operations, staying compliant with current regulations is your foundation for success. The drone industry offers incredible opportunities, but only for operators who respect the rules that keep our skies safe for everyone.

How to Build a Profitable Drone Service Business: Pricing, Clients, and Growth Strategy

Ready to turn your drone flying skills into a profitable business? You’re not alone. The commercial drone industry is booming, and skilled pilots who understand business fundamentals are cashing in on opportunities that didn’t exist five years ago.

But here’s the reality: successful drone service businesses aren’t built by accident. They require strategic thinking, smart pricing, systematic client acquisition, and operational excellence. The good news? Most drone service businesses achieve profitability within 6-12 months with proper planning, and full-time operators typically establish consistent client flow within 3-6 months.

Let’s break down exactly how to build a drone service business that generates real income.

Start With the Right Niche (This Makes or Breaks Everything)

image_1

Not all drone services are created equal. Your niche choice directly impacts your earning potential and how quickly you’ll reach profitability.

High-Value Niches:

  • Industrial inspection services: $1,500-$5,000 per project
  • Construction progress monitoring: $100-$200 per flight or $500-$1,500 monthly retainers
  • Agricultural mapping and crop monitoring: $5-$15 per acre
  • Insurance claim documentation: $150-$500 per claim

Entry-Level Niches:

  • Real estate photography: $75-$300 per property
  • Wedding and event videography: $200-$1,000 per event
  • Basic aerial photography: $50-$200 per session

Here’s the key insight: higher-value niches require more specialized equipment and expertise, but they’re also less saturated. Industrial inspection work might require thermal imaging capabilities and specific certifications, but you’re competing against fewer pilots charging premium rates.

Before investing heavily in equipment, validate your chosen niche. Search job sites like Indeed.com for “drone jobs in [your location]” to understand actual demand and competition levels. Contact potential clients directly: contractors, real estate agents, farmers, or industrial facilities: to understand their specific needs.

Master Your Pricing Strategy

image_2

Pricing separates profitable drone businesses from hobby operations struggling to break even. Your pricing strategy should reflect value delivered, not just time spent flying.

Three Pricing Models That Work:

1. Project-Based Pricing
Charge per completed project rather than hourly rates. This allows you to capture value for efficiency and expertise. A skilled pilot who completes a construction survey in 30 minutes can charge the same $500 as someone who takes 2 hours.

2. Retainer Arrangements
Monthly retainers provide predictable revenue streams. Construction companies often prefer paying $800-$1,500 monthly for weekly progress monitoring rather than per-flight pricing. This model stabilizes your income and builds long-term client relationships.

3. Value-Added Service Pricing
Combine basic drone services with premium deliverables. For construction monitoring, offer free 3D models of active sites to demonstrate how your services reduce rework costs. This positions you above commodity pricing and justifies premium rates.

Pricing Research Strategy:
Research competitor pricing in your geographic market, then adjust based on your expertise level and equipment quality. Don’t compete solely on price: compete on value, reliability, and specialized capabilities.

Consider offering pilot projects at reduced rates to establish credibility, then leverage testimonials and case studies for full-rate projects. This approach builds your portfolio while demonstrating value to potential long-term clients.

Build a Client Acquisition System

Most drone pilots fail because they treat marketing as an afterthought. Successful operators develop systematic approaches to finding and winning clients.

Direct Outreach Strategy:
Identify specific companies in your target niche and contact decision-makers directly. Skip generic marketing: focus on demonstrating how your services solve specific problems they’re already facing.

For construction companies, research their current projects and explain how drone monitoring could reduce site visits and improve project documentation. For real estate agencies, show examples of how aerial footage increases listing engagement and sale prices.

Portfolio Development:
Build a professional portfolio showcasing your best work across different scenarios. Use platforms like Instagram and YouTube to attract inbound inquiries, but focus on quality over quantity. Five exceptional examples of your work are more valuable than fifty mediocre clips.

Relationship-Based Growth:
The drone services industry runs on relationships and referrals. One satisfied construction client often leads to contracts with their subcontractors, suppliers, and industry contacts. Focus on exceeding expectations for your first few clients rather than pursuing dozens of prospects simultaneously.

Industry-Specific Networking:
Attend construction industry events, real estate meetups, or agricultural conferences. These face-to-face interactions often generate more business than online marketing efforts.

Scale Your Operations Systematically

image_3

Growing a drone service business requires operational systems that support increased project volume without compromising quality.

Start Part-Time, Scale Smart:
Begin operations while maintaining other income sources. This reduces financial pressure while you test markets and build client bases. Most successful operators validate their niche and establish operational systems before transitioning to full-time operations.

Essential Operational Systems:

  • Flight record management: Track all flights, locations, and client projects
  • Equipment maintenance schedules: Prevent costly failures and downtime
  • FAA compliance documentation: Maintain current Part 107 certification and flight logs
  • Client communication protocols: Standardize project updates and deliverable timelines

Service Diversification:
Expand revenue streams by combining primary services with complementary offerings. Agricultural spraying operations might add training services or equipment maintenance. Construction monitoring companies often expand into surveying or mapping services.

This diversification hedges against market fluctuations in any single service line while leveraging existing client relationships.

Business Fundamentals That Generate Profit

Legal Requirements First:
Obtain FAA Part 107 certification before accepting commercial work. Dedicate 15-20 hours to focused study: this certification represents your first concrete business step and demonstrates professional credibility to potential clients.

Equipment Investment Strategy:
Match equipment purchases to confirmed client needs rather than buying the latest technology. A reliable drone with good camera capabilities often generates more income than cutting-edge equipment sitting unused.

Consider TechInMotion360’s FPV drone support packages for technical guidance and drone components that balance performance with cost-effectiveness.

Financial Management:
Separate business and personal finances from day one. Track project profitability, not just revenue. Account for equipment depreciation, insurance costs, and vehicle expenses when calculating true profit margins.

Insurance and Risk Management:
Commercial drone insurance is non-negotiable. Liability claims can destroy uninsured operations overnight. Research policies that cover your specific service types and geographic operating areas.

The Path Forward

Building a profitable drone service business isn’t about having the best flying skills: it’s about understanding business fundamentals and executing systematically. Focus on solving real problems for specific industries rather than treating drone services as a flying hobby.

Start by validating one niche thoroughly before expanding. Price based on value delivered, not time spent. Build relationships that generate referrals and repeat business. Scale operations through systems, not just more flying hours.

The commercial drone industry offers genuine opportunities for pilots who approach it strategically. Companies need reliable drone services, and they’re willing to pay premium rates for operators who deliver consistent results and professional service.

Your next step? Choose your niche, validate demand through direct client contact, and start building the operational systems that will support your growth. The market is there: success depends on how systematically you pursue it.

For technical support and equipment guidance as you build your operation, explore TechInMotion360’s services designed specifically for professional drone operators.

FPV Racing vs Cinematic FPV: Which Path Should You Choose in 2026?

You’ve mastered the basics, your goggles are dialed in, and your quad is finally flying smooth. Now comes the moment every FPV pilot faces: which path do you take? Racing through gates at breakneck speeds, or crafting cinematic masterpieces that capture the impossible? In 2026, both paths offer incredible opportunities, but they lead to completely different destinations.

This isn’t about which quad to buy, it’s about which pilot you want to become.

The Racing Path: Speed, Precision, and Pure Adrenaline

FPV racing is digital combat at 100+ mph. Picture yourself threading the needle between gates while three other pilots try to overtake you, all while your heart pounds and muscle memory takes over. Racing pilots develop reflexes that border on superhuman, reacting to course changes in milliseconds.

What Racing Really Demands

Racing isn’t just about going fast, it’s about being consistently fast under pressure. You’ll spend countless hours learning racing lines, perfecting your throttle control, and developing the mental fortitude to execute flawless runs when it matters. The skill ceiling is impossibly high, which means there’s always another level to reach.

The racing community operates on respect earned through performance. Rankings matter. Lap times matter. When you nail a perfect line that shaves two seconds off your personal best, that rush is pure addiction. But be ready for frustration too, racing will humble you repeatedly before it rewards you.

image_1

The Racing Lifestyle

Racing pilots often become part of tight-knit local communities. Race days become social events where pilots share tuning tips, celebrate victories, and commiserate over spectacular crashes. The competitive spirit creates bonds that extend far beyond flying.

Expect to invest significant time in maintenance and tuning. Racing quads take punishment, and you’ll become intimate with every screw, wire, and component. This technical knowledge often leads pilots into building custom racing setups that perfectly match their flying style.

The Cinematic Path: Storytelling Through Flight

Cinematic FPV transforms you into a flying cinematographer. You’re not just piloting, you’re painting with movement, creating shots that would be impossible with traditional cameras. According to recent industry data, over 60% of commercial drone video projects now incorporate FPV techniques, making this a path with serious professional potential.

What Cinematic Flying Entails

Cinematic pilots master three distinct flight modes: aggressive manual flying for dynamic shots, stabilized flight for smooth transitions, and cinematic mode for butter-smooth footage. You’ll learn to think like a director, planning shots that tell stories and evoke emotions.

The satisfaction comes from nailing the perfect reveal shot or capturing a moment that makes viewers feel like they’re flying. Unlike racing’s immediate feedback loop, cinematic work often requires patience, multiple takes, and post-production skills.

Creative and Commercial Opportunities

The cinematic path opens doors racing simply can’t. Real estate agents need cinematic drone services for property tours. Wedding photographers want dynamic footage that traditional drones can’t achieve. Content creators crave the unique perspectives only FPV can deliver.

Cinewhoop-style builds have become particularly valuable, accounting for 63% of commercial FPV projects. These compact, ducted-prop drones excel at tight interior shots and building tours that showcase spaces in revolutionary ways.

image_2

Skill Development: Two Different Journeys

Racing Skills Focus On:

  • Split-second decision making
  • Precision throttle and stick control
  • Race line optimization
  • High-stress performance
  • Technical tuning knowledge
  • Crash recovery and maintenance

Racing pilots develop incredible muscle memory and spatial awareness. The constant pressure to improve lap times creates pilots who can execute complex maneuvers instinctively.

Cinematic Skills Focus On:

  • Smooth, controlled movements
  • Shot composition and framing
  • Storytelling through camera movement
  • Working with clients and directors
  • Post-production workflow
  • Risk assessment for valuable equipment

Cinematic pilots become well-rounded creative professionals, developing business skills alongside flying expertise. Many successful cinematic pilots report that client communication and project management become as important as stick skills.

image_3

Community Culture: Competition vs Collaboration

The racing community thrives on competition. Pilots constantly push each other to fly faster, try more aggressive lines, and achieve better rankings. This competitive environment accelerates skill development but can feel intense for pilots who prefer collaborative learning.

Racing events create electric atmospheres where pilots share technical knowledge while fiercely competing. The community values performance above all else: your reputation is built on lap times and race results.

The cinematic community operates more collaboratively. Pilots share shots, discuss techniques, and often work together on projects. Success is measured differently: by the beauty of footage, client satisfaction, or creative breakthroughs rather than raw performance metrics.

Cinematic pilots often develop networks that include filmmakers, real estate professionals, and content creators. These connections frequently lead to paid opportunities and creative collaborations.

Investment Levels and Returns

Racing Investment:

  • Lower initial hardware costs (analog systems, lightweight components)
  • High ongoing maintenance costs due to frequent crashes
  • Equipment focused on performance over longevity
  • Potential prize money and sponsorships for top performers
  • Limited monetization options outside competitive success

Racing can be surprisingly affordable to start but expensive to maintain at competitive levels. However, the technical skills developed often translate into other drone-related opportunities.

Cinematic Investment:

  • Higher initial costs for quality cameras and stabilization
  • More expensive equipment due to commercial-grade requirements
  • Lower crash rates mean longer equipment lifespan
  • Multiple revenue streams: real estate, events, content creation
  • Scalable business potential with proper support packages

Cinematic pilots often see faster returns on investment through paid work, but the barrier to entry can be higher due to equipment costs and the need for additional skills like video editing.

Making Your Decision: Follow Your Energy

The right path often reveals itself through your natural interests and energy patterns:

Choose Racing If:

  • You crave competition and measurable performance goals
  • Quick feedback loops motivate you
  • You enjoy technical tuning and optimization
  • High-stress situations energize rather than drain you
  • You want to be part of a competitive community
  • Pure flying skill development is your primary goal

Choose Cinematic If:

  • You’re drawn to creative expression and storytelling
  • You enjoy working with clients and solving visual problems
  • Business development and marketing appeal to you
  • You prefer collaborative over competitive environments
  • Multiple income streams interest you more than prize money
  • You want to combine flying with other creative skills

image_4

Getting Started on Your Chosen Path

Racing Beginners: Start by finding local racing groups and attending events as a spectator. Most racing communities welcome newcomers and offer advice on entry-level racing builds. Focus on consistent flying before worrying about speed: clean, repeatable flights will improve faster than trying to go fast immediately.

Cinematic Beginners: Begin by studying cinematic footage and understanding what makes shots compelling. Practice smooth flying in open areas before attempting complex shots. Consider starting with drone components that allow you to build experience while keeping costs manageable.

Both paths benefit from proper preparation and realistic expectations. Racing pilots should prepare for frequent crashes and rebuilds. Cinematic pilots should invest in learning post-production skills and understanding client needs.

Your FPV Future Starts Now

The beautiful truth about FPV is that there’s no wrong choice: only different adventures. Racing pilots develop incredible precision and join communities united by shared passion for performance. Cinematic pilots become visual storytellers with the freedom to explore creative and commercial opportunities.

Some pilots eventually explore both paths, using racing skills to enhance their cinematic capabilities or applying cinematic thinking to make their racing footage more compelling. The skills from either path create a foundation for any drone-related career.

The most important decision isn’t which path to choose: it’s committing fully to the journey ahead. Whether you’re chasing lap times or perfect shots, 2026 offers incredible opportunities for dedicated FPV pilots willing to push their limits.

Your quad is ready. Your skills are developing. The only question remaining is: which pilot do you want to become?

FPV Drone Maintenance: How to Extend Flight Time and Prevent Costly Repairs

Your FPV drone is more than just a flying machine: it’s an investment in your passion, business, or creative vision. But here’s the reality: without proper maintenance, even the most expensive drone can become a costly paperweight faster than you think. The good news? A simple maintenance routine can dramatically extend your flight time, prevent emergency repairs, and keep you in the air longer.

Think of drone maintenance like caring for a high-performance sports car. You wouldn’t drive a Ferrari without regular oil changes, and you shouldn’t fly your FPV drone without consistent upkeep. The pilots who get thousands of flight hours out of their equipment aren’t just lucky: they follow proven maintenance strategies that we’re about to share.

Battery Management: Your Flight Time Foundation

Your battery pack is the heart of extended flight time, and proper battery care can mean the difference between 8-minute flights and 15-minute adventures. Poor battery maintenance is one of the fastest ways to kill both performance and your wallet.

Always use a balance charger and avoid overcharging: this single practice can extend your battery’s lifespan by months. Overcharging creates heat buildup that permanently damages lithium polymer cells, reducing capacity and creating safety hazards.

For storage between flying sessions, discharge batteries to approximately 50-60% rather than keeping them fully charged. Storing fully charged LiPo batteries for extended periods causes chemical degradation that you can’t reverse. Many pilots store batteries at full charge and wonder why their flight times drop dramatically after a few weeks.

image_1

Inspect your batteries before and after every flight for signs of swelling, puffing, leaks, or physical damage. A swollen battery isn’t just performance-limiting: it’s potentially dangerous and should be disposed of immediately through proper recycling channels.

Clean battery contacts regularly using isopropyl alcohol and cotton swabs. Dirty contacts create resistance that reduces power delivery and can cause voltage drops during high-demand maneuvers. This simple 30-second task can prevent unexpected power failures mid-flight.

Pre-Flight Maintenance: Catching Problems Before They Become Emergencies

Smart pilots know that most catastrophic failures start with small problems that could have been caught during inspection. A systematic pre-flight check takes less than five minutes but can save you hundreds in repair costs.

Battery verification goes beyond just checking charge levels. Ensure connections are secure with no wiggle or resistance, verify cell voltages are balanced within 0.1V of each other, and confirm your battery hasn’t suffered any impact damage since your last flight.

Propeller inspection might seem obvious, but it’s where many pilots get careless. Check for hairline cracks that aren’t immediately visible: these can cause catastrophic failure during aggressive maneuvers. Look for chips, bends, or imbalance issues that create vibration and stress other components.

Keep your firmware current with manufacturer updates. These aren’t just feature additions: they often include critical bug fixes and performance optimizations that prevent crashes and improve flight characteristics.

Motor testing should happen with propellers removed. Power up each motor individually and listen for unusual sounds, grinding, or hesitation. A motor that runs roughly on the ground will fail under flight loads.

Post-Flight Care: Protecting Your Investment

What you do immediately after landing determines how well your drone performs on the next flight. Hot motors, dirty components, and undetected damage compound quickly without proper post-flight attention.

Allow motors to cool completely before storage. Extended operation creates thermal stress that shortens motor life, and packing a hot drone can trap moisture and cause corrosion.

Clean thoroughly but smartly: remove dust, dirt, and debris using soft cloths and compressed air. For electronic components, use isopropyl alcohol rather than water, which conducts electricity and can cause short circuits even in small amounts. If something feels off after landing, a Phone/Video Basic Support “Quick Fix Call” ($50) can walk you through a 10-minute checklist before issues snowball.

image_2

Damage inspection after each flight catches problems while they’re still repairable. Check your frame for new stress fractures, examine the camera gimbal for impact damage, and verify all screws remain properly tightened. Small problems caught early are infinitely cheaper than major failures.

Systematic Maintenance Schedules: The Professional Approach

Professionals don’t maintain equipment randomly: they follow schedules that maximize performance while minimizing downtime. Adopting this approach separates serious pilots from weekend warriors.

Every 2-3 flights, perform light maintenance: blow out dust with compressed air, clean camera lenses, check motor smoothness by spinning them by hand, and inspect the frame for new damage or loose components. If you want a quick pro set of eyes before a session, book a Phone/Video Standard Support “Flight Ready Check” ($75).

Weekly deep cleaning involves removing the battery and accessing hard-to-reach areas. Clean motor bells, check wire connections for fraying, and inspect solder joints for cracks or cold joints that cause intermittent failures. For recurring issues or minor fixes, our FPV Drone Basic Maintenance & Repair ($40-$75) covers cleaning and adjustments, and for deeper tuning use Phone/Video Advanced Support “Performance Tune & Troubleshoot” ($125).

Monthly comprehensive inspection includes checking motor mounting screws (apply thread locker if loose), lubricating bearings with high-speed bearing oil, and testing all electronic systems under load. If you fly often, the Phone/Video Annual Remote Support Plan “Fly with Confidence” ($350) keeps your setup dialed all year.

Motor and Bearing Maintenance: The Performance Engine

Motors are the most expensive components to replace, making their maintenance critical for long-term cost control. Proper motor care can extend their lifespan from hundreds to thousands of flights. When you want smoother footage or more thrust, consider the Performance Upgrade Package ($175-$250) and, for remote tuning, Phone/Video Advanced Support “Performance Tune & Troubleshoot” ($125).

Bearing maintenance involves regular oiling with appropriate high-speed bearing lubricant: never use standard household oils that attract debris and create drag. Clean bearings showing high friction using specialized bearing cleaner or careful WD-40 application followed by proper lubrication.

Motor inspection should catch problems before they cause crashes. Look for burnt windings (indicated by discoloration or burning smells), loose magnets in the motor bell, and chipped or damaged motor shafts that cause vibration.

image_3

Check that motor screws maintain proper torque: loose screws allow motor movement that damages mounting points and creates electrical connection problems. Over-tightening, however, can crack motor mounting points or strip threads.

Component and Frame Integrity Checks

Your drone’s frame experiences incredible stress during aggressive flying, and small cracks can propagate into complete structural failures without warning. Regular frame inspection prevents catastrophic mid-air breakups that can damage expensive cameras and electronics. If damage is beyond a quick fix, our Full Rebuild / Frame Swap Package ($180-$300) gets you back in the air with a clean build.

Stress point examination focuses on areas where arms connect to the main body, motor mounting points, and anywhere different materials meet. Carbon fiber frames can develop delamination that isn’t immediately visible but compromises structural integrity.

Electronic system checks should identify short circuits, missing components, blown capacitors, frayed wires, and poor solder joints before they cause system failures. Many electronic problems start as intermittent issues that become permanent failures under flight stress.

Cost-Benefit Analysis: Maintenance vs. Replacement

Professional maintenance practices typically cost less than $20 per month in supplies and tools but can prevent repair bills that easily exceed $200-500 for major component failures. Quality drone components and proper maintenance supplies represent insurance against much larger replacement costs.

Consider that a replacement motor costs $30-80, while proper bearing maintenance costs under $5 annually. A new frame runs $50-150, while stress fracture inspection takes minutes and costs nothing. If a crash does happen, the “Ready-to-Fly Again” Crash Recovery Package ($325-$400) bundles diagnostics, repair, and test flights so you can recover faster.

Building Your Maintenance Toolkit

Effective maintenance requires the right tools and supplies. Basic cleaning supplies, quality lubricants, proper fasteners, and basic electronic testing equipment pay for themselves quickly through prevented failures.

TechInMotion360’s support packages often include maintenance supplies specifically chosen for FPV applications, ensuring compatibility and performance. If you’d rather we handle it end-to-end, the FPV Drone Basic Maintenance & Repair ($40-$75) covers cleaning, inspections, and minor fixes.

image_4

Long-Term Performance Optimization

Consistent maintenance doesn’t just prevent failures: it actively improves performance over time. Clean motors run cooler and more efficiently, properly maintained batteries deliver more consistent power, and well-maintained frames handle stress better during aggressive maneuvers.

Flight time improvements from proper battery care alone can add 2-4 minutes per flight, while motor maintenance ensures consistent power delivery throughout the battery’s discharge cycle.

Professional Support and Resources

While basic maintenance can be performed by any pilot, complex repairs and major overhauls benefit from professional expertise. Knowing when to seek professional help prevents amateur repairs that can cause more damage than the original problem.

Many maintenance tasks become easier with experience, but starting with professional guidance ensures you develop proper techniques from the beginning. TechInMotion360 provides resources and support for pilots at every maintenance skill level. For quick guidance, book a Phone/Video Basic Support “Quick Fix Call” ($50). For pre-session checks, choose the Phone/Video Standard Support “Flight Ready Check” ($75). For deeper tuning, use Phone/Video Advanced Support “Performance Tune & Troubleshoot” ($125). If you’re grounded, our “Ready-to-Fly Again” Crash Recovery Package ($325-$400), Full Rebuild / Frame Swap Package ($180-$300), and Performance Upgrade Package ($175-$250) get you flying again with confidence. Want ongoing help? The Phone/Video Annual Remote Support Plan “Fly with Confidence” ($350) keeps you covered all year.

The investment in proper maintenance pays dividends in extended component life, improved performance, and reduced emergency repair costs. Your future self: and your bank account: will thank you for establishing these habits early. Every flight hour gained through prevention is infinitely more valuable than time lost to repairs.

How to Choose the Best FPV Drone Parts Without Wasting Money (Compatibility Guide)

Let’s be honest, nothing stings quite like ordering a bunch of FPV drone parts, waiting a week for delivery, and then realizing half of them don’t work together. Been there. Done that. Learned the hard way so you don’t have to.

Building your own FPV drone is one of the most rewarding experiences in the hobby. You get exactly what you want, you understand your machine inside and out, and you save money compared to buying pre-built options. But here’s the catch: compatibility matters more than you think.

This guide is going to walk you through everything you need to know about choosing FPV drone parts that actually work together, without burning through your budget on returns, adapters, or parts that collect dust on your workbench.

Understanding the Core Components

Before we dive into compatibility, let’s make sure we’re on the same page about what you’re actually buying. Every FPV drone build requires these essential components:

  • Frame – The skeleton that holds everything together
  • Flight Controller (FC) – The brain of your drone
  • Electronic Speed Controller (ESC) – Controls motor speed
  • Motors – Provide thrust
  • Propellers – Generate lift
  • Video Transmitter (VTX) – Sends video to your goggles
  • FPV Camera – Captures the view
  • Radio Receiver (RX) – Receives commands from your controller
  • Battery – Powers the whole system

Each of these needs to play nice with the others. One wrong choice and you’re either rewiring connections, buying adapters, or starting over completely.

image_1

The Research-First Approach That Saves You Money

Here’s a technique that’s saved me hundreds of dollars: instead of picking parts at random, research pre-built or Bind-N-Fly drones in your target category first.

Want to build a 5-inch freestyle quad? Look at what the successful pre-builts are using. Document the specs. You’ll start to see patterns, most 5-inch freestyle builds use 2207 or 2306 motors rated between 1750-1850 KV with 5-inch propellers and 600mW to 2-watt video transmitters.

This approach reveals proven combinations that actually work together. You’re not guessing, you’re replicating success.

Check out what’s available in our drone components category to see the parts we’ve vetted for quality and compatibility.

The Flight Controller and ESC: Buy Them Together

This is where most beginners mess up, so pay attention.

The flight controller and ESC are the most critical compatibility pairing in your entire build. My recommendation? Never buy these separately. Instead, purchase them as a “stack” combo.

Why? Because:

  • Pre-matched stacks guarantee compatible connectors
  • You avoid the nightmare of repinning or soldering adapters
  • Mounting patterns are already matched
  • Firmware compatibility is sorted

Speaking of mounting patterns, most 5-inch frames accept either 20x20mm or 30x30mm mounting holes. Before you buy your stack, check your frame’s specifications. A 30×30 stack won’t fit in a 20×20 frame without adapters (and sometimes not at all).

image_2

Frame Selection: Size Matters More Than You Think

Your frame dictates almost everything else about your build. It determines:

  • What size propellers you can run
  • What mounting pattern your FC/ESC stack needs
  • What camera size you can fit
  • How much weight you can carry

For most pilots, a 5-inch frame offers the best balance of power, agility, and flight time. But if you’re looking for something more specialized, we carry AOS RC FPV drone frames including 3D printed options for custom builds.

Pro tip: Don’t cheap out on the frame. A quality frame survives crashes and protects your expensive electronics. A flimsy frame cracks on the first hard landing and takes your camera and VTX with it.

Motor and Propeller Compatibility

Motors and propellers work as a team. The wrong combination wastes battery, reduces flight time, and can even damage your motors.

Here’s the basic formula:

  • Motor size (like 2207 or 2306) indicates the stator width and height
  • KV rating determines how fast the motor spins per volt
  • Propeller size must match your frame and motor capabilities

For a standard 5-inch build:

  • 2207 or 2306 motors
  • 1750-1850 KV for 6S batteries
  • 2300-2600 KV for 4S batteries
  • 5-inch propellers (duh)

Higher KV means faster spinning but more current draw. Lower KV offers more torque and efficiency. Match your KV to your battery voltage and flying style.

image_3

The Video System Trap: Analog vs. Digital

This is where things get expensive if you’re not careful.

Critical rule: Your camera and video transmitter must use the same system. An analog camera will NOT work with a digital video transmitter. Period.

⚠️ FLAG FOR LINDY – LEGAL REVIEW REQUIRED:
The following section contains competitor brand comparisons (DJI, HDZero, Walksnail, Caddx) that require legal review before publishing. Please review and approve.

There are currently three main digital FPV systems on the market: DJI, HDZero, and Walksnail. Each uses proprietary cameras and transmitters that are NOT cross-compatible. A DJI camera won’t work with an HDZero receiver, and vice versa.

For analog systems, popular camera options include the Caddx Ratel 2 and similar models from various manufacturers.

END FLAG SECTION

If you’re just starting out, analog is cheaper and simpler. If you want the best video quality and can afford the investment, digital is the future. Just don’t mix and match systems.

One More Thing About Video Transmitters

NEVER power on your video transmitter without an antenna attached.

I’m putting this in its own section because I’ve seen too many pilots fry their VTX by forgetting this step. Operating without an antenna can destroy your transmitter instantly. That’s $30-100 down the drain in seconds.

Always double-check. Every. Single. Time.

Radio Receiver Compatibility

Your radio receiver needs to match your radio transmitter’s protocol. If you’re using an ExpressLRS transmitter, you need an ExpressLRS receiver. Same goes for Crossfire, FrSky, and other protocols.

This seems obvious, but you’d be surprised how many pilots order the wrong receiver because they didn’t check the protocol. Take 30 seconds to verify before you checkout.

When DIY Gets Overwhelming

Look, building your own FPV drone is awesome. But sometimes you want to fly, not troubleshoot compatibility issues.

If you’re feeling overwhelmed or just want a professional eye on your build, check out our FPV Drone Support Packages. We offer everything from quick troubleshooting calls to full performance tune-ups and crash recovery services.

And if you’d rather skip the build entirely and get something flight-ready, browse our DJI BNF/PNP FPV Drones collection.

image_4

Your Pre-Purchase Checklist

Before you hit that buy button, run through this list:

  1. ✅ Frame mounting pattern matches your FC/ESC stack
  2. ✅ Motor size and KV appropriate for your frame and battery
  3. ✅ Propeller size matches your frame
  4. ✅ Camera and VTX use the same video system
  5. ✅ Camera mount size fits your frame (or you have an adapter)
  6. ✅ Radio receiver matches your transmitter’s protocol
  7. ✅ Battery connector matches your ESC/PDB
  8. ✅ All connectors are compatible (or you’re prepared to solder)

Final Thoughts

Choosing FPV drone parts doesn’t have to be a minefield. Research proven combinations, buy your FC and ESC as a stack, verify your video system compatibility, and double-check everything before checkout.

The time you spend on research upfront saves you money, frustration, and wasted weekends waiting for replacement parts.

Ready to start your build? Head over to TechInMotion360’s shop to browse our curated selection of compatible parts and support packages. And if you get stuck, our services team is here to help.

Now get out there and build something awesome. 🚁

Cinematic FPV Real Estate Videos: Why Fly-Throughs Will Change Your Listings in 2026

Picture this: A potential buyer clicks on your property listing. Instead of scrolling through static photos, they’re instantly transported through the front door, gliding seamlessly through the living room, swooping up the staircase, and floating out onto the backyard patio: all in one breathtaking, uninterrupted shot.

That’s the power of FPV drone fly-throughs. And in 2026, they’re not just a “nice-to-have” for real estate marketing: they’re becoming the new standard.

If you’re a real estate agent, property developer, or homeowner looking to sell, here’s why cinematic FPV videos are about to change everything about how you showcase listings.

What Exactly Is an FPV Fly-Through?

FPV stands for “first-person view.” Unlike traditional drones that hover outside and capture aerial shots, FPV drones are designed to fly fast, fly low, and navigate through tight spaces. We’re talking doorways, hallways, around furniture, and out windows.

The result? A dynamic, continuous “one-take” video tour that flows through a property like a cinematic experience. It’s immersive, engaging, and frankly: pretty addictive to watch.

image_1

Traditional real estate photography gives buyers a snapshot. Standard drone footage gives them a bird’s-eye view. But FPV fly-throughs? They put buyers inside the property, creating an emotional connection that static images simply can’t match.

The Numbers Don’t Lie: FPV Drives Results

Let’s talk data, because at the end of the day, marketing is about results.

In 2025, a Tempe hotel campaign using FPV fly-throughs saw virtual tour engagement jump by 41%. That’s not a minor bump: that’s a fundamental shift in how viewers interact with property content.

Even more compelling: A luxury Sedona property listing that incorporated advanced drone techniques sold 22% faster than comparable properties in the same market. When buyers feel connected to a space before they ever set foot inside, the decision-making process accelerates.

Across the board, listings featuring aerial video experienced a 68% increase in inquiries in 2025. And commercial real estate in Arizona saw a 37% jump in drone video adoption year-over-year.

The message is clear: Video sells. And FPV video sells faster.

Why FPV Beats Traditional Drone Footage

Standard drone cinematography has its place. Those sweeping aerial shots of the neighborhood, the dramatic reveals of a property’s exterior: they’re beautiful and effective.

But here’s where FPV technology pulls ahead: seamless indoor-outdoor transitions.

Traditional drones can’t fly through a front door, weave around a kitchen island, and exit through a sliding glass door onto the pool deck. They’re too big, too slow, and too limited by their design.

FPV drones are built for exactly this kind of agile, creative flying. They capture perspectives that were literally impossible just a few years ago:

  • Chase sequences that follow the natural flow of a home’s layout
  • Tight fly-ins that showcase architectural details up close
  • Indoor-to-outdoor transitions that reveal how living spaces connect to outdoor entertainment areas
  • Dynamic reveals that make viewers feel like they’re discovering the property in real-time

image_2

A Phoenix real estate campaign in 2025 tested this directly: FPV footage boosted online engagement by 70% compared to standard drone footage of the same properties.

That’s not a slight edge. That’s a game-changer.

2026 Technology: Better, Safer, More Accessible

One reason FPV fly-throughs are exploding right now? The technology has caught up with the creative vision.

Today’s FPV systems feature:

  • 8K micro-cameras with advanced low-light sensors for stunning detail in any lighting condition
  • AI-powered stabilization that delivers buttery-smooth footage even during aggressive maneuvers
  • Collision-avoidance systems that make indoor flying safer and more reliable than ever

These improvements mean professional-quality FPV videography is more accessible and consistent than it’s ever been. The days of shaky, risky indoor drone footage are behind us.

For real estate professionals, this translates to higher production value without the uncertainty. You get cinematic results you can count on.

What Types of Properties Benefit Most?

Honestly? Almost any property can benefit from an FPV fly-through. But certain listings see especially dramatic results:

Luxury Homes

High-end buyers expect high-end marketing. An FPV fly-through signals that you’re serious about presentation: and that the property is worth the investment.

Homes with Unique Architecture

Mid-century modern, open-concept designs, multi-level layouts: these properties shine when buyers can experience the flow and spatial relationships firsthand.

Properties with Outdoor Living Spaces

Pools, patios, outdoor kitchens, landscaped gardens: FPV drones showcase how indoor and outdoor spaces connect in ways static photos never could.

image_3

Commercial Real Estate

Event venues, restaurants, office spaces, hotels: any commercial property where experience matters benefits from immersive video tours.

New Construction and Developments

For builders and developers, FPV tours help pre-sell units before construction is even complete. Buyers can visualize the space in ways that floor plans and renderings can’t achieve.

The Competitive Reality: Standard Footage No Longer Cuts It

Here’s the uncomfortable truth for real estate marketers in 2026: Standard aerial footage no longer meets market expectations.

By 2025, over 60% of new commercial drone video projects in the US incorporated FPV techniques. Agencies now routinely require FPV in project briefs. Buyers have become accustomed to immersive video content across every platform they use.

When your competitors are delivering cinematic fly-through tours and you’re still relying on static photos and basic drone shots, you’re not just behind the curve: you’re invisible.

The good news? Getting started with FPV real estate video isn’t as complicated as you might think.

How to Get Started with FPV Real Estate Videos

If you’re ready to level up your property marketing, here’s what to consider:

Work with Experienced Pilots

FPV flying: especially indoors: requires skill, practice, and precision. This isn’t a weekend hobby project. Partner with professionals who understand both the technical requirements and the creative storytelling that makes real estate video effective.

At TechInMotion360, we specialize in cinematic drone services that help properties stand out. Whether you need a single listing video or ongoing support for your real estate business, our team delivers professional-quality FPV content that drives results.

Plan Your Shot List

The best FPV fly-throughs aren’t improvised: they’re choreographed. Work with your pilot to map out the route, identify key features to highlight, and plan transitions that create narrative flow.

Prepare the Property

FPV drones are agile, but they still need clear flight paths. Remove obstacles, ensure good lighting, and stage the property so it looks its best on camera.

Invest in Quality

This isn’t the place to cut corners. Professional FPV videography requires professional equipment, skilled operators, and post-production expertise. The difference between amateur and professional footage is immediately obvious: and so is the impact on buyer engagement.

image_4

Check out our services offered to see how we can help bring your listings to life.

The Future Is Immersive

Real estate marketing has always been about helping buyers imagine themselves in a space. For decades, that meant glossy photos and carefully staged open houses.

In 2026, it means putting buyers inside the property before they ever schedule a showing. It means creating emotional connections through dynamic, cinematic storytelling. It means standing out in a crowded market where attention is the most valuable currency.

FPV fly-throughs aren’t a gimmick. They’re the future of property marketing: and that future is already here.

Ready to transform how you showcase your listings? Visit TechInMotion360.org to learn more about our drone services, or explore our FPV drone support packages if you’re looking to build your own in-house capabilities.

The properties that sell fastest in 2026 will be the ones that buyers can experience before they ever walk through the door. Make sure yours is one of them.


🚩 FLAG FOR LINDY: This blog post does not contain direct competitor comparisons. No legal review required for this content. Ready to publish pending Michael’s approval.

FPV Drone Setup for Beginners: 7 Mistakes You’re Making (And How to Fix Them)

So you’ve finally taken the plunge into FPV flying. Welcome to one of the most exhilarating hobbies on the planet. There’s nothing quite like strapping on your goggles and seeing the world from a completely new perspective, zipping through trees, diving off buildings, or capturing cinematic footage that makes people’s jaws drop.

But here’s the thing: most beginners crash hard before they ever really get started. And I’m not just talking about crashing their drones (though that happens too). I’m talking about making preventable setup mistakes that kill the fun before it even begins.

After years of helping pilots get airborne at TechInMotion360, I’ve seen the same errors pop up again and again. The good news? Every single one of them is fixable. Let’s break down the seven biggest mistakes you’re probably making right now, and exactly how to turn things around.

Mistake #1: Skipping Simulator Practice

Look, I get it. You just dropped serious cash on your first FPV rig, and that shiny quad is calling your name. The last thing you want to do is sit at your computer flying a virtual drone when the real one is right there.

But here’s the brutal truth: FPV flying is hard. Really hard. The controls are counterintuitive, the perspective is disorienting, and your reflexes haven’t been trained yet. Without simulator time, your first real flight will likely last about three seconds before you’re picking pieces out of a tree.

The Fix: Commit to at least 10 hours of simulator practice in Acro (manual) mode before your first real flight. Yes, ten hours. It sounds like a lot, but it’s the difference between a controlled maiden voyage and an expensive crash. Popular simulators like Liftoff, Velocidrone, and DRL Simulator will build the muscle memory you need.

image_1

Mistake #2: Ignoring Component Compatibility

This one bites builders hard. You find a great deal on motors, grab some random ESCs, pick up a flight controller that looked cool, and then wonder why things are smoking when you plug in the battery.

Here’s what’s happening: electronic components have specific voltage ratings, and mixing them incorrectly is a recipe for disaster. Most components handle either 5V (from the flight controller’s regulator) or direct battery voltage (anywhere from 7V to 36V depending on your pack). Sending 22V to a component rated for 5V? That’s an instant magic smoke release.

The Fix: Before purchasing anything, map out your entire build and verify voltage compatibility across all components. When in doubt, stick with quality drone components from trusted sources that provide clear specs. If you’re new to building, consider a BNF or PNP drone where compatibility has already been sorted out for you.

Mistake #3: Getting the Power-On Sequence Wrong

You’d think turning on electronics would be straightforward, right? Press the power button and go. But FPV systems are picky about order, and doing it wrong can cause binding issues, video interference, or, in worst cases, a runaway drone.

The Fix: Always follow this sequence:

  1. Transmitter (radio) first – This ensures your drone has a control signal to bind to
  2. Goggles second – Get your video feed ready
  3. Drone last – Only power up when everything else is ready to receive

And when you’re done flying? Reverse the order. Drone off first, then goggles, then transmitter. This simple habit will save you from countless headaches.

image_2

Mistake #4: Throttle Position Mistakes When Arming

Picture this: you’re at the field, everything’s powered on correctly, you flip the arm switch and… nothing. The drone just sits there. You try again. Still nothing. Frustration builds.

Nine times out of ten, this is a throttle position issue. As a safety feature, most flight controllers won’t arm unless your throttle stick is at the absolute bottom of its travel. Even a tiny bit of upward position, so small you might not notice, will prevent arming.

The Fix: Before attempting to arm, physically push your throttle stick all the way down and hold it there. Some pilots develop a habit of giving the stick a little extra push just to be sure. Also, check your Betaflight (or other configurator) settings to ensure your throttle endpoints are calibrated correctly. Your min throttle value should read close to 1000 when the stick is fully down.

Mistake #5: Starting in the Wrong Flight Mode

Here’s where ego gets a lot of beginners in trouble. You’ve seen those incredible freestyle videos, and you know the pros fly in Acro mode. So naturally, you want to start there too.

Please don’t.

Acro mode gives you complete manual control: which is amazing once you know what you’re doing. But for a true beginner, it’s like learning to drive in a Formula 1 car. You need the basics first.

The Fix: Progress through flight modes systematically:

  • Level/Angle mode – The drone self-levels when you release the sticks. Perfect for learning basic orientation and building confidence.
  • Horizon mode – Similar to level mode but allows flips and rolls at full stick deflection. Good for learning aerobatics with a safety net.
  • Acro mode – Full manual control. Graduate to this once you’re comfortable with the others.

There’s no shame in the progression. Every pilot you admire went through these same steps.

image_3

Mistake #6: Poor Soldering and Assembly

Building your own FPV drone is incredibly rewarding, but bad solder joints are the silent killer of builds. A cold joint might work fine on the bench, then vibrate loose mid-flight. Excess solder can bridge connections and short components. Insufficient heat creates weak connections that fail under stress.

The Fix: Invest in proper tools before you start building:

  • Quality soldering iron (temperature-controlled, 60W minimum)
  • Good solder (60/40 or 63/37 rosin core)
  • Flux (makes everything flow better)
  • Hex drivers in 1.5mm, 2mm, and 2.5mm sizes
  • Proper M8 nut driver for props

If soldering intimidates you, there’s no shame in getting help. Our FPV Drone Support Packages include build assistance and troubleshooting for pilots who want expert guidance. Sometimes having a pro check your work: or handle the tricky bits: is the smartest move you can make.

Mistake #7: First Flights on Hard Surfaces

Your first few takeoffs and landings are going to be rough. That’s not pessimism: it’s reality. And when those rough landings happen on concrete or asphalt, you’re looking at broken props, cracked frames, and potentially damaged cameras or motors.

The Fix: Find a grassy field for your initial flights. Soft surfaces are incredibly forgiving. A tipover that would destroy a prop on concrete becomes a harmless tumble in thick grass. Once you’ve got consistent takeoffs, hovering, and controlled landings down, you can graduate to harder surfaces.

Also consider having spare parts on hand. Extra props are essential. If you’re flying AOS RC frames, keep backup arms available. Being prepared for minor damage means you’re back in the air faster.

image_4

The Bigger Picture

Here’s what I want you to take away from all this: mistakes are part of the journey. Every experienced FPV pilot has a graveyard of broken props and embarrassing crash stories. The difference is that they learned from each one.

The pilots who succeed aren’t the ones who never fail: they’re the ones who set themselves up to fail safely, learn quickly, and keep progressing.

If you’re feeling overwhelmed by the setup process or just want someone in your corner as you learn, check out our support packages designed specifically for beginners. From quick troubleshooting calls to full build assistance, having expert backup makes the learning curve a lot less steep.

Now get out there, put in your simulator hours, double-check those connections, and start flying. The sky’s waiting.


Want more FPV tips and guides? Visit the TechInMotion360 blog for regular updates, or browse our shop for quality components and support services.

The Ultimate Guide to Cinematic Drone Techniques: Create Professional Aerials in 5 Steps

There’s something magical about watching perfectly executed aerial footage. The smooth glides over landscapes, the dramatic reveals, the way a well-crafted drone shot can make viewers feel like they’re soaring through the sky themselves. But here’s the thing, creating that kind of cinematic magic isn’t about luck or having the most expensive gear. It’s about mastering a handful of fundamental techniques that separate amateur footage from professional-grade content.

Whether you’re capturing real estate fly-throughs, documenting adventures, or building a portfolio that turns heads, this guide will walk you through five actionable steps to elevate your aerial game. Let’s get you flying like a pro.

Step 1: Plan Your Shoot with Purpose

Every breathtaking aerial shot you’ve ever seen started long before the drone left the ground. Planning isn’t just about logistics, it’s about vision.

Pre-Flight Essentials

Before you even think about creative decisions, nail down the basics:

  • Check weather conditions: Wind speeds, cloud cover, and lighting all impact your footage dramatically
  • Review local regulations: Know your airspace restrictions and any permits required
  • Safety inspection: Battery levels, propeller integrity, GPS signal strength, don’t skip these

image_1

Storyboard with Intention

Here’s where amateurs and professionals diverge. Pros don’t just “go up and see what looks cool.” They define what each shot needs to accomplish. Ask yourself:

  • Am I establishing a location?
  • Am I following a subject through space?
  • Am I building suspense or creating a reveal?

Think about leading lines in your environment, roads cutting through forests, rivers winding through valleys, architectural symmetry in urban settings. These natural guides pull viewers’ eyes through the frame and add serious depth to your compositions.

If you’re working with an FPV drone setup, planning becomes even more critical. FPV flying opens up dynamic possibilities, but it also demands knowing your flight path before you commit.

Step 2: Configure Optimal Camera Settings

Your drone’s camera is only as good as the settings you dial in. Get these right, and you’ll have footage that’s a dream to work with in post-production. Get them wrong, and no amount of editing will save you.

Resolution and Frame Rate

  • Shoot in 4K: Even if your final output is 1080p, 4K gives you flexibility to crop, stabilize, and reframe without losing quality
  • Frame rate choices: 24fps delivers that classic cinematic feel. 30fps works great for general content. Save 60fps and higher for footage you plan to slow down

The 180-Degree Rule

This one’s non-negotiable for natural-looking motion blur. Set your shutter speed to double your frame rate:

  • Shooting 24fps? Shutter speed = 1/50
  • Shooting 30fps? Shutter speed = 1/60
  • Shooting 60fps? Shutter speed = 1/120

You might need ND filters to achieve these settings in bright conditions, but trust me, the smooth, filmic motion blur is worth it.

Color Profile Strategy

Shoot in a flat or log color profile whenever possible. Yes, the footage looks washed out straight from the camera. That’s the point. You’re preserving dynamic range and giving yourself maximum flexibility in color grading later.

Keep ISO as low as possible to minimize noise. Your shadows will thank you.

image_2

Step 3: Master Smooth Flight Control

Here’s a truth that took me way too long to learn: slow is smooth, and smooth is cinematic. Every jerky movement, every sudden correction: your footage captures all of it. And viewers feel it, even if they can’t articulate why something looks “off.”

The Art of Gradual Movement

Train yourself to make inputs gradually. Instead of snapping the stick to turn, ease into it. Let movements build and fade organically. Think of piloting like you’re operating a massive, expensive piece of equipment floating through air: because you are.

Adjust your gimbal pitch speed down to around 10 for slower, more controlled camera tilts. Fast gimbal movements scream “amateur” louder than almost anything else.

Leverage Automated Flight Modes

Modern drones come packed with intelligent flight modes that can elevate your footage dramatically:

  • Waypoints: Pre-program exact flight paths for repeatable, buttery-smooth shots
  • ActiveTrack: Let the drone handle subject tracking while you focus on flight path
  • Point of Interest: Orbit shots that maintain perfect framing automatically

These aren’t cheats: they’re tools. Professionals use them constantly.

Combining Movements

Single-axis movements (just forward, just up, just panning) often look flat. The magic happens when you combine:

  • Forward motion + gradual tilt down
  • Rising altitude + slow orbit
  • Backward pull + pan to reveal

These compound movements create depth and energy that single-axis shots simply can’t match.

For complex flying or if you’re still building confidence, TechInMotion360’s support packages can help you dial in your setup and troubleshoot flight behavior issues before they cost you a shot.

Step 4: Execute Dynamic Shot Compositions

Now we get to the fun part: the actual shots that make people stop scrolling and pay attention.

image_3

Essential Cinematic Shots to Master

The Orbit Shot
Circle around your subject while keeping it centered in frame. This works phenomenally for architecture, vehicles, and people in dramatic landscapes. Point of Interest mode makes this easier, but manual orbits give you more creative control.

The Reveal Shot
Start with an obstructed or limited view: behind a tree line, facing a hillside, low to the ground. Then rise or push forward to reveal the full scene. The payoff is emotional. Viewers feel like they’re discovering something.

The Pull-Away
Begin hovering close to your subject, then gradually move backward and upward simultaneously. This creates scale and context, showing your subject in relation to the environment around it.

Low-Flying Glides
Skim low over water, grass, or terrain. The sense of speed and proximity creates immersive, high-energy footage. This requires practice and confidence: start higher than you think you need to.

Top-Down Perspective
Bird’s-eye shots looking straight down create abstract, geometric compositions. Roads become lines, crowds become patterns. It’s a perspective humans rarely see, which makes it inherently compelling.

Timing is Everything

Golden hour (just after sunrise, just before sunset) and blue hour (the 20-30 minutes before sunrise and after sunset) deliver lighting that’s nearly impossible to replicate any other way. The soft, warm tones during golden hour and the moody blues during blue hour add instant production value.

Plan your shoots around these windows whenever possible.

Step 5: Polish with Professional Post-Production

Raw footage: even great raw footage: needs finishing work. Post-production is where good becomes exceptional.

Stabilization First

Even the smoothest pilots benefit from post-stabilization. Tools like Warp Stabilizer in Premiere Pro or DaVinci Resolve’s stabilization engine can iron out micro-jitters you didn’t even notice while flying. Just don’t over-stabilize: it can create a weird, floating look.

Color Correction Workflow

  1. Fix white balance first: Get neutral, accurate colors before adding any creative looks
  2. Apply a base grade: Adjust contrast, bring back the dynamic range you captured in that flat profile
  3. Add creative color: LUTs (Look-Up Tables) can speed this up, but always tweak after applying: no preset is one-size-fits-all
  4. Fine-tune shadows and highlights: Preserve detail in both dark and bright areas

image_4

Variety in Your Edit

Aim to capture 4-5 different shot types for every sequence. Wide establishing shots, medium detail shots, close-ups, movement shots, and static shots. This variety gives you options in the edit and keeps viewers engaged through visual rhythm.

Pair your aerial footage with immersive perspectives from 360 action cameras for projects that demand multiple angles and maximum impact.

Bringing It All Together

Cinematic drone footage isn’t about one thing done perfectly: it’s about stacking fundamentals. Plan with intention. Dial in settings that serve your vision. Fly smooth and deliberate. Execute shots that tell stories. Polish everything in post.

The difference between footage that gets scrolled past and footage that stops people in their tracks? It’s these details, applied consistently.

If you’re ready to level up your setup with quality drone components or need expert support getting your rig dialed in, TechInMotion360 has you covered. Now get out there and create something that makes people feel like they’re flying.


For more tips, tutorials, and drone insights, check out the TechInMotion360 blog.

Struggling With FPV Drone Issues? 50+ Quick Troubleshooting Fixes That Actually Work

We’ve all been there. You’re pumped for a flight, batteries charged, goggles ready: and then something goes wrong. Your quad won’t arm. The video feed looks like a 1990s TV signal. Or worse, it takes off and immediately flips into the grass.

Before you launch your controller across the room, take a breath. Most FPV drone issues have straightforward fixes once you know where to look. I’ve compiled over 50 quick troubleshooting solutions that actually work, organized by problem type so you can get back in the air fast.

Let’s dive in.

The 4-Step Diagnostic Method

Before we get into specific fixes, here’s the approach that’ll save you hours of frustration:

  1. Understand what each component does
  2. Observe the problem and gather information
  3. Isolate the issue to a specific system
  4. Test your theory with practical checks

Keep this framework in mind as you work through the fixes below.


Motor and Propeller Fixes (1-12)

image_1

Motor problems are probably the most common headaches in FPV. Here’s how to tackle them:

1. Verify motor order : Check your ESC signal wire connections against the motor layout in Betaflight configurator. Mismatched motors will cause chaos.

2. Check motor rotation direction : Diagonal motors should spin the same direction. If motors 1 and 2 are reversed, swap them.

3. Spin test without props : Power up your quad without propellers and verify each motor spins freely. Listen for grinding or stuttering.

4. Inspect prop nuts : Loose prop nuts cause vibrations and can lead to mid-flight prop ejection. Tighten them snugly but don’t strip the threads.

5. Check for bent props : Even small bends create vibrations. Roll props on a flat surface: they should roll smoothly without wobbling.

6. Clean motor bells : Debris inside motor bells creates friction and heat. Use compressed air to clear out grass, dirt, and tiny rocks.

7. Check motor screws : Screws that are too long can puncture motor windings. Use the exact length specified by your motor manufacturer.

8. Test motor phase wires : If a motor stutters or won’t spin, check for broken phase wires at the solder joints.

9. Soft-mount your flight controller : Excessive vibrations cause the FC to overcorrect, making your quad shoot up uncontrollably or act erratic.

10. Balance your props : Unbalanced props create oscillations. Use a prop balancer or replace with fresh props.

11. Check motor bearings : Spin each motor by hand. Grinding or resistance means it’s time for new bearings or a new motor.

12. Verify motor timing : Incorrect motor timing settings in BLHeli can cause efficiency loss and overheating.

Need quality replacement drone components? We’ve got you covered.


Arming and Throttle Fixes (13-22)

Nothing’s more frustrating than a quad that won’t arm. Here’s your checklist:

13. Check throttle endpoints : Your throttle range should be 1000-2000. If your minimum is higher, Betaflight won’t arm.

14. Verify throttle is at zero : Seems obvious, but if min_check is set too low, even a slightly raised throttle prevents arming.

15. Recalibrate your radio : Run through your transmitter’s calibration process to reset stick endpoints.

16. Check arming angle : If your quad isn’t level when you try to arm, it may refuse. Adjust the max arming angle in Betaflight or level your quad.

17. Disable runaway takeoff prevention temporarily : This safety feature can prevent arming if it detects issues. Disable it for testing, then re-enable.

18. Verify arming switch assignment : Double-check your aux channel is correctly mapped to your arming switch.

19. Adjust gyro calibration sensitivity : If your quad won’t initialize after power-up, increase “gyro_calib_noise_limit” in CLI to 100 or 120.

20. Check for CLI errors : Type “status” in Betaflight CLI to see active arming prevention flags.

21. Verify accelerometer calibration : An uncalibrated accelerometer triggers arming prevention. Recalibrate on a level surface.

22. Update firmware : Outdated firmware can cause weird arming issues. Flash the latest stable Betaflight release.


Receiver and Communication Fixes (23-32)

image_2

Lost connection? Failsafe triggering randomly? Try these:

23. Check RX power wires : Broken power wires to your receiver are a common culprit. Inspect solder joints carefully.

24. Rebind your receiver : Sometimes the simplest fix works. Put your RX in bind mode and rebind to your transmitter.

25. Verify channel mapping : AETR vs TAER mapping mismatches cause weird control behavior. Match your TX to your Betaflight settings.

26. Listen to beeper codes : Your flight controller communicates through beeps. Specific patterns indicate receiver link issues or throttle position errors.

27. Check antenna placement : RX antennas buried under carbon fiber get poor signal. Position them for clear line-of-sight.

28. Verify UART assignment : Make sure your receiver is connected to the correct UART and that it’s enabled in Betaflight.

29. Check protocol settings : SBUS, CRSF, FrSky: verify your receiver protocol matches what’s configured in Betaflight.

30. Update RX firmware : Outdated receiver firmware can cause connection drops. Update through your manufacturer’s software.

31. Test in receiver tab : Use Betaflight’s receiver tab to verify all channels respond correctly to stick inputs.

32. Replace damaged antennas : Bent or broken RX antennas dramatically reduce range. Swap them out.


Power and Electrical Fixes (33-42)

Electrical gremlins can drive you crazy. Here’s how to hunt them down:

33. Check battery voltage : A battery that shows “full” might be sagging under load. Test voltage while connected to your quad.

34. Inspect for battery swelling : Puffy LiPo batteries are dangerous and should be retired immediately.

35. Test your 12V BEC : Use a multimeter on the 12V pad. If you read 0V, your voltage regulator is fried and needs replacement.

36. Add a capacitor : Install a minimum 25V 200µF capacitor across main battery terminals to absorb voltage spikes from motor braking.

37. Connect ESC signal ground : For DShot ESCs, connecting the signal ground wire is strongly recommended for reliable communication.

38. Check XT60 connector : Loose or corroded battery connectors cause intermittent power loss. Clean or replace them.

39. Verify VTX power settings : Running your video transmitter at high power without adequate cooling causes brownouts.

40. Test components in isolation : If something acts strange, remove it from the quad and test with a known good power supply.

41. Check for shorts : Use a multimeter in continuity mode to check for shorts between power and ground pads.

42. Inspect voltage regulator output : Verify your 5V and 3.3V regulators output correct voltage under load.

When electrical issues get complex, our FPV Drone Support Packages can help you diagnose and fix problems fast.


Wiring and Connection Fixes (43-50)

image_3

Bad connections cause more crashes than bad flying. Here’s what to check:

43. Reflow solder joints : Cold solder joints look dull and cause intermittent connections. Reheat and add fresh solder.

44. Check crimped wire connections : Silicon-coated wires can break inside the insulation at crimp points while looking fine externally.

45. Use a data USB cable : Power-only USB cables won’t connect to Betaflight. Make sure you’re using a data cable.

46. Secure loose wires : Vibrations cause wires to break at solder joints. Use hot glue or zip ties to secure everything.

47. Check continuity on all connections : Systematically test every wire for continuity from end to end.

48. Replace damaged connectors : JST and SH connectors wear out. Replace them before they cause mid-flight failures.

49. Inspect motor wire solder joints : These take a lot of abuse. Reflow any that look questionable.

50. Check frame for shorts : Carbon fiber frames conduct electricity. Make sure no exposed pads or wires contact the frame.


Video System Fixes (51-55)

51. Tighten camera screws : Loose camera mounting causes jello and shaky footage.

52. Check camera sensor : A loose sensor inside the camera housing creates image stabilization nightmares.

53. Verify VTX channel : Make sure your goggles and VTX are on the same channel and band.

54. Replace damaged VTX antenna : A damaged antenna drastically reduces range and video quality.

55. Check camera cable connection : The ribbon cable between camera and VTX can work loose. Reseat it firmly.


When to Call for Backup

Look, sometimes the problem goes deeper than a quick fix can solve. If you’ve worked through this list and you’re still stuck, don’t burn hours chasing ghosts.

Our Performance Tune & Troubleshoot package gives you expert eyes on your setup. And if your quad took a hard hit, the Crash Recovery Package gets you flying again without the headache.

Check out more tips and guides on the TechInMotion360 blog, and remember: every pilot has dealt with these issues. You’re not alone, and there’s always a fix.

Now get out there and fly.

Best FPV Batteries for Long Flight Time: TechInMotion360's Top Picks vs Generic LiPo Packs

Let’s be real for a second, your FPV drone is only as good as the battery strapped to it. You could have the most dialed-in tune, the crispest camera setup, and motors that sing like angels, but if your battery is trash? You’re coming down early, watching voltage sag ruin your footage, or worse, dealing with a puffed pack that’s become a safety hazard.

I’ve seen too many pilots cheap out on batteries and pay for it later. Sometimes literally, when they have to replace damaged electronics. Sometimes figuratively, when they miss the shot because their pack couldn’t hold up under load.

So today, we’re breaking down what separates quality LiPo batteries from the generic packs flooding the market, and why the difference matters more than you might think.

Why Your Battery Choice Actually Matters

Here’s the thing about FPV batteries that nobody tells you when you’re starting out: they’re not all created equal. Two batteries with identical specs on paper can perform wildly differently in the air.

A quality battery delivers consistent power throughout your flight. It handles the amp demands when you punch out of a dive. It charges safely and maintains capacity over hundreds of cycles. A generic pack? It might do all those things… for a while. Then the voltage sag creeps in, the capacity drops, and suddenly that “1500mAh” battery is giving you 1100mAh on a good day.

image_1

The real cost of cheap batteries isn’t just the replacement cycle, it’s the performance you’re leaving on the table every single flight.

Understanding LiPo Battery Basics

Before we dive into comparisons, let’s make sure we’re speaking the same language.

Capacity (mAh): This is how much energy your battery can store. Racing and freestyle pilots typically run 1300-1500mAh packs for the power-to-weight balance. Cinematic flying? You’ll want 1800mAh or higher to maximize flight duration without sacrificing too much agility.

Discharge Rate (C Rating): This tells you how quickly the battery can deliver power. A 100C battery can theoretically discharge 100 times its capacity per hour. For most FPV applications, you want at least 75C for freestyle and 100C+ for racing.

Cell Count (S): Most modern FPV drones run 4S or 6S configurations. Higher voltage means more power potential, but also more weight and complexity.

Internal Resistance (IR): Lower is better. This measures how efficiently the battery can deliver power. High IR means wasted energy as heat and increased voltage sag.

TechInMotion360’s Top Picks: What We Recommend

Through years of testing and real-world flying, we’ve identified the battery characteristics that actually matter for different flying styles. When clients come to us for power system upgrades, battery selection is always part of the conversation.

For Long-Range and Cinematic Work

If you’re chasing extended flight times, think long-range cruising or cinematic real estate shots, the battery game changes completely. Li-Ion cells like the Molicel P30B have become the gold standard here. They offer superior energy density, meaning more flight time per gram of weight.

For 10-inch long-range builds, we typically recommend 6S configurations in the 8000-10000mAh range with 25-30C discharge rates. These aren’t going to win any races, but they’ll keep you in the air for 20+ minutes of smooth, controlled flight.

image_2

For Freestyle and Racing

This is where high-quality LiPo packs shine. You need batteries that can dump serious amps without flinching, and recover quickly when you let off the throttle. Look for:

  • True 100C+ discharge capability (not just marketing numbers)
  • Low internal resistance across all cells
  • Balanced cell voltages out of the box
  • Quality XT60 connectors with solid solder joints

The Molicel P28A and Sony VTC6 cells are excellent choices for builds where you need both punch and reasonable flight times.

Generic LiPo Packs: The Hidden Costs

Now let’s talk about those suspiciously cheap batteries you see online. You know the ones: $15 for a 1500mAh 100C pack that seems too good to be true.

Spoiler: It usually is.

The C Rating Problem

Generic manufacturers are notorious for inflating C ratings. That “100C” battery might actually deliver 40-50C before voltage sag makes it unusable. This isn’t just annoying: it’s potentially dangerous if your quad suddenly loses power mid-maneuver.

Inconsistent Cell Quality

Quality battery manufacturers test and match cells within each pack. Generic packs? They grab whatever’s available. This leads to unbalanced cells, where one cell works harder than the others and degrades faster. Eventually, you’re charging a time bomb.

The False Economy

Let’s do some quick math. A quality battery costs $35 and lasts 300 cycles. A generic pack costs $15 and lasts 75 cycles before it’s puffed or performing poorly.

Quality battery: $35 ÷ 300 = $0.12 per flight
Generic battery: $15 ÷ 75 = $0.20 per flight

You’re actually paying MORE per flight with cheap batteries: and getting worse performance the entire time.

image_3

Flight Time: Real-World Expectations

Let’s set some realistic expectations here, because I see a lot of pilots frustrated by flight times that don’t match their dreams.

Racing/Freestyle (5-inch, 4S-6S): 3-5 minutes of aggressive flying. This is normal. Accept it.

Cinematic Freestyle: 5-7 minutes with larger capacity packs and smoother flying style.

Long-Range Cruising: 15-25+ minutes with optimized builds and Li-Ion cells.

Cinewhoops: 4-8 minutes depending on prop size and battery capacity.

The key to maximizing flight time isn’t just buying bigger batteries: it’s optimizing your entire power system. Motor efficiency, prop selection, tune quality, and flying style all factor in. If you’re looking to squeeze more time out of your setup, our performance upgrade packages address all these elements together.

Charging Speed and Safety

Quality batteries aren’t just better in the air: they’re safer on the ground too.

Premium LiPo packs can typically handle 1C-2C charging rates safely. That means a 1500mAh battery can charge at 1.5-3 amps without excessive heat buildup or degradation. Some high-end packs even support 3C+ charging for quick turnarounds.

Generic packs? Pushing them past 1C is asking for trouble. The inconsistent cell quality means some cells heat up faster than others, accelerating wear and increasing puff risk.

Pro tip: Invest in a quality charger with cell-level monitoring. It’ll tell you immediately if something’s wrong with your pack before it becomes a fire hazard.

image_4

Making the Right Choice for Your Flying Style

Here’s my honest recommendation based on thousands of hours helping pilots optimize their setups:

If you’re racing or doing aggressive freestyle: Buy quality mid-capacity packs (1300-1550mAh) from reputable manufacturers. The performance difference is immediately noticeable.

If you’re shooting cinematic content: Invest in higher-capacity packs (1800mAh+) with proven discharge curves. Consistency matters when you’re getting paid for footage.

If you’re building for long-range: Consider Li-Ion configurations with quality cells. The upfront cost pays dividends in flight time.

If you’re just starting out: Buy quality packs from the beginning. Building bad habits around garbage batteries will cost you more in the long run.

The Bottom Line

Your battery is the heart of your quad. It determines how long you fly, how hard you can push, and ultimately, how safe your hobby stays. Cutting corners here doesn’t save money: it costs performance, reliability, and potentially your equipment.

Need help optimizing your power system or troubleshooting battery-related issues? Check out our advanced support packages or basic maintenance services. We’re here to help you fly longer, fly better, and fly safer.

Now get out there and send it( with batteries you can actually trust.)

0
    0
    Your Cart
    Your cart is emptyReturn to Shop

    Search For Products

    Product has been added to your cart