How to Choose FPV Motors That Won’t Burn Out: TechInMotion360’s Motor Selection Guide

There’s nothing worse than watching smoke curl up from your quad mid-flight. One second you’re ripping through a gap, the next you’re walking through a field looking for your downed drone with a fried motor. Been there. Done that. Got the singed fingerprints to prove it.

Motor burnout isn’t random bad luck: it’s almost always the result of a mismatch somewhere in your build. Wrong KV for your props. Undersized stator for your frame. Cheap windings that can’t handle the heat. The good news? Once you understand what makes motors fail, you can avoid it entirely.

Let’s break down everything you need to know about choosing FPV motors that’ll last.

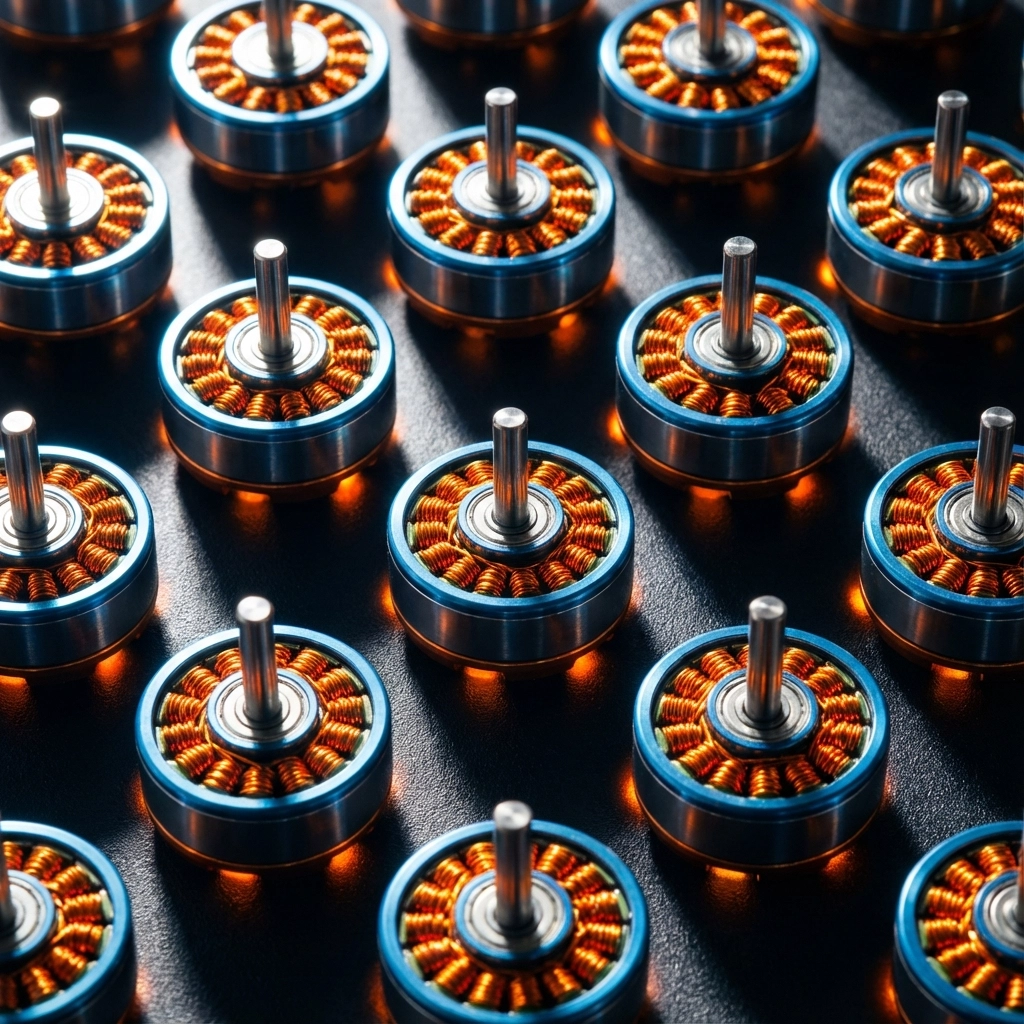
Understanding Motor Sizing: Those Four Numbers Matter

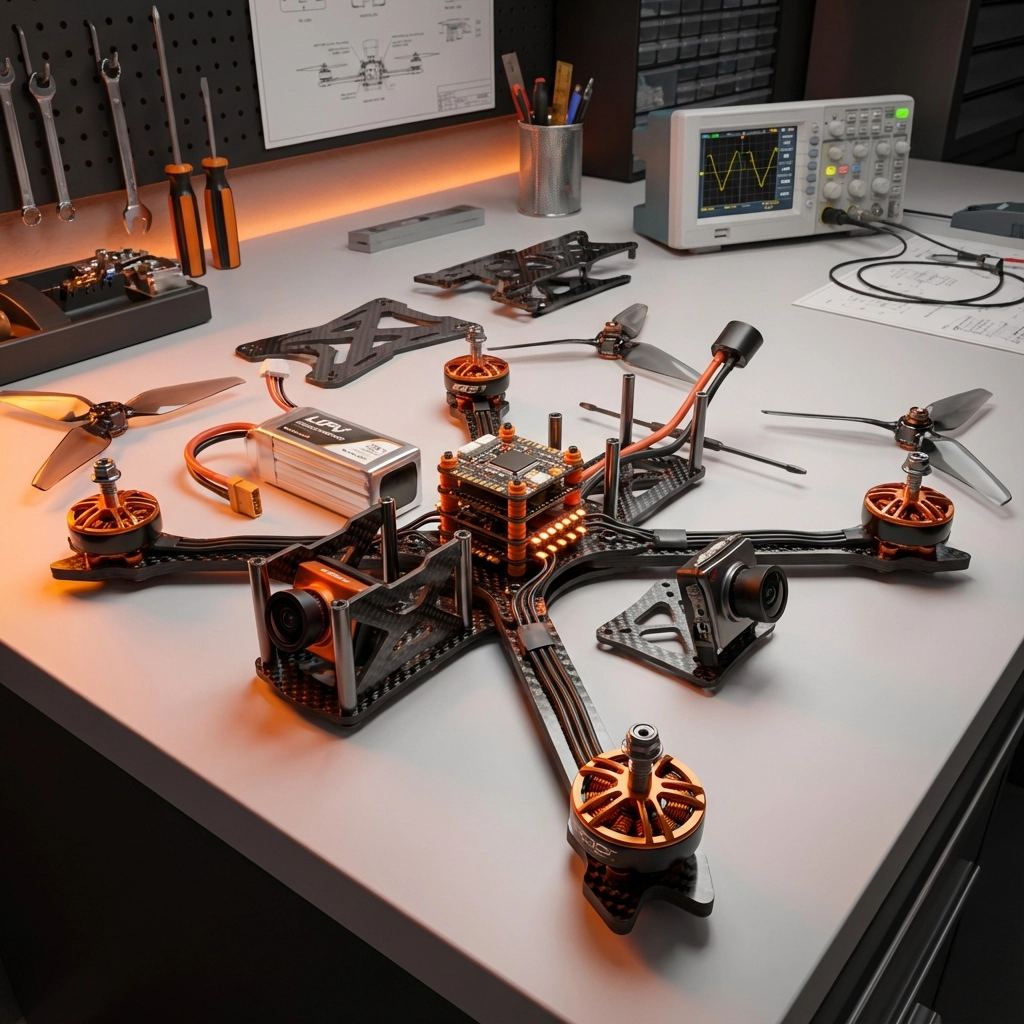
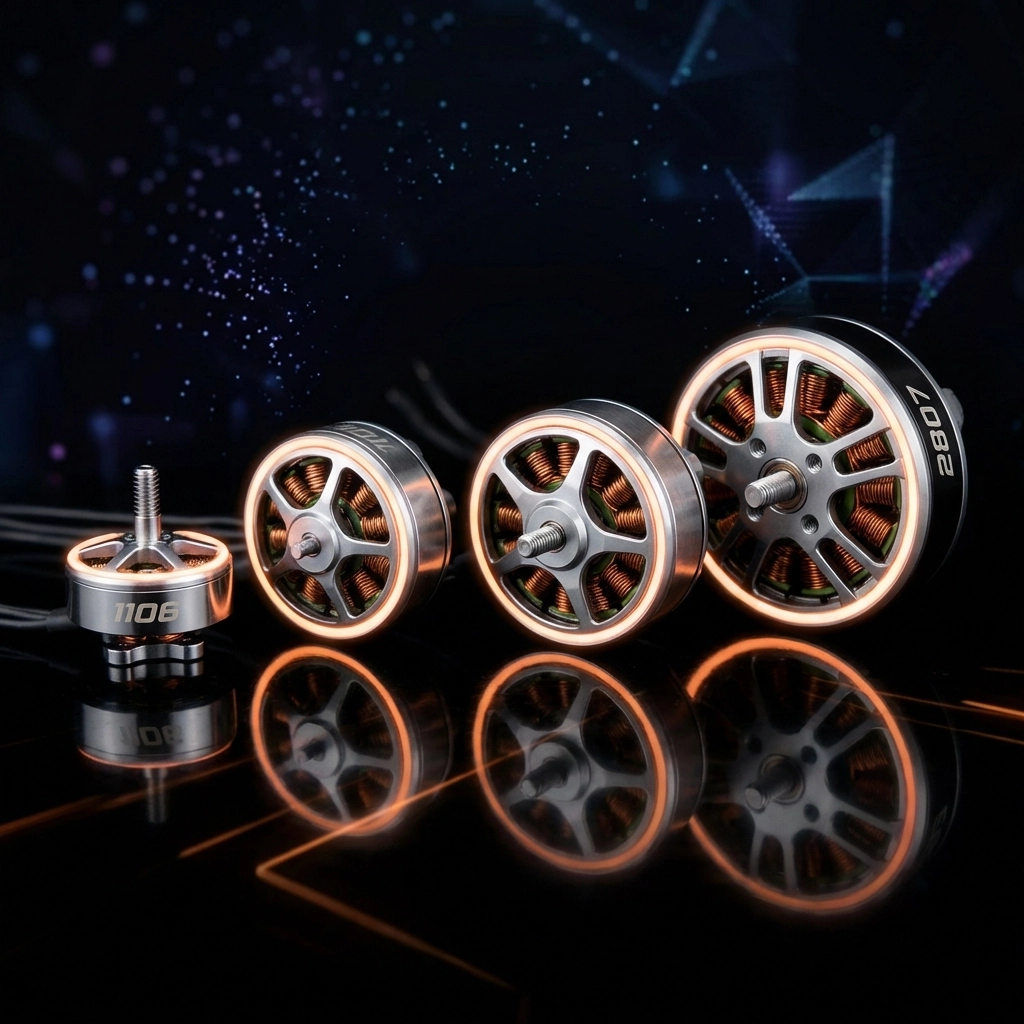
Every brushless motor has a four-digit designation like 2207 or 1404. These aren’t random: they tell you exactly what you’re working with.

The first two digits represent the stator diameter in millimeters. The last two digits indicate the stator height. A 2207 motor has a 22mm diameter stator that’s 7mm tall.

Why does this matter? Stator volume directly correlates with torque and power handling. Bigger stators can push bigger props and dissipate more heat. Smaller stators are lighter but work harder on aggressive setups.

image_1

Here’s the general breakdown:

  • 1103/1106/1507 motors : Perfect for 2-3 inch micro builds
  • 1804/2004 motors : Great for 3-4 inch lightweight rigs
  • 2206/2207/2306 motors : The sweet spot for 5-inch freestyle and racing
  • 2507/2807 motors : Built for 6-7 inch long-range and cinematic rigs

Slapping 2207 motors on a 3-inch frame? You’re carrying unnecessary weight. Running 1507 motors on a 5-inch freestyle build? You’re asking for thermal failure. Match your motors to your frame size, period.

KV Ratings: The Speed vs. Efficiency Tradeoff

KV tells you how many revolutions per minute a motor spins per volt applied. A 2400KV motor on a 4S battery (14.8V nominal) theoretically spins at 35,520 RPM unloaded.

But here’s where pilots get into trouble: higher KV doesn’t automatically mean faster.

Higher KV motors spin faster but produce less torque. They’re designed for smaller props where you need RPM to generate thrust. Lower KV motors spin slower but with more grunt: perfect for swinging larger props efficiently.

The golden rules:

  • 2300-2700KV : Standard for 5-inch builds on 4S batteries
  • 1700-1950KV : Ideal for 5-inch builds on 6S batteries
  • 2800-4000KV : Designed for micro quads with 2-3 inch props

Running high-KV motors with oversized props forces the motor to work against its design. The windings overheat. The bearings wear faster. Eventually, something gives.

If you’re unsure which direction to go with your power system, the team at TechInMotion360 offers a dedicated Power System Upgrade Package that takes the guesswork out of matching motors, ESCs, and batteries.

Battery Voltage: The Foundation of Your Power System

Your battery voltage determines everything downstream. Motors are rated for specific voltage ranges, and exceeding them is a fast track to failure.

  • 4S (14.8V) : The traditional standard for 5-inch FPV
  • 6S (22.2V) : Increasingly popular for smoother throttle response and efficiency
  • 3S and below : Typically reserved for micros and cinewhoops

image_2

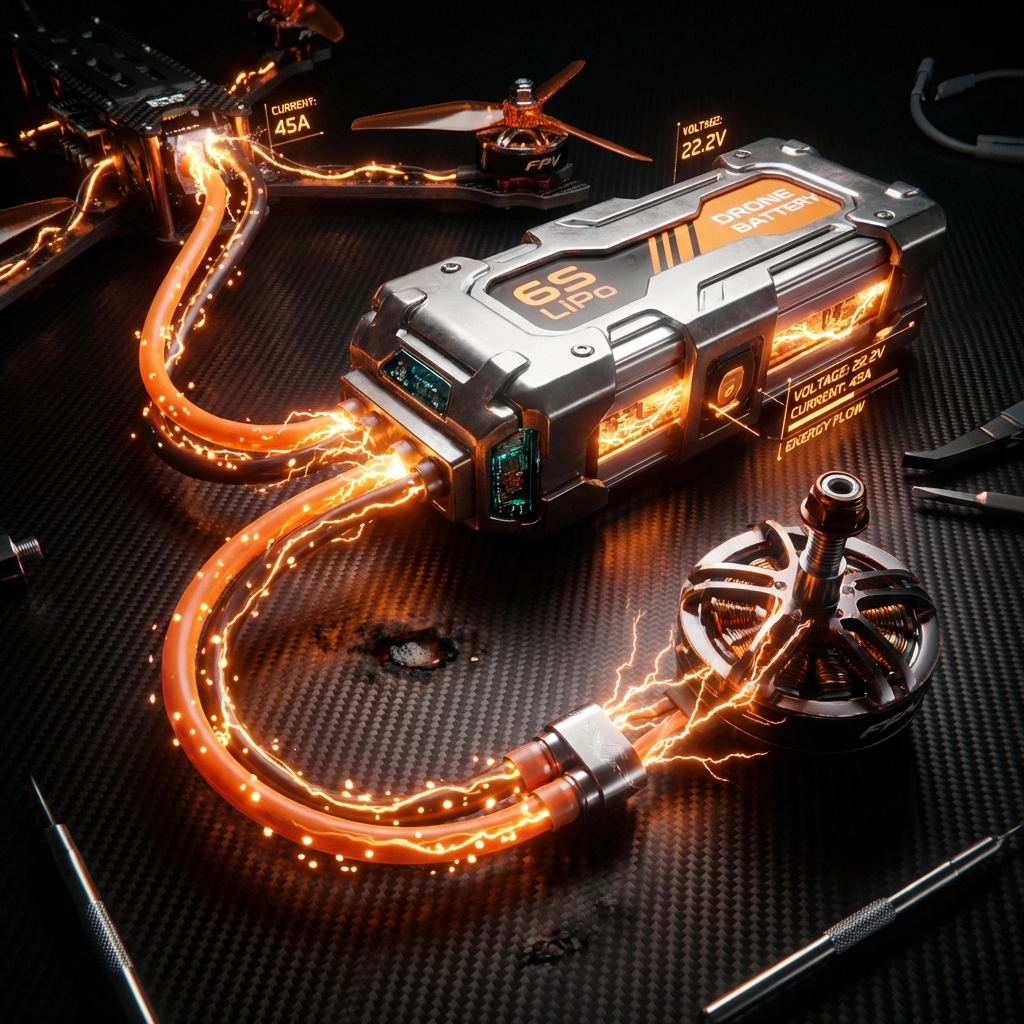
Here’s the thing: a 6S setup with appropriate low-KV motors often runs cooler than an equivalent 4S high-KV setup. Why? Because lower KV motors draw less current to achieve the same thrust. Less current means less heat in your windings and ESCs.

If you’re considering making the jump to 6S or want to optimize your current voltage setup, a Performance Tune & Troubleshoot session can help dial in your PIDs and motor timing for maximum efficiency.

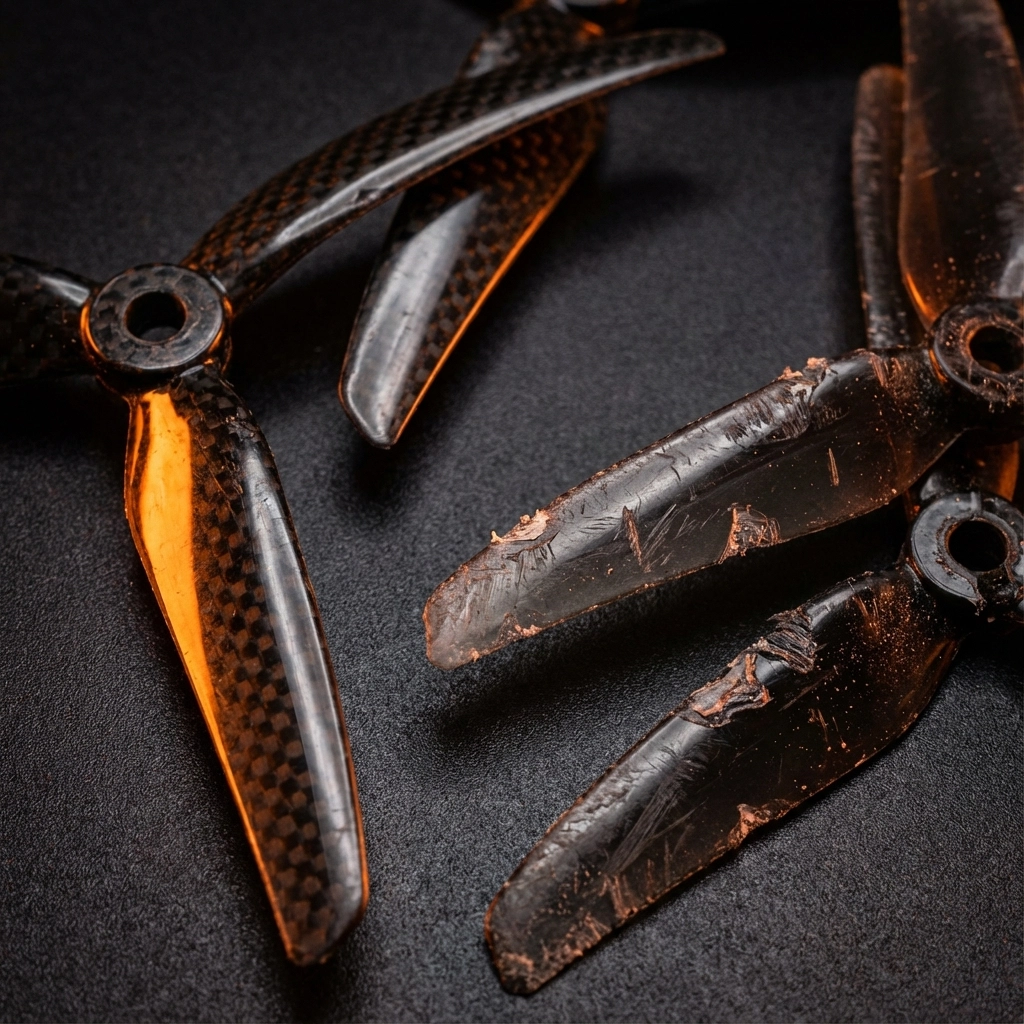
Prop Size: The Partner Your Motor Needs

Motors and props are dance partners. The wrong pairing steps on toes.

Propeller size affects the load your motor sees. Longer props and higher pitch create more air resistance, demanding more torque. If your motor can’t deliver that torque efficiently, it compensates by drawing excessive current: and generating destructive heat.

General prop-to-motor guidelines:

Frame Size Prop Size Recommended Motors
3 inch 3″ props 1306-1507
4 inch 4″ props 1806-2004
5 inch 5″ props 2206-2306
6 inch 6″ props 2407-2507
7 inch 7″ props 2507-2807

Running aggressive bi-blade props? Your motors work less hard than with tri-blades. Pushing high-pitch props for top speed? Expect higher motor temperatures. It’s all about balance.

Flying Style: Match Your Motors to Your Mission

A freestyle pilot and a long-range cruiser have completely different motor needs: even on identical frames.

Freestyle and Racing:
You need motors that handle rapid throttle changes, recover quickly from prop wash, and survive crashes. Look for:

  • Higher torque (larger stator height)
  • Quality bearings rated for impact
  • Reinforced windings

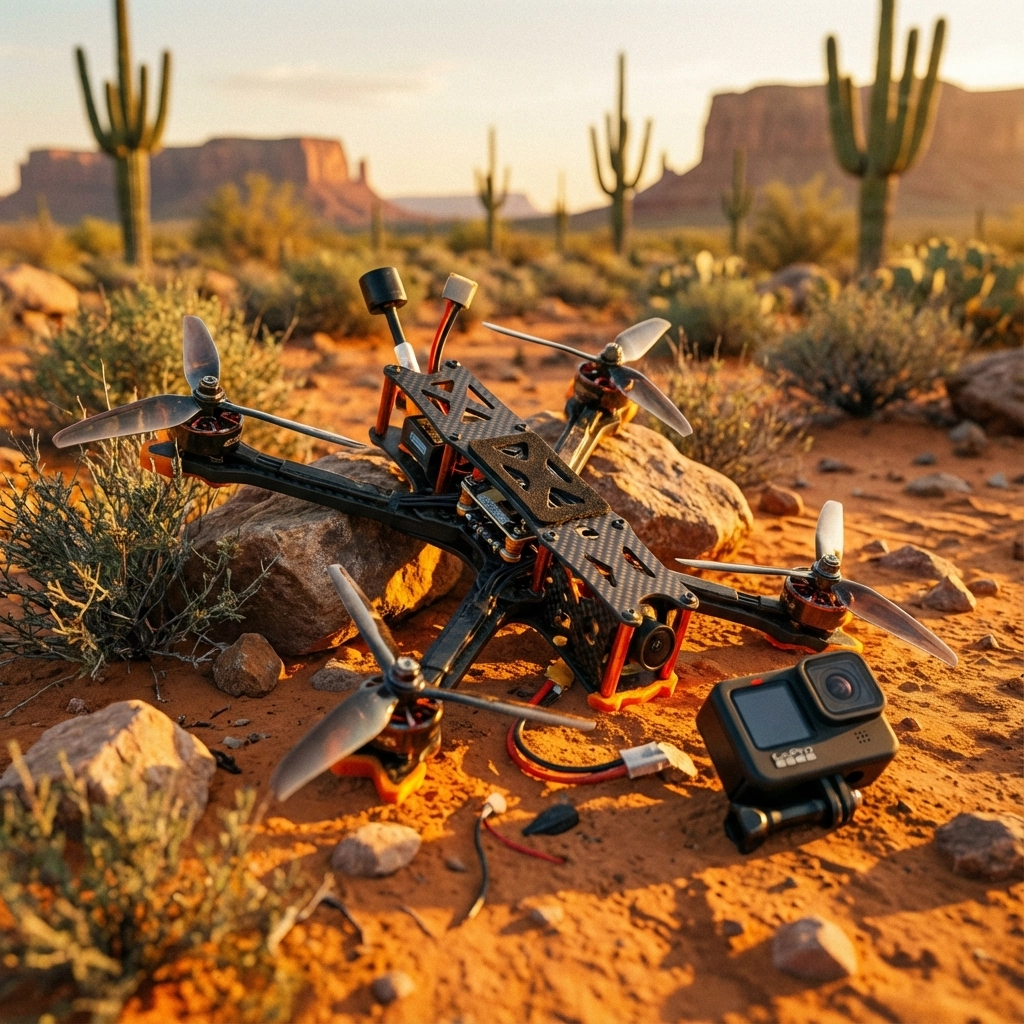
Cinematic and Long-Range:
Efficiency trumps raw power. You want motors that sip current and stay cool during extended flights:

  • Lower KV ratings
  • Optimized for specific prop sizes
  • Excellent grams-per-watt efficiency ratings

Cinewhoops:
These ducted builds need motors that perform well in prop guards without overheating:

  • Mid-range KV
  • Designed for restricted airflow conditions
  • Often 1404 or 1507 sizes

image_3

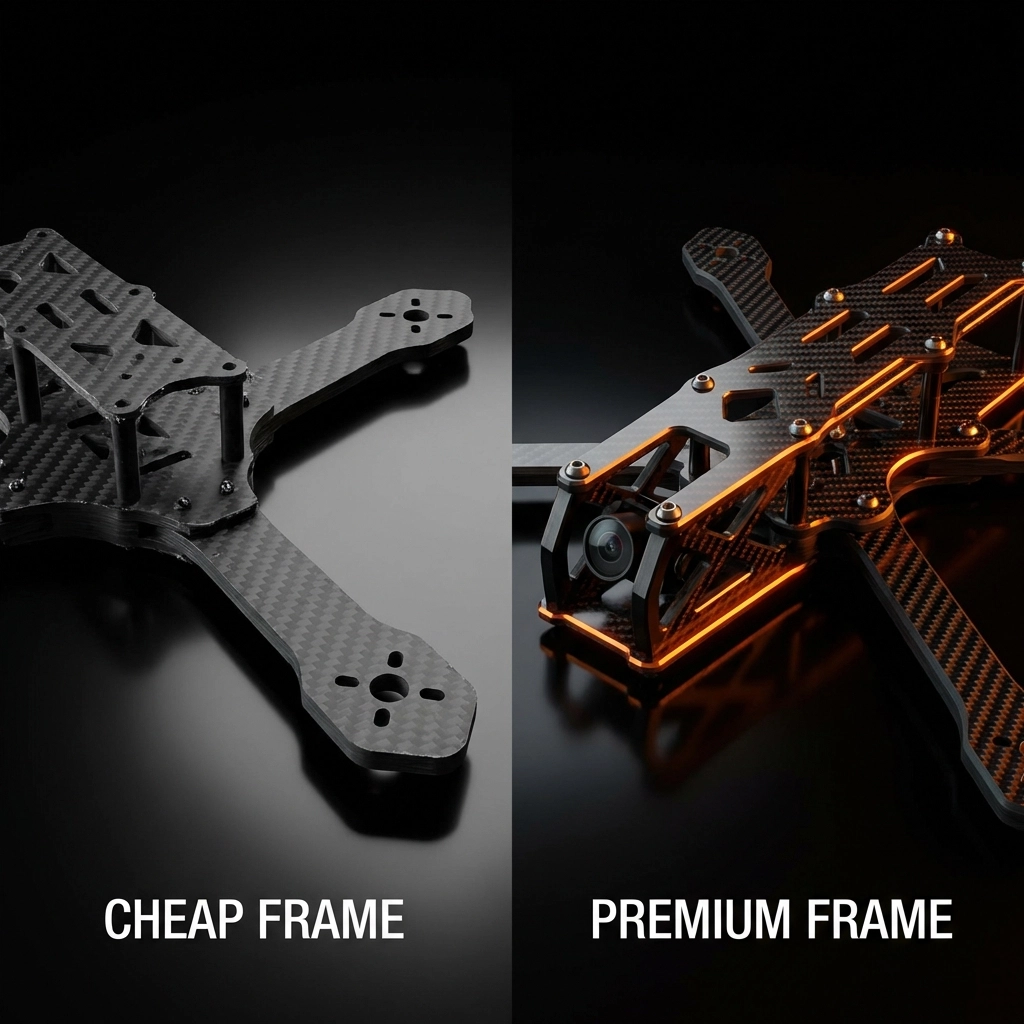
Cheap Motors vs. Quality Motors: You Get What You Pay For

Let’s be real: budget motors are tempting. Twenty bucks for a set of four? Sounds great until you’re replacing them every few weeks.

Here’s what separates quality motors from cheap knockoffs:

Windings: Premium motors use precision-wound copper with proper insulation. Cheap motors often have sloppy windings that create hot spots and short out under stress.

Bearings: Good motors run smooth, quiet bearings rated for the RPMs and impacts of FPV flying. Budget bearings develop play quickly and create vibration that destroys flight footage.

Magnets: Higher-grade magnets (N52 vs N48) deliver better performance per gram and resist demagnetization from heat.

Quality Control: Reputable manufacturers test motors before shipping. Budget brands often skip this step, leaving you with units that vary wildly in performance.

Investing in quality motors isn’t just about performance: it’s about reliability. When you’re flying over water, through gaps, or capturing client footage, you need equipment you can trust.

For ongoing peace of mind, TechInMotion360’s Annual Remote Support Plan keeps your entire rig optimized throughout the year.

Signs Your Motors Are Struggling

Catch problems before they become failures:

  • Excessive heat after short flights : Your motors are working too hard
  • Unusual sounds : Grinding or clicking indicates bearing issues
  • Reduced throttle response : Could signal demagnetization or winding damage
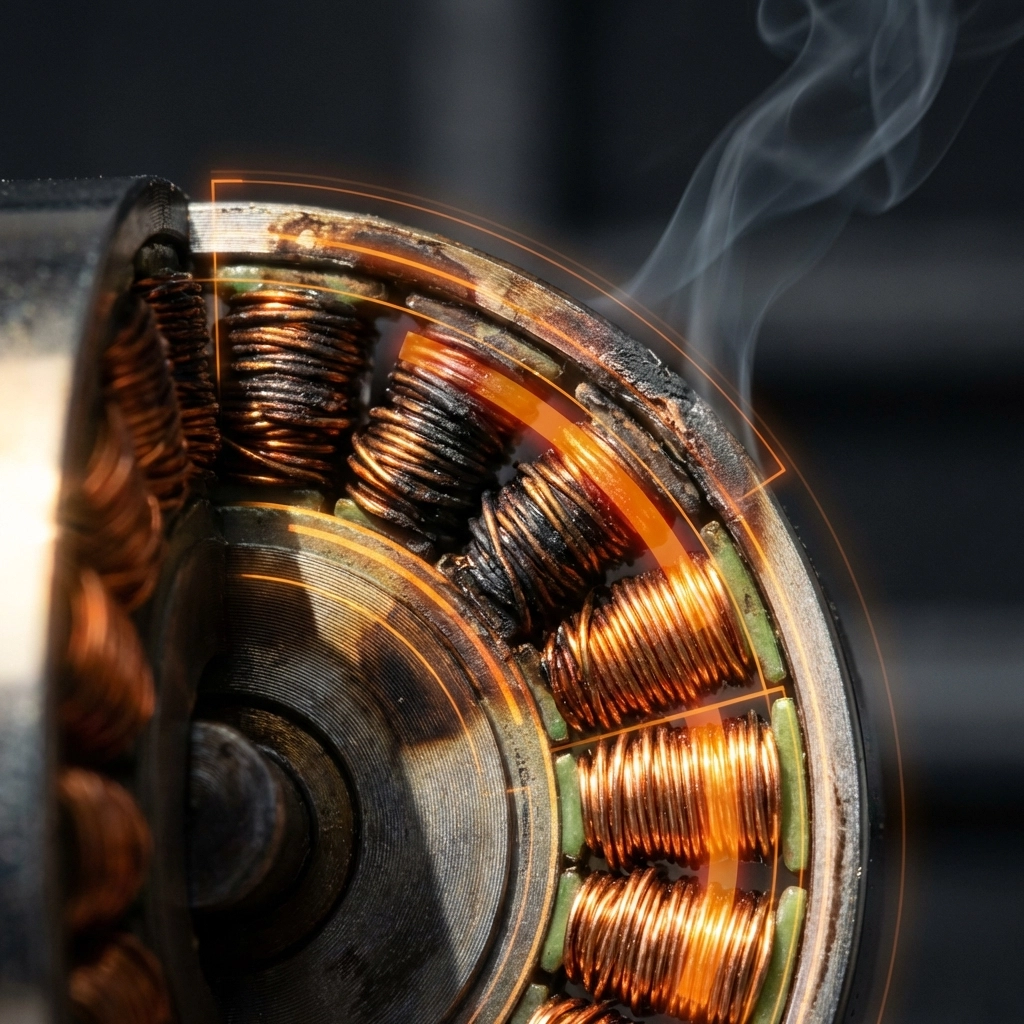
  • Visible discoloration : Brown or blackened windings mean thermal damage has occurred
  • Motor oscillations : Often a sign of bearing play or imbalanced bells

Regular maintenance extends motor life significantly. A Basic Maintenance & Repair session can identify worn components before they leave you stranded in a field.

image_4

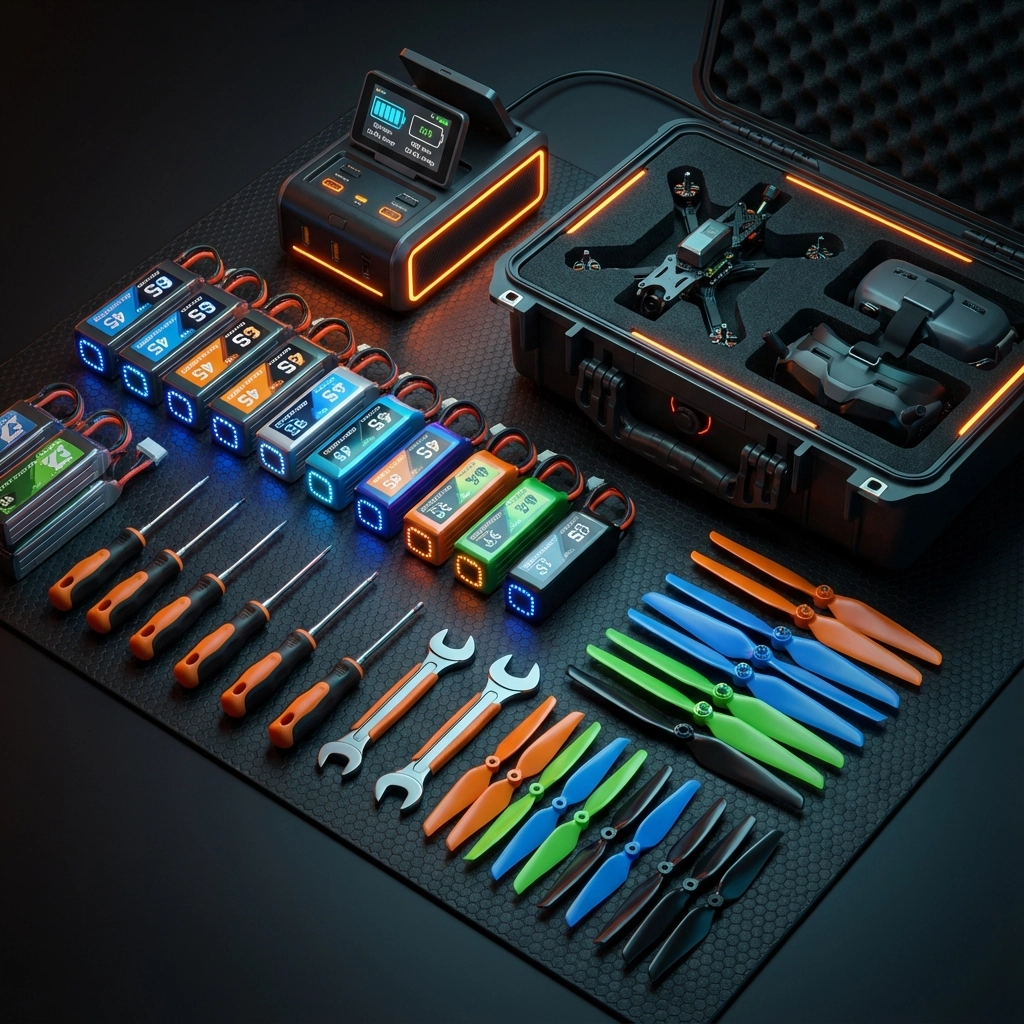
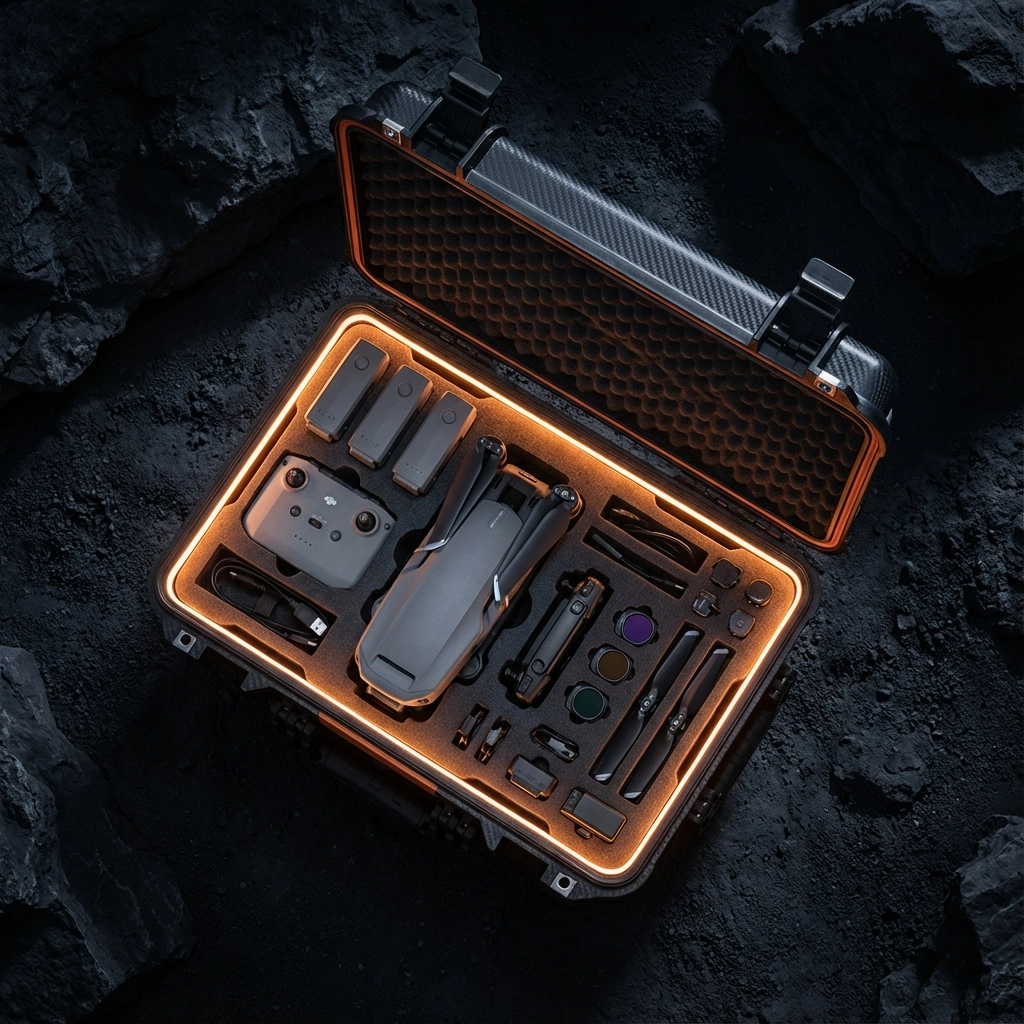
Putting It All Together

Choosing the right FPV motors comes down to matching four key variables:

  1. Frame size dictates motor size
  2. Battery voltage determines KV range
  3. Prop size must match motor capability
  4. Flying style guides your priorities

Get these right, and your motors will run cool, last long, and deliver consistent performance flight after flight.

Get them wrong, and you’ll keep chasing mysterious burnouts, wondering why your quad can’t stay in the air.

The difference between a frustrating hobby and a rewarding passion often comes down to these foundational choices. Take the time to understand your power system, invest in quality components, and don’t be afraid to ask for help when you need it.

Ready to build a rig that performs? Check out the full range of support options at TechInMotion360 and fly with confidence.

Complete FPV Kits vs Building Your Own: What Actually Saves You Time and Money

So you’ve decided to get into FPV drones. Awesome choice. But now you’re staring down two very different paths: grab a complete kit that’s ready to fly, or source every single component yourself and build from scratch.

Both options have their place. But which one actually makes sense for your situation, your budget, and your sanity? Let’s break it down with real numbers, real time estimates, and zero fluff.

The DIY Dream vs. The DIY Reality

Building your own FPV drone sounds incredible on paper. You get to handpick every component, customize everything to your exact specifications, and learn the system inside and out. There’s a certain pride that comes with flying something you assembled from bare parts.

But here’s what nobody tells you upfront: the hidden costs add up fast, and the time investment can be brutal: especially if you’re new to the hobby.

When you build from scratch, you’re not just buying parts. You’re buying the education that comes with figuring out which parts actually work together. And that education often comes in the form of expensive mistakes.

image_1

Breaking Down the Real Costs

Let’s get into the numbers. A typical DIY FPV build requires:

  • Frame: $30–$80
  • Flight controller: $40–$100
  • ESC (Electronic Speed Controller): $40–$80
  • Motors (4x): $60–$120
  • Propellers: $10–$25
  • Camera: $25–$60
  • Video transmitter: $30–$70
  • Receiver: $25–$50
  • Antennas: $15–$40
  • Wiring, hardware, zip ties: $20–$40

That’s roughly $295–$665 just for the drone itself. Now add goggles ($150–$600), a radio transmitter ($80–$300), batteries ($25–$50 each, and you’ll want at least 4), and a charger ($40–$100).

Your “budget build” just became a $700–$1,500+ investment. And we haven’t even factored in the tools you might need: soldering iron, hex drivers, multimeter, heat shrink, and more.

With a complete kit from TechInMotion360’s DJI BNF/PNP collection, you’re getting matched components that are tested to work together, often at a comparable or better price point: minus the headaches.

The Time Factor: Hours vs. Weeks

Here’s where complete kits really shine. A beginner building their first FPV drone from scratch should budget:

  • Research time: 10–20 hours (watching tutorials, reading forums, comparing parts)
  • Ordering and waiting: 1–3 weeks (especially if ordering from multiple suppliers)
  • Assembly time: 4–10 hours (assuming everything goes right)
  • Troubleshooting: 2–10+ hours (because something always goes wrong the first time)

We’re talking potentially 40+ hours before you even take your first flight. And that’s being optimistic.

Complete kits? Unbox, charge, bind, fly. Most people are in the air within an hour or two. That’s not an exaggeration: it’s the whole point of a curated kit.

image_2

The Compatibility Nightmare

This is the thing that catches most DIY builders off guard. FPV components aren’t universally compatible. You need to verify:

  • Firmware compatibility between flight controller and ESC
  • Voltage requirements across all components
  • Physical mounting dimensions
  • Protocol matching between receiver and transmitter
  • Camera and VTX voltage compatibility

Get any of these wrong, and you’re looking at components that won’t communicate, won’t fit, or worse: magic smoke when you plug in the battery. That $40 flight controller you scored on sale? Useless if it doesn’t play nice with your ESC firmware.

TechInMotion360’s complete kits eliminate this entirely. Every component is selected to work together out of the box. No guesswork, no forum deep-dives trying to figure out why your OSD isn’t showing up.

The Learning Curve Consideration

“But I want to learn how everything works!”

Fair point. Understanding your drone’s systems makes you a better pilot and gives you the ability to repair and upgrade confidently. There’s genuine value in that knowledge.

Here’s the thing though: you can still learn all of this with a complete kit. The difference is you’re learning while flying instead of learning while troubleshooting why nothing works.

When something eventually breaks (and it will: that’s FPV), you’ll have hands-on repair experience. And when you’re ready to upgrade, services like the FPV Drone Performance Upgrade Package or Power System Upgrades let you level up with confidence.

The Support Difference

Building from scratch means you’re on your own. When something doesn’t work, you’re hitting Reddit, Facebook groups, and manufacturer support (good luck with that last one). You might get helpful advice. You might get conflicting opinions. You’ll definitely spend hours searching.

Complete kits from TechInMotion360 come with something DIY builds don’t: actual support from people who know the exact configuration you’re flying.

The Annual Remote Support Plan gives you a full year of expert assistance. Got a weird issue? Someone who knows your setup can help diagnose it. Need performance tuning? The Advanced Support Package has you covered.

That’s not a luxury: it’s a massive time-saver that actually accelerates your learning.

image_3

When DIY Actually Makes Sense

Let’s be fair. There are situations where building from scratch is the right call:

  • You’re an experienced builder who already knows component compatibility inside and out
  • You have very specific requirements that no pre-built kit addresses
  • You genuinely enjoy the building process as much as flying
  • You have the tools, time, and troubleshooting patience already

For these pilots, DIY is rewarding. The process is part of the hobby for them.

But if you’re trying to fly as soon as possible, minimize frustration, and avoid expensive compatibility mistakes? Complete kits win every time.

The Real Cost of “Saving Money”

Here’s the math nobody does upfront:

That DIY build that’s “$100 cheaper” on paper? Add in the wrong ESC you bought because the listing was confusing ($45). The frame that didn’t fit your motors ($35). The camera you fried because of a voltage mismatch ($50). The two weeks of evenings spent troubleshooting instead of flying.

Suddenly your savings evaporated: and you lost time you’re never getting back.

Complete kits from TechInMotion360 aren’t just about convenience. They’re about predictable outcomes. You know what you’re getting, you know it works, and you know someone has your back if something goes sideways.

Making the Right Choice

If you’re new to FPV, the answer is pretty clear: start with a complete kit. Get flying, build your skills, and learn the systems through actual flight experience. When you’re ready to go deeper, upgrade paths and maintenance support are waiting.

If you’re experienced and want a custom build, go for it. You know the risks, you have the skills, and you’re prepared for the process.

For everyone else? Save your time, protect your budget, and start your FPV journey with components that actually work together. Your future self: the one who’s out flying instead of debugging firmware: will thank you.

image_4

Ready to Start Flying?

Check out TechInMotion360’s complete FPV drone options and find a kit that matches your goals. And if you ever need help along the way, troubleshooting support is just a click away.

The sky’s waiting. Let’s get you there the smart way.

Carbon Fiber Frames vs Cheap Alternatives: Why Your Frame Choice Makes or Breaks Your FPV Drone

Let me paint you a picture. You’ve just spent three months learning to fly FPV, dropped serious cash on a decent camera, quality motors, and a flight controller that rivals a small computer. Then you slapped all of it onto a $15 frame you found on some random marketplace because “a frame is just a frame, right?”

Wrong. So very wrong.

That budget frame is about to become the weakest link in your entire setup. And when it fails, not if, when, it’s taking everything else down with it. I’ve seen it happen dozens of times, and it never gets easier to watch someone learn this lesson the hard way.

The Hidden Cost of “Saving Money” on Frames

Here’s the thing about cheap frames that nobody tells you upfront: they’re not actually cheap. Not when you factor in replacement parts, crashed components, and the sheer frustration of dealing with subpar materials.

Budget frames typically use lower-grade carbon fiber, or worse, carbon fiber mixed with fiberglass to cut costs. The result? A frame that looks decent on paper but crumbles under real-world stress. That first hard landing? Crack. That tree branch you clipped during a proximity run? Shattered arm. That slightly rough landing on asphalt? Split bottom plate.

image_1

Quality carbon fiber frames, like the ones we work with at TechInMotion360, use properly layered, high-density carbon that’s designed to handle the abuse FPV flying dishes out. The difference isn’t just marketing speak, it’s physics.

Understanding Carbon Fiber Quality

Not all carbon fiber is created equal. This is probably the most important thing you’ll learn from this entire post, so pay attention.

Cheap carbon fiber characteristics:

  • Thin, inconsistent layering
  • Lower carbon-to-resin ratio
  • Brittle failure modes (shatters instead of flexing)
  • Rough, unfinished edges that can cut wires
  • Poor vibration dampening

Quality carbon fiber characteristics:

  • Multiple precisely-layered sheets
  • Higher carbon content for strength-to-weight optimization
  • Controlled flex before failure
  • Chamfered, smooth edges
  • Better vibration characteristics for cleaner footage and stable flight

The research backs this up: carbon fiber’s advantages include being lighter, stronger, less dense, and stiffer with more responsive handling characteristics. Quality frames resist corrosion and don’t experience the fatigue issues that plague cheaper alternatives over time.

The Crash Test Reality

Let’s talk about what actually happens when you crash, because you will crash. Everyone does. It’s part of flying FPV.

With a quality carbon fiber frame, a moderate crash typically results in:

  • Minor scratches or scuffs
  • Maybe a bent prop (easily replaced)
  • Your electronics staying safely mounted
  • Getting back in the air within minutes

With a budget frame, that same crash often means:

  • Cracked or broken arms
  • Motor mounts that snap clean off
  • Standoffs pulling through weakened material
  • A pile of expensive components scattered across the ground

image_2

I’ve personally seen pilots go through four or five cheap frames in the time a quality frame would still be flying strong. When you add up those replacement costs, plus the time spent rebuilding, plus any collateral damage to other components… that “savings” evaporates pretty quickly.

Weight vs. Durability: Finding the Sweet Spot

Here’s where it gets interesting. You’d think lighter always equals better in the FPV world, but that’s an oversimplification.

Research comparing similar-priced frames showed an aluminum frame at 216 grams versus a carbon fiber frame at 240 grams. That 24-gram difference? Barely noticeable in flight. What IS noticeable is how each material handles stress.

Quality carbon fiber frames hit the sweet spot: they’re light enough for agile flight characteristics while being strong enough to survive your learning curve. Cheap frames often sacrifice structural integrity for weight savings, giving you a drone that flies great until its first real impact.

The goal isn’t the lightest possible frame, it’s the best strength-to-weight ratio you can achieve. That’s where premium carbon fiber shines.

Flight Characteristics You Can Actually Feel

Beyond durability, your frame choice directly impacts how your drone flies. This isn’t placebo effect stuff, it’s measurable.

Vibration tuning becomes a real factor with material choice. Your flight controller is typically calibrated assuming certain vibration characteristics. Cheaper frames with inconsistent carbon quality or poor design create noise in your system that:

  • Degrades your video footage
  • Makes tuning more difficult
  • Can trigger unwanted flight controller responses
  • Reduces overall flight smoothness

A well-designed carbon fiber frame acts as a stable platform for all your components. Everything stays where it should, vibrations get dampened appropriately, and your flight controller can do its job without fighting bad data.

image_3

The Long-Term Investment Perspective

Let me break down the real math here:

Scenario A: Budget Frame Approach

  • Initial frame cost: $15-25
  • Average lifespan before replacement: 2-3 months of regular flying
  • Collateral damage from frame failures: $50-150 per incident
  • Annual frame costs: $60-100+ just in frames
  • Total first-year cost: $150-300+ including damaged components

Scenario B: Quality Frame Investment

  • Initial frame cost: $45-85
  • Average lifespan: 12+ months of regular flying
  • Collateral damage: Minimal (frame protects components)
  • Annual frame costs: $45-85
  • Total first-year cost: $45-85

The numbers don’t lie. Spending more upfront on a quality frame actually saves you money over time. Plus, you get better flight characteristics, cleaner footage, and way less frustration.

When Your Frame Does Need Attention

Even the best frames eventually need maintenance or upgrades. That’s just reality. The difference is how often and how extensive that maintenance needs to be.

If you’re running a quality setup and something does go wrong, our Basic Maintenance & Repair service can get you back in the air quickly. For more complex issues or if you want to optimize your build further, our Advanced Support Package covers performance tuning and troubleshooting.

The point is: with a quality frame, maintenance is occasional and manageable. With a cheap frame, it’s constant and expensive.

Making the Right Choice

So what should you actually look for when choosing a frame? Here’s my checklist:

Material specs: Look for 3K or higher carbon weave, multiple layers, and published thickness specifications. If a seller can’t tell you the exact carbon specs, that’s a red flag.

Design features: Quality frames have chamfered edges, proper hardware, and thoughtful component mounting options. Check for reinforced motor mounts and adequate standoff spacing.

Reputation: Frames from established manufacturers with community feedback beat anonymous marketplace options every time.

Warranty/support: Does the manufacturer stand behind their product? Quality frame makers typically do.

image_4

The Bottom Line

Your frame is literally the foundation of your entire FPV drone. Everything else, your expensive camera, your tuned motors, your flight controller, all of it depends on that frame to keep it safe, stable, and flying.

Cheaping out on your frame is like building a house on sand. Sure, it might look fine at first, but it’s only a matter of time before everything comes crashing down.

Invest in a quality carbon fiber frame from the start. Your wallet will thank you. Your components will thank you. And you’ll spend way more time flying and way less time rebuilding.

Ready to upgrade your setup or need help choosing the right components? Check out our Performance Upgrade Package or browse our full range of FPV drone support services to get flying with confidence.


Have questions about frame selection or need help with your current build? Drop by the TechInMotion360 blog for more guides and tips.

FPV Drone Binding & Configuration: Getting Your Controller and Drone Talking

Picture this: You’ve just assembled your first FPV drone. Every component is perfectly in place, your goggles are charged, and you’re ready to experience the freedom of flight. You flip the switch on your transmitter, arm your drone… and nothing happens. Your sticks move, but your quad sits there like a paperweight. Welcome to the world of fpv drone binding : the invisible handshake that transforms scattered components into a symphony of flight.

Don’t worry. Every FPV pilot has been exactly where you are right now. That moment of confusion when technology seems to mock your excitement is actually your gateway to understanding one of the most fundamental aspects of fpv drone setup. Today, we’re going to turn that frustration into mastery.

What is FPV Drone Binding and Why Does It Matter?

Binding is the secure communication link between your transmitter and your drone’s receiver : think of it as teaching your drone to recognize and respond only to your voice in a crowded room. Without this digital handshake, your quad has no idea that those stick movements on your controller are meant for it.

At its core, every FPV control system has three critical components: your handheld transmitter (TX) sending commands, the receiver module (RX) on your drone receiving those signals, and a communication protocol defining how they talk to each other. Binding ensures your receiver knows it should listen exclusively to your transmitter, preventing interference from other pilots and creating that magical moment when your inputs translate into flight.

This process isn’t just technical necessity : it’s the foundation of trust between pilot and machine. Once bound correctly, your drone becomes an extension of your will, responding instantly to every subtle stick movement with precision that would make fighter pilots jealous.

Pre-Binding Preparation: Setting Yourself Up for Success

Before diving into binding, proper preparation prevents hours of fpv troubleshooting later. Think of this as your pre-flight checklist for the digital realm.

Firmware Compatibility Check: Your transmitter and receiver must speak the same language version. Mismatched firmware is like trying to have a conversation in different dialects : technically the same language, but full of miscommunication. Always update both devices to the latest compatible firmware before attempting to bind.

Power and Module Verification: Ensure your transmitter module is correctly installed and receiving power. A loose module connection is often the culprit behind binding failures that leave pilots scratching their heads for hours.

Protocol Confirmation: Verify that your transmitter and receiver are using the same protocol (ELRS, Crossfire, FrSky, etc.). This seems obvious, but in the excitement of building, it’s easy to overlook this fundamental requirement.

image_1

The Universal Binding Process: Your Step-by-Step Guide

While specific steps vary by protocol, the fundamental binding process follows a universal pattern that every FPV pilot should master:

Step 1: Enter Transmitter Binding Mode
Navigate to your transmitter’s bind function. On most radios, this involves accessing the model setup menu and selecting “Bind” or a similar option. Your transmitter’s display should indicate it’s actively searching for a receiver to pair with.

Step 2: Activate Receiver Binding Mode
Locate the small bind button on your receiver (usually a tiny button on the flight controller board). With your drone unpowered, press and hold this button while connecting a battery. The receiver LED should begin blinking rapidly, indicating it’s ready to accept a binding request.

Step 3: Complete the Handshake
With both devices in binding mode, they’ll automatically discover each other and establish the connection. You’ll see confirmation on your transmitter display, and the receiver LED will change from rapid blinking to solid or slow blinking.

Step 4: Verify Connection
Move your transmitter sticks and confirm that your flight controller recognizes the inputs. This verification step catches binding issues before they become flight failures.

Protocol-Specific Mastery: ELRS, Crossfire, and Beyond

ExpressLRS (ELRS) Binding
ELRS has revolutionized fpv drone setup with its unique binding approach. Instead of physical buttons, power cycle your receiver three times quickly by unplugging and reconnecting the battery. The LED will blink rapidly when in binding mode. Then activate bind mode through your radio’s Lua script interface. This method eliminates the need to access tiny buttons on cramped flight controllers.

TBS Crossfire Protocol
Crossfire maintains the traditional binding approach but with enhanced reliability. Enter binding mode on your transmitter through the Crossfire Lua script, then press the bind button on your receiver while powering up. Crossfire’s robust protocol often succeeds where other systems struggle in challenging RF environments.

FrSky Systems
FrSky receivers typically require holding the F/S button while powering up the receiver, then initiating bind mode on the transmitter. The process is straightforward but timing-sensitive : hold the button too long or too short, and the binding attempt will fail.

Betaflight Configuration: Where Binding Meets Flight

Successful binding is only half the battle. Your flight controller needs proper configuration to interpret those receiver signals correctly. This is where many beginners encounter their first major fpv troubleshooting challenge.

Connect your drone to Betaflight Configurator and navigate to the Receiver tab. Here, you’ll configure:

Channel Mapping: Ensure your stick movements correspond to the correct flight functions (throttle, pitch, roll, yaw). Incorrect mapping can result in dangerous control reversal or unexpected behavior.

Channel Range: Set appropriate minimum and maximum values for each channel. Most systems use 1000-2000 microseconds, but some protocols require different ranges.

Failsafe Configuration: Program what your drone should do if it loses connection with your transmitter. Proper failsafe settings can save your quad from flyaways and crashes.

image_2

Common Binding Errors and Professional Troubleshooting

Even with perfect preparation, binding issues can arise. Understanding these common problems transforms frustrating troubleshooting sessions into quick fixes:

Firmware Mismatch: The most frequent culprit behind binding failures. Always verify firmware compatibility before assuming hardware issues.

RF Interference: Other 2.4GHz devices (WiFi routers, phones, microwaves) can disrupt binding attempts. Move to a different location or power down interfering devices.

Hardware Compatibility: Not all receivers work with all transmitter modules. Research compatibility before purchasing to avoid expensive learning experiences.

Timing Issues: Some protocols require precise timing during the binding process. Practice the sequence a few times to develop muscle memory.

Power Supply Problems: Insufficient or unstable power can prevent successful binding. Ensure your battery is fully charged and capable of supplying adequate current.

Advanced Configuration: Unlocking Peak Performance

Once basic binding succeeds, advanced configuration separates novice pilots from experts:

Telemetry Setup: Configure bidirectional communication to receive battery voltage, RSSI, and other critical flight data on your transmitter.

Model Matching: For pilots with multiple drones, proper model matching prevents accidentally binding to the wrong aircraft.

Range Testing: Perform range tests to verify your binding maintains reliable communication at expected distances.

When to Seek Professional FPV Drone Support

While binding is fundamentally a DIY process, certain situations warrant professional assistance. Complex multi-protocol setups, custom firmware configurations, or persistent binding failures might require expert intervention.

TechInMotion360’s FPV Drone Support Package eliminates the guesswork from challenging binding scenarios. Our team has resolved binding issues across every major protocol and hardware combination, turning hours of frustration into minutes of expert troubleshooting.

Whether you’re struggling with your first binding attempt or optimizing an advanced racing setup, professional support ensures you spend more time flying and less time debugging. Sometimes the most efficient path to the sky involves admitting when expert help can accelerate your journey.

The Path Forward: From Binding to Soaring

Mastering FPV drone binding isn’t just about getting your controller and drone to communicate : it’s about understanding the digital foundation that makes aerial freedom possible. Every successful binding represents a small victory over complexity, a step closer to that moment when technology disappears and pure flight remains.

Remember, every expert was once a beginner who refused to give up when the binding failed for the tenth time. That persistence, that determination to master each fundamental step, is what separates pilots who occasionally fly from those who truly soar.

Your journey from confused beginner to confident pilot starts with this digital handshake. Master the binding process, understand the underlying principles, and you’ll have built the foundation for every aerial adventure that follows. The sky isn’t just calling : it’s waiting for you to answer with perfectly bound precision.

FPV Camera Settings for Cinematic Footage: From Shaky to Smooth in Minutes

The difference between amateur FPV footage and professional cinematic aerial videography isn’t just the pilot’s skill: it’s the camera settings. In just a few minutes of configuration, you can transform your shaky, amateur-looking drone footage into smooth, Hollywood-quality cinematic content that rivals professional productions.

Whether you’re an FPV hobbyist looking to elevate your content or a potential client considering our aerial video services, understanding these fundamental camera settings will revolutionize how you capture the world from above.

The Foundation: Resolution and Frame Rate Settings

Your journey to cinematic excellence begins with choosing the right resolution and frame rate combination. For professional cinematic drone videography, you have two primary paths:

The Cinematic Route: 5.3K at 24fps
This is the gold standard for film-like footage. The 24fps frame rate creates natural motion blur that our eyes associate with cinema, while 5.3K resolution provides incredible detail and flexibility in post-production. Lock your settings to 5.3K, 16:9 aspect ratio, 24fps for that authentic film look.

The Versatile Route: 4K at 60fps
Perfect for dynamic FPV flights where you need smooth slow-motion capabilities. This setting gives you the flexibility to slow footage down to 24fps in post for dramatic effect while maintaining buttery-smooth playback. For DJI FPV systems, ensure transmission quality is set to “high quality” to unlock true 4K 60fps recording.

image_1

Mastering Camera Angle: The Secret to Dynamic Footage

Camera angle is where art meets physics in FPV drone setup. The angle you choose dramatically affects both the flying experience and the final footage quality.

For Cinematic Sweeps: 15-25 Degree Uptilt
A moderate uptilt creates those breathtaking forward-moving shots where the horizon gradually reveals itself. This angle works perfectly for landscape reveals, architectural flythroughs, and establishing shots that captivate viewers.

For Dynamic Racing Shots: 35-45 Degree Uptilt
Higher camera angles create more aggressive, immersive footage perfect for high-speed flights through obstacles or urban environments. The steep angle adds energy and excitement to your shots.

Pro Tip: Always consider your flight path when setting camera angle. Cinematic drone videography requires planning your shots around your camera’s perspective, not the other way around.

GoPro Settings That Separate Pros from Amateurs

Your GoPro configuration can make or break your cinematic aspirations. Here’s the exact setup used by professional aerial videographers:

Essential GoPro Settings:

  • Resolution: 5.3K or 4K (based on your frame rate choice)
  • Bit Rate: High (maximum available)
  • Bit Depth: 10-bit if your GoPro supports it
  • Profile: Standard (avoid HDR or other processing-heavy modes)
  • Sharpness: Low (you’ll add this in post for better control)
  • ISO: Locked at 100 (minimum noise, maximum quality)

The Critical Shutter Speed Rule:
Lock your shutter speed at exactly double your frame rate. Shooting 24fps? Use 1/48th shutter. Shooting 60fps? Use 1/120th shutter. This creates natural motion blur that makes footage appear smooth and cinematic rather than the “video look” that screams amateur.

ND Filters: Your Secret Weapon for Professional Results

Neutral Density (ND) filters are game-changers for achieving proper exposure while maintaining that crucial shutter speed rule. Think of them as sunglasses for your camera: they reduce light without affecting color.

Essential ND Filter Kit:

  • ND8 (3-stop): Perfect for overcast days or golden hour shooting
  • ND16 (4-stop): Ideal for bright daylight conditions
  • ND32 (5-stop): Essential for extremely bright conditions or snow/beach environments

Pro Application: If you’re shooting 4K 60fps (1/120th shutter) on a bright day, your camera might overexpose even at ISO 100. An ND16 filter allows you to maintain that critical 1/120th shutter speed while achieving perfect exposure.

image_2

Electronic Image Stabilization: From Shaky to Smooth

This single setting transforms amateur footage into professional-grade content. Electronic Image Stabilization (EIS) is non-negotiable for cinematic drone videography.

Activation Process:

  1. Navigate to your camera’s advanced settings
  2. Enable Electronic Image Stabilization (EIS)
  3. For DJI systems, disable “image roll correction” to prevent excessive cropping
  4. Test with gentle movements before aggressive flying

Understanding the Trade-offs:
EIS crops your footage slightly (typically 10-15%) to create stabilization room. Plan your shots accordingly, leaving extra space around your subject. The slight crop is worth the dramatically improved smoothness.

When to Disable EIS:
Only disable for extremely aggressive FPV racing where maximum field of view matters more than smoothness. For cinematic work, always keep it enabled.

Color Grading Fundamentals for Cinematic Results

Your camera settings create the foundation, but color grading transforms good footage into stunning cinematic aerial videography.

Shooting for Post-Production:

  • Use Standard Profile: Avoid pre-processed looks like Vivid or Saturated
  • Shoot Flat: Lower contrast and saturation preserve more color information
  • Protect Highlights: Slightly underexpose rather than clip highlights
  • Monitor White Balance: Lock white balance to prevent color shifts during flight

Basic Cinematic Color Grading:

  1. Adjust Exposure: Lift shadows, protect highlights
  2. Add Contrast: Create depth with subtle S-curve adjustments
  3. Color Temperature: Warm highlights, cool shadows for that “film look”
  4. Saturation: Increase selectively: focus on skies and landscapes
  5. Vignetting: Subtle darkening around edges draws focus to center

image_3

Advanced Techniques for Professional Results

Manual Focus Considerations:
Many FPV cameras default to auto-focus, creating subtle breathing effects during flight. For truly professional cinematic drone videography, consider manual focus locked at hyperfocal distance for your typical flying altitude.

Audio Synchronization:
While FPV footage typically uses music overlays, professional aerial video services often sync multiple camera angles. Use a clap or visual marker at the beginning of flights for easier post-production alignment.

Backup Recording:
Always enable “record on takeoff” to ensure you capture every moment. Nothing’s worse than perfect flying with no recording to show for it.

Troubleshooting Common Issues

Jello Effect (Rolling Shutter):
If you notice wavy distortions during fast movements, your shutter speed might be too slow. Increase shutter speed slightly or add more vibration damping to your camera mount.

Overexposed Footage:
Bright conditions overwhelming your camera? Add stronger ND filters rather than increasing shutter speed beyond the double-frame-rate rule.

Color Inconsistency:
Lock white balance before takeoff and avoid auto-exposure modes that adjust during flight. Consistent settings create professional-looking footage.

From Settings to Success: Your Next Steps

Mastering these camera settings is just the beginning of your cinematic FPV journey. The real magic happens when you combine technical precision with creative vision and skilled piloting.

At TechInMotion360, we’ve spent years perfecting these techniques across hundreds of professional aerial projects. Whether you’re ready to implement these settings on your own setup or you’d prefer to experience the results through our professional FPV drone services, the path to cinematic excellence starts with understanding the fundamentals.

Ready to Transform Your Footage?

These settings will immediately improve your results, but remember: cinematic drone videography is an art form that combines technical mastery with creative vision. Start with these foundational settings, practice consistently, and don’t be afraid to experiment as you develop your unique visual style.

The sky isn’t the limit: it’s your canvas. Every flight is an opportunity to capture something extraordinary, and with these camera settings dialed in, you’re equipped to turn that vision into stunning cinematic reality.

Your journey from shaky footage to smooth, professional cinematic content starts now. The only question is: what amazing story will you tell from the sky?

Essential FPV Drone Accessories Every Beginner Should Own (and Why)

Starting your FPV drone journey feels like stepping into the future: and honestly, it is. But here's the reality: your first flight is just the beginning. The difference between a frustrating crash-and-quit experience and becoming the pilot you dreamed of isn't just practice. It's having the right drone accessories in your toolkit from day one.

After helping hundreds of beginners take flight, I've seen the same pattern: pilots who invest in essential fpv drone parts and accessories early on progress faster, crash less, and actually enjoy the learning process. Those who skip this step? They usually end up buying everything anyway: just at the worst possible moments.

Let's cut through the marketing hype and focus on what actually matters for your success.

The Foundation: Essential Building Tools

Think of FPV drone building like learning to play guitar. You wouldn't start without picks, strings, and a tuner, right? Same principle applies here.

Soldering Iron (Non-Negotiable)
The TS100 or TS80P soldering irons are game-changers for beginners. Unlike cheap hardware store options, these heat up in seconds, maintain consistent temperature, and won't destroy your expensive electronics. You'll use this for everything from connecting flight controllers to repairing crashed components.

Hex Driver Set
Your drone is held together by tiny hex screws (1.5mm, 2mm, 2.5mm). Get a quality ball-end hex driver set: the ball ends let you access screws at angles, which you'll appreciate when working in tight spaces.

image_1

Wire Management Arsenal

  • Wire cutters and strippers for clean connections
  • Heat shrink tubing in various sizes (3mm, 4mm, 6mm)
  • Zip ties for cable management
  • Electrical tape for temporary fixes

Digital Multimeter
This isn't optional equipment: it's crash prevention. A basic multimeter helps you check battery voltage, test continuity, and diagnose electrical issues before they destroy components.

Power Systems: The Heart of Flight

High-Quality LiPo Batteries
Your battery choice directly impacts flight time, performance, and safety. Start with name-brand 4S 1300-1500mAh batteries from manufacturers like Tattu or CNHL. Cheap batteries aren't just poor performers: they're fire hazards.

Battery count rule: Buy at least 3-4 batteries. One in the drone, one charging, one cooling down, one backup. This rotation keeps you flying longer and extends battery life.

Smart Charger
The ISDT Q6 Nano or similar smart chargers are worth every penny. They'll balance your cells, prevent overcharging, and give you detailed battery health data. Your $50 charger protects hundreds of dollars in batteries and potentially your house.

Storage and Transport
LiPo-safe charging bags aren't paranoia: they're smart risk management. Store batteries at 3.8V per cell for long-term health, and always transport them in hard cases with proper padding.

Propellers: Your Drone's Lifeline

Here's what every beginner learns the hard way: propellers break constantly. Not sometimes. Every single session, especially while learning.

image_2

Stock Up Smart
Buy propellers in bulk: we're talking 20-30 sets minimum. HQ Props offer excellent durability and performance, but also grab some cheaper options for practice sessions. Mix of materials:

  • Polycarbonate props for durability during learning
  • Carbon fiber props for performance once you've mastered basics

Prop Balancing
Unbalanced props cause vibrations that ruin video footage. A simple prop balancer (or even a hex driver through the center hole) helps you identify heavy spots that need sanding down.

Vision Systems: Seeing Through Your Drone's Eyes

FPV Goggles
This is where beginners often overspend or severely underspend. The sweet spot? DJI FPV Goggles V2 or Fatshark Attitude V6 for digital systems, or Skyzone Cobra X or Eachine EV800D for analog.

Digital offers crystal-clear footage with low latency, but analog is more forgiving for beginners and cheaper to repair when (not if) you crash.

Camera Protection
A $20 TPU camera mount protects your $100+ FPV camera. Print them yourself or order custom designs: they're consumable items that absorb crash impact.

Storage and Organization Solutions

Dedicated FPV Bag or Case
The Lowepro DroneGuard or similar padded cases organize everything and make transport safe. Compartments for batteries, tools, spare parts, and your drone prevent the "digging through a pile of parts" frustration.

Small Parts Organization
Tackle boxes or modular storage systems keep screws, standoffs, and small components organized. Nothing kills momentum like spending 20 minutes looking for a specific screw size.

image_3

Safety and Recovery Gear

Smoke Stopper
This $15 device can save hundreds in electronics. It limits current flow during first power-ups, preventing magic smoke release when something's wired wrong.

Buzzer and LED Strip
Crashed drones hide in the most impossible places. A loud buzzer activated by your transmitter's lost model alarm is a lifesaver. LED strips help with orientation and make retrieval easier.

Landing Pad
Protects your gimbal and camera from debris during takeoff and landing. Also provides a consistent reference point for practicing precise landings.

Advanced Accessories Worth Considering

Video Transmitter (VTX) Antenna Upgrade
Stock antennas are mediocre at best. Circular polarized antennas like TrueRC X-Air series dramatically improve range and signal quality. Just remember: never power on your VTX without an antenna attached: you'll destroy it instantly.

Transmitter Upgrades
Quality gimbals like Hall Effect sensors eliminate stick drift and improve precision. RadioMaster Boxer or FrSky Taranis series offer excellent upgrade paths as your skills develop.

What to Skip (For Now)

GPS Modules: Learn manual flying first
Expensive Action Cameras: Master FPV cameras before adding GoPros
Carbon Fiber Everything: Durability beats weight savings while learning
Racing-Specific Gear: Focus on smooth flying before speed

Building Your Starter Kit: Budget Breakdown

Essential Tier ($150-200):

  • Basic tool kit with soldering iron
  • 20 sets of propellers
  • 3-4 quality batteries
  • Smart charger
  • Storage bag

Intermediate Tier ($300-400):

  • Everything above plus quality FPV goggles
  • Upgraded antennas
  • Professional storage case
  • Safety equipment

Advanced Tier ($500+):

  • Premium goggles and transmitter
  • Carbon fiber accessories
  • Professional tool upgrades

Your Next Steps

The FPV community thrives on shared knowledge and mutual support. Every expert was once a beginner who made these same accessory decisions. The difference? They learned from others' experience instead of repeating expensive mistakes.

Ready to build your complete setup? Check out our curated drone components collection where we've assembled everything mentioned in this guide. No guesswork, no compatibility issues: just the gear that works.

Remember: the goal isn't to buy everything at once. Start with essentials, fly regularly, and expand your toolkit as your skills and interests develop. Every accessory should solve a real problem you're experiencing, not just look cool on the shelf.

Your journey into cinematic FPV flight starts with proper preparation. These accessories aren't just purchases; they're investments in countless hours of incredible flights ahead.

The sky isn't the limit anymore. It's your new playground.

Choosing Your First FPV Drone Kit: What Beginners Actually Need

The world of FPV drone racing and cinematic flight is calling your name. You've watched countless YouTube videos of pilots threading the needle between trees at 60 mph, capturing breathtaking aerial footage that makes Hollywood jealous. Now you're ready to take the leap from spectator to pilot.

But here's where most beginners hit their first wall: What do you actually need to buy?

Walking into the FPV drone world can feel like entering a foreign country where everyone speaks in acronyms like ESC, VTX, and PDB. Don't worry , we're about to break down exactly what you need to get airborne without breaking the bank or your spirit.

The Great Beginner's Dilemma: Ready-to-Fly vs. Build-Your-Own

Your first major decision isn't about which drone to buy , it's about how you want to get into the air.

Ready-to-Fly (RTF) Kits: The Fast Track to Flight

Ready-to-fly kits are like getting a complete meal at a restaurant instead of grocery shopping and cooking. Everything you need comes in one box: drone, controller, FPV goggles, battery, and charger.

The RTF advantage is simple: Unbox, charge, and fly within an hour.

Popular RTF options include:

  • BetaFPV Cetus X Kit ($250-300): Perfect for indoor and outdoor learning
  • DJI Avata 2 ($769): Premium option with crash-resistant design and 4K video
  • EMAX Tinyhawk III (~$269): Great balance of features and affordability

Build-Your-Own (BNF/PNP): The Learning Path

Building your own FPV drone is like learning to cook. Yes, it takes longer and you might burn a few meals, but you'll understand every ingredient and technique. This knowledge becomes invaluable when you need repairs or want to upgrade components.

image_1

Understanding the Essential Components

Every FPV setup requires three core systems working in harmony:

1. The Flight System

  • Frame: Your drone's skeleton (typically 3-7 inches diagonal motor-to-motor)
  • Flight Controller: The brain that keeps everything stable
  • Electronic Speed Controllers (ESCs): Control motor speed and direction
  • Motors: Create lift and maneuverability
  • Propellers: Convert motor rotation into thrust

2. The Video System

  • FPV Camera: Captures live video feed
  • Video Transmitter (VTX): Broadcasts camera feed wirelessly
  • FPV Goggles with Receiver: Your window into the drone's perspective

3. The Control System

  • Radio Transmitter: Your physical controller
  • Radio Receiver: Mounted on drone, receives your control inputs

Frame Size: Your Gateway Decision

Frame size isn't just about physical dimensions : it determines your entire flying experience.

3-Inch Frames: Indoor-friendly, quieter, perfect for learning basic maneuvers in tight spaces. Great for apartment dwellers or those with limited outdoor access.

5-Inch Frames: The sweet spot for most pilots. Fast enough for racing, stable enough for cinematic work, and parts are widely available and affordable.

7-Inch Frames: Long-range exploration machines. Higher top speeds and better wind resistance, but require more space and experience.

Pro tip: Start with a 5-inch frame. It's the Honda Civic of FPV drones : reliable, parts are everywhere, and it'll grow with your skills.

image_2

Motor Specifications Decoded

Motor specs look intimidating, but they follow a simple pattern: XXYY format.

  • XX: Stator width in millimeters
  • YY: Stator height in millimeters

For example, a 2207 motor has a 22mm wide, 7mm tall stator.

Beginner-friendly motor ranges:

  • 2204-2207: Good balance of power and efficiency for 5-inch props
  • 1404-1507: Perfect for smaller 3-4 inch builds
  • 2306-2308: More aggressive power for racing applications

KV rating indicates how many RPMs per volt the motor will spin. Lower KV (1600-1800) provides more torque and efficiency with larger props. Higher KV (2300-2600) spins faster with smaller props but consumes more power.

Flight Controller: Your Drone's Brain

Modern flight controllers run Betaflight firmware : the gold standard for FPV flight. Look for these essential features:

  • F4 or F7 processor: Handles complex calculations smoothly
  • Built-in OSD: Overlays flight data on your FPV feed
  • Blackbox logging: Records flight data for performance tuning
  • Multiple UART ports: Connects additional accessories

Popular beginner-friendly flight controllers include the Matek F405 series and SpeedyBee F4/F7 boards. These offer excellent documentation and community support.

image_3

The Hidden Costs: What's NOT in Most Kits

Here's where beginners get surprised. Even "complete" kits often exclude crucial items:

Immediate Necessities

  • Extra batteries: Plan for 3-5 flight packs minimum
  • Battery charger: Many kits include basic USB chargers that take forever
  • Tools: Hex drivers, prop pullers, soldering iron for repairs
  • Spare propellers: You WILL break props learning

Near-Future Needs

  • Upgraded FPV goggles: Kit goggles often have poor screens or latency
  • Better radio transmitter: Entry-level controllers lack advanced features
  • Field charging solution: Car chargers or portable power stations
  • Transport case: Protect your investment during travel

At TechInMotion360.org, we've seen too many enthusiastic beginners get discouraged by unexpected costs. Our FPV Drone Support Packages include consultation to help you budget correctly from day one.

Avoiding Compatibility Nightmares

Nothing kills enthusiasm faster than ordering components that don't work together. Here are the critical compatibility checkpoints:

Radio Protocol Matching

Your radio transmitter and receiver must speak the same language. Popular protocols include:

  • FrSky ACCST/ACCESS: Reliable, long-range
  • Spektrum DSMX: Rock-solid connection, popular in racing
  • TBS Crossfire/ELRS: Long-range systems for exploration flying

Video System Compatibility

FPV video operates on specific frequencies:

  • 5.8GHz: Most common, good range and penetration
  • 2.4GHz/1.3GHz: Longer range but require larger antennas
  • Digital systems: DJI Digital FPV offers HD video but costs more

Power System Matching

Your battery voltage must match your components:

  • 3S (11.1V): Smaller, efficient builds
  • 4S (14.8V): Most popular for 5-inch racing quads
  • 6S (22.2V): High-performance applications

image_4

Our Top Beginner Kit Recommendations

Based on supporting hundreds of new pilots, here are our proven winners:

Budget Champion: BetaFPV Cetus X Kit ($299)

Complete RTF package perfect for learning. Includes everything needed for immediate flight, durable design handles crashes well, and excellent customer support.

Best Value: EMAX Tinyhawk III RTF Kit ($269)

Outstanding indoor/outdoor performance, quality components that last, and active community support for troubleshooting.

Premium Pick: DJI Avata 2 ($769)

Safest learning platform with obstacle avoidance, incredible 4K video quality, and easiest controls for beginners. Higher cost but lowest frustration factor.

DIY Option: Custom 5" Build with Support ($400-600)

Our drone components selection helps you build a personalized setup that grows with your skills.

The TechInMotion360 Advantage

Choosing your first FPV drone shouldn't feel like gambling. At TechInMotion360.org, we eliminate the guesswork with:

  • Pre-flight consultations: Understand your goals and match them with the right equipment
  • Complete compatibility checking: Every component verified to work together perfectly
  • Basic support packages: Get unstuck fast when issues arise
  • Flight-ready services: We'll tune and test your setup before you fly

Your Journey Starts with One Decision

The perfect FPV drone doesn't exist : but the perfect FPV drone for you absolutely does. Whether you choose a ready-to-fly kit for immediate gratification or embrace the learning journey of building your own, the most important step is the first one.

Don't let analysis paralysis keep you grounded. Every professional FPV pilot started exactly where you are now, staring at component lists and wondering if they're making the right choice.

image_5

Remember: Your first drone won't be your last drone. That's not failure : that's progression. Start with something that gets you flying safely and affordably, then let your growing skills and interests guide your next upgrade.

Ready to transform from spectator to pilot? The sky is calling, and we're here to make sure you answer with confidence.

Need help choosing the perfect setup for your specific situation? Our team at TechInMotion360.org offers personalized consultations to match you with equipment that fits your goals, budget, and skill level. Because the best drone is the one that gets you flying.

Your First FPV Flight: Pre-Flight Checklist and Safety Tips

The moment you've been waiting for has arrived. Your FPV drone is built, your goggles are charged, and the Arizona sky beckons with endless possibilities. But before you launch into that first exhilarating flight, there's something more important than speed or acrobatics: safety.

Every legendary FPV pilot started exactly where you are now : eager, excited, and maybe a little nervous about that first takeoff. The difference between those who go on to create breathtaking aerial cinematography and those who end up with a box of broken parts? They master the fundamentals first.

This isn't just another boring safety lecture. This is your roadmap to confident, responsible FPV flying that protects your investment, respects our shared airspace, and sets you up for years of incredible flights ahead.

The Foundation: Essential Pre-Flight Equipment Check

Before you even think about heading to your flying location, your fpv drone setup begins at home with a methodical equipment inspection. This isn't paranoia : it's professionalism.

Power Systems First
Your battery is the heart of your FPV system. Check that all batteries are fully charged and balanced. Inspect LiPo connectors for any signs of damage, corrosion, or loose connections. A failing battery connection mid-flight isn't just inconvenient : it's dangerous.

Frame and Hardware Inspection
Remove your propellers and give your drone a thorough visual inspection. Check every screw, every motor mount, and every wire connection. Look for stress fractures in the frame, particularly around motor mounts and camera gimbal attachment points. Arizona's temperature swings can cause materials to expand and contract, potentially loosening hardware over time.

image_1

Motor and Propeller Verification
Spin each motor by hand to ensure smooth rotation. They should turn freely without grinding or catching. When you mount your propellers, double-check that each one is the correct type for its position and securely fastened. A loose propeller at altitude can cause catastrophic failure.

FPV System Check
Power up your goggles and verify you're receiving a clear image on the correct channel. Check your video transmitter antenna : flying without a properly connected VTX antenna can damage your video system permanently. Ensure your DVR is functioning and has adequate storage space.

Understanding Arizona's Airspace: Know Before You Fly

Arizona's diverse landscape offers incredible FPV opportunities, from the Sonoran Desert to mountain ranges, but with that freedom comes responsibility. FPV drone services like ours see too many pilots who skip this crucial step.

Federal Regulations
The FAA requires all drone pilots to pass the TRUST exam for recreational flying or obtain a Part 107 certificate for commercial operations. But regulations go deeper than just certification. You're limited to 400 feet above ground level in most areas, and you must yield right of way to all manned aircraft.

Arizona-Specific Considerations
Arizona's proximity to Mexico creates additional complexities along the border regions. Military operations areas (MOAs) are scattered throughout the state, particularly around Luke Air Force Base and Davis-Monthan Air Force Base near Tucson. Use the B4UFLY app religiously : it's not optional.

Phoenix's Class B airspace extends in a complex pattern that can catch inexperienced pilots off guard. What looks like open desert might actually be controlled airspace requiring special authorization.

Local Courtesy
Arizona's vast open spaces make it tempting to fly anywhere, but respect private property, wildlife areas, and indigenous lands. Many of Arizona's most scenic locations fall under special protection that prohibits drone operations entirely.

image_2

Line-of-Sight vs. FPV Flying: Understanding the Balance

This is where many new FPV pilots get confused. The FAA requires that you maintain visual line of sight with your aircraft at all times, even when flying FPV. This means you need a visual observer or must be able to see your drone with your naked eyes while wearing goggles.

The Reality of FPV Flying
Pure FPV flight : where you're flying entirely through your goggles : is incredibly immersive but technically requires a visual observer for legal compliance. Many experienced pilots develop the skill to quickly lift their goggles and visually acquire their aircraft, but this takes practice.

Starting Safe
For your first flights, stay close and low. Practice in a large, open area where you can easily see your drone even while focusing on your goggle feed. This builds confidence in both your piloting skills and your ability to transition between FPV and line-of-sight flying.

Building Situational Awareness
Develop the habit of regularly checking your position relative to obstacles, other aircraft, and boundaries. Your FPV camera has a limited field of view : what you can't see through your goggles could be a serious hazard.

Beginner-Friendly Flight Modes: Your Training Wheels

Modern flight controllers offer multiple modes designed to ease new pilots into FPV flying. Understanding these modes is crucial for your fpv drone beginner guide journey.

Angle Mode (Horizon Mode)
This self-leveling mode is your best friend for early flights. The drone automatically returns to level when you release the sticks, preventing disorientation and uncontrolled flight. It limits your maximum tilt angle, making it nearly impossible to flip upside down accidentally.

Acro Mode (Manual Mode)
This is pure, unlimited control : and where you'll eventually want to be for advanced FPV flying. But resist the temptation to jump straight into acro mode. Without the training wheels of self-leveling, a new pilot can quickly lose orientation and crash.

GPS Modes
If your drone has GPS capabilities, modes like position hold and return-to-home can be valuable safety nets. However, don't become dependent on these features : they can fail, and true FPV flying skills require manual control proficiency.

image_3

Progressive Training Approach
Start with short flights in angle mode, focusing on smooth, controlled movements. Practice basic maneuvers: forward/backward, side to side, gentle turns. Build muscle memory before progressing to more aggressive flying or advanced modes.

When Things Go Wrong: Crash Recovery and Damage Assessment

Despite your best preparation, crashes happen. How you handle them separates experienced pilots from frustrated quitters.

Immediate Post-Crash Protocol
First, disarm your motors immediately. A crashed drone with spinning propellers can cause serious injury or additional damage. Approach cautiously and disconnect the battery before handling.

Damage Assessment
Check for obvious damage first: broken propellers, cracked frame components, or damaged camera gimbal. But don't miss the subtle signs : a motor that spins but feels rough, loose wiring connections, or a slightly bent motor shaft can cause problems on your next flight.

Arizona-Specific Recovery Challenges
Arizona's terrain presents unique recovery challenges. Desert crashes can bury small components in sand. Rocky terrain can cause impact damage that's not immediately obvious. Carry a small flashlight and basic tools : you might be searching for scattered parts in low light.

Learning from Failures
Every crash is a learning opportunity. Review your DVR footage if available. What led to the crash? Could better pre-flight preparation have prevented it? Was it pilot error, equipment failure, or environmental factors?

image_4

When to Seek Professional Help
Sometimes damage is beyond field repair. Complex flight controller issues, motor problems, or camera gimbal repairs require specialized knowledge. TechInMotion360's FPV drone support packages can help diagnose problems and get you back in the air safely.

Building Your Safety Mindset

Safety isn't just about following rules : it's about developing a mindset that prioritizes responsible flying over flashy maneuvers. Every flight should begin with the same question: "What could go wrong, and how am I prepared for it?"

Pre-Flight Ritual
Develop a consistent pre-flight routine and stick to it, even when you're excited about perfect flying conditions. Experienced pilots know that shortcuts in preparation lead to problems in the air.

Weather Awareness
Arizona's weather can change rapidly. Monitor wind conditions, temperature, and approaching storms. High density altitude affects performance, particularly during hot summer days. Know your equipment's limitations and respect them.

Community Responsibility
Remember that every FPV flight reflects on our community. Fly responsibly, respect regulations, and help other pilots develop good habits. The future of FPV flying depends on maintaining public trust through consistently safe operations.

image_5

Your first FPV flight represents more than just getting airborne : it's the beginning of a journey that could take you to incredible places and experiences. But that journey starts with a foundation of safety, preparation, and respect for the responsibility that comes with operating these amazing machines.

Take your time, follow the checklist, and remember that every expert was once a beginner who chose to prioritize safety over shortcuts. The Arizona sky is waiting, and when you're properly prepared, that first FPV flight will be everything you've dreamed of and more.

The view from above is incredible, but the confidence that comes from knowing you're flying safely and legally? That's priceless.

The Ultimate Guide to Drone Accessories: Everything You Need for Professional Aerial Video

The difference between amateur aerial footage and truly cinematic professional work often comes down to one thing: having the right drone accessories in your kit. Whether you're launching your aerial video services or elevating your existing setup, the accessories you choose can make or break your next project.

After years of working with pilots who've transformed their footage quality through smart accessory choices, I've seen firsthand how the right gear elevates everything from real estate showcases to Hollywood-level productions. Let's dive into the essential accessories that separate the pros from the weekend warriors.

Power Management: The Foundation of Professional Shoots

Nothing kills a professional shoot faster than running out of juice mid-flight. Smart power management goes way beyond just buying extra batteries.

Multiple Battery Strategy: Professional aerial video work demands at least 4-6 high-capacity batteries per shoot. This isn't just about flight time: it's about maintaining consistent performance throughout long shooting days. Lithium polymer batteries perform best when they're not completely drained, so cycling through multiple batteries keeps your drone performing at peak levels.

Charging Solutions: A dual or quad-channel charging hub is non-negotiable. Look for chargers that can handle different battery types and offer fast-charging capabilities. Some advanced setups include car charging adapters for location shoots where wall power isn't available.

Power Banks and Field Charging: Bring portable power stations that can charge your batteries, controller, and mobile devices simultaneously. Nothing's worse than having charged batteries but a dead controller when that perfect golden hour light hits.

image_1

Camera Enhancement Accessories

The camera accessories you choose directly impact the cinematic quality of your footage. These aren't optional upgrades: they're essential tools for professional results.

ND Filters: Your Secret Weapon: Neutral density filters are absolutely crucial for professional aerial videography. They control the amount of light entering your camera, allowing you to maintain cinematic frame rates and motion blur even in bright daylight conditions. A good set includes ND4, ND8, ND16, and ND32 filters to handle various lighting scenarios.

Polarizing Filters: These reduce glare from water, glass, and wet surfaces while enhancing color saturation. Essential for coastal shoots or any work involving reflective surfaces.

UV Filters: While modern cameras handle UV well, these filters provide an extra layer of protection for your expensive camera lens during challenging outdoor conditions.

Flight Performance and Safety Equipment

Professional aerial video work demands accessories that enhance both performance and safety margins.

Propeller Management: Always carry at least two complete sets of spare propellers. Carbon fiber propellers offer superior performance through reduced vibration and better power transfer, resulting in smoother footage and longer flight times.

Landing Pads and Protection: Professional landing pads aren't just about convenience: they're about protecting your equipment investment. Look for collapsible designs that fold flat but provide a stable, clean takeoff and landing zone. Some advanced pads include GPS coordinates and emergency contact information.

Propeller Guards: While they add weight and reduce flight time, guards are essential for tight indoor spaces or when working around people. Choose quick-release designs that don't compromise your drone's aerodynamics.

image_2

Storage and Transport Solutions

Your accessories are worthless if they're damaged in transport or you can't find them when you need them.

Hard Cases vs Soft Bags: Professional setups demand hard cases for air travel or rough transport conditions. Pelican-style cases with custom foam inserts keep everything organized and protected. For local shoots, high-quality soft bags offer easier portability while still protecting your gear.

Memory Card Strategy: Use high-speed microSD cards (Class 10 or higher) and always bring spares. Professional shoots generate massive amounts of data, and card failures happen at the worst possible moments. Consider cards with different capacities: smaller cards for test flights and larger ones for actual production work.

Cable Organization: Invest in cable organizers and spare charging cables. USB-C cables, micro-USB adapters, and HDMI outputs should all have backups in your kit.

Advanced Control and Monitoring

Professional aerial video services require precise control and real-time monitoring capabilities.

External Monitors: While built-in screens work for basic flying, external monitors provide better visibility in bright conditions and more accurate color representation for critical footage evaluation. Look for monitors with high brightness ratings and sun hoods.

Controller Enhancements: Controller lanyards, thumb stick protectors, and grip accessories might seem minor, but they make significant differences during long shooting sessions. Spare thumb sticks are essential: they wear out faster than you'd expect with heavy use.

Range Extenders and Signal Boosters: For complex shots or challenging RF environments, range extenders can be the difference between getting the shot and losing signal at the critical moment.

image_3

Specialized Accessories for Advanced Applications

As your aerial video services expand, certain specialized accessories become essential for specific types of work.

FPV Equipment: For immersive flight experiences or specialized camera work, FPV setups including dedicated cameras, video transmitters, and goggles open up creative possibilities impossible with standard flight modes. Modern FPV systems offer HD video transmission with minimal latency.

Lighting Accessories: Strobe lights aren't just about safety compliance: they add creative possibilities for twilight and night shoots. LED panels can provide fill lighting for subjects in aerial portraits or real estate work.

Environmental Protection: Rain guards, lens hoods, and temperature-rated equipment expand your operational envelope. Professional work often can't wait for perfect weather conditions.

Maintenance and Field Repair Kit

Professional pilots always carry field maintenance capabilities.

Essential Tools: A compact toolkit with the right screwdrivers, allen wrenches, and specialty tools for your specific drone model. Include thread locker, spare screws, and basic electrical repair supplies.

Cleaning Supplies: Lens cleaning cloths, compressed air, and gentle cleaning solutions keep your equipment performing at peak levels. Dirty sensors and lenses destroy footage quality faster than any other factor.

Diagnostic Equipment: Multimeters, battery voltage checkers, and basic diagnostic tools help identify and resolve issues before they become flight-ending problems.

image_4

Building Your Professional Accessory Kit

Start with the essentials: extra batteries, ND filters, spare propellers, and a quality carrying case. As your skills and business grow, add specialized accessories that match your specific service offerings.

Budget Considerations: Quality accessories are investments, not expenses. Cheap ND filters destroy footage quality, unreliable batteries cause crashes, and poor-quality cases lead to damaged equipment. Buy once, buy right.

Scalability: Choose accessories that can grow with your setup. Modular systems, universal mounting solutions, and gear that works across multiple drone platforms offer better long-term value.

The accessories in your kit directly impact the quality and reliability of your aerial video work. Whether you're building your first professional setup or expanding an existing service, choosing the right drone accessories transforms good footage into exceptional aerial video services that clients remember and recommend.

Remember, every accessory should serve a specific purpose in your workflow. The goal isn't to carry everything possible: it's to have exactly what you need when you need it, whether that's capturing that perfect golden hour shot or handling an unexpected equipment issue in the field.

Ready to build your professional drone accessory kit? Check out our comprehensive selection of drone components and start transforming your aerial video capabilities today.

Stop Wasting Time on Basic Drone Footage: 5 Creative FPV Techniques That Book More Properties

Real estate professionals are discovering what we've known for years: standard drone footage just doesn't cut it anymore. While your competition is still doing basic flyovers and static aerial shots, savvy agents are booking 37% more showings with dynamic FPV drone videography that tells a story.

The numbers don't lie. A 2025 Phoenix campaign using FPV techniques achieved a 70% boost in online engagement compared to traditional aerial footage. But here's the thing, most real estate professionals are barely scratching the surface of what's possible with FPV drone services.

Today, we're sharing five game-changing FPV techniques that transform ordinary property listings into must-see experiences that generate serious buyer interest.

Why Standard Drone Footage Falls Flat

Let's be honest, basic drone footage is boring. Those slow, predictable aerial shots that every listing seems to have? They're about as exciting as watching paint dry. Potential buyers scroll past them without a second thought because they've seen the same thing a thousand times.

FPV changes everything. Instead of passive observation, viewers experience an emotional journey through the property. They don't just see a house, they envision their life unfolding in those spaces.

image_1

Technique #1: The Seamless Indoor-Outdoor Flow

This is where FPV drone services truly shine. Traditional drones can't navigate tight spaces or transition smoothly between interior and exterior shots. With FPV, you create one continuous, breathtaking journey.

How it works: Start outside the front entrance, fly through the front door (yes, literally through), navigate the main living areas, and exit through sliding patio doors to reveal the backyard and pool area. No cuts, no transitions: just pure cinematic magic.

Why it books properties: This technique helps buyers understand the property's flow and connection between spaces. They're not just viewing rooms: they're experiencing how they'd move through their potential new home.

Pro tip: Practice this shot extensively in safe environments. Indoor FPV requires precision and confidence. Consider using a cinewhoop drone for tighter indoor spaces.

Technique #2: The Dramatic Reveal Shot

Nothing beats the emotional impact of a perfectly executed reveal. This technique builds anticipation and delivers a "wow" moment that sticks with viewers long after they've scrolled away.

The setup: Start low and close to an architectural feature: maybe a stone pathway, garden feature, or pool edge. Fly parallel to this element for 3-4 seconds, then execute a smooth ascent and backward pull that reveals the entire property in one sweeping motion.

Advanced variation: For multi-level homes, start at the foundation, rise along the exterior wall, and pull back at the roofline to showcase both the architectural details and the property's scale.

Why it works: Our brains are wired to love surprises. The reveal shot triggers genuine excitement and creates memorable moments that buyers associate with the property.

Technique #3: The Speed Ramp Showcase

Speed ramping: transitioning from slow motion to real-time to fast motion within a single shot: adds cinematic flair that makes properties feel like movie locations.

Perfect for luxury homes: Start in slow motion capturing intricate details like stonework or landscaping. Ramp to normal speed as you approach the main feature (pool, outdoor kitchen, mountain view), then accelerate through the final reveal.

image_2

Technical note: This requires post-production work, but the results are worth it. Shoot at higher frame rates (60fps or 120fps) to ensure smooth slow-motion segments.

Booking power: Speed ramping creates an emotional rhythm that keeps viewers engaged through the entire video. It's the difference between watching a property video and experiencing it.

Technique #4: The Impossible Angle

FPV drones can capture shots that defy physics: or at least appear to. These "impossible" shots create intrigue and showcase properties from perspectives that human eyes never naturally see.

Examples that work:

  • Flying inverted over a pool to capture the reflection and sky simultaneously
  • Threading between palm trees at high speed to frame the house
  • Diving down a spiral staircase in a foyer
  • Power loops around architectural features

Safety first: These shots require advanced piloting skills. Always scout locations thoroughly and have a spotter when attempting complex maneuvers.

Client reaction: Buyers remember impossible shots. They share them. They talk about them. That word-of-mouth marketing is invaluable for busy real estate professionals.

Technique #5: The Lifestyle Integration

The most effective FPV real estate videos don't just show empty spaces: they hint at the lifestyle awaiting new owners. This technique requires coordination but delivers exceptional results.

Stage the scene: Have people using the space naturally. Kids playing in the yard, adults preparing dinner, or friends gathered around a fire pit. Your FPV drone weaves through these moments, capturing both the human element and the property's features.

Timing is everything: Coordinate drone movements with human activity. As the drone rises over the pool area, have swimmers diving in. When approaching the outdoor kitchen, capture someone grilling.

image_3

Emotional connection: This technique transforms property videos into lifestyle aspirations. Viewers don't just see features: they imagine themselves living those moments.

The Technical Foundation for Success

These creative techniques mean nothing without solid fundamentals. Professional FPV drone services require:

Proper equipment: Cinewhoops for indoor work, racing drones for speed sequences, and hybrid setups for versatility. At TechInMotion360.org, we maintain multiple drone configurations to match each property's unique requirements.

Skillful piloting: FPV flying, especially indoors and around people, requires hundreds of hours of practice. There's no substitute for experience when capturing those perfect shots.

Post-production expertise: Raw FPV footage is just the beginning. Color grading, speed ramping, and seamless editing transform good footage into booking-generating content.

Measuring Your Success

The goal isn't just pretty footage: it's measurable results. Track these metrics to gauge your FPV investment:

  • Listing views and engagement time
  • Showing requests within 48 hours of posting
  • Social media shares and comments
  • Days on market compared to traditional listings
  • Final sale price relative to asking price

Real estate professionals using advanced aerial video services consistently report faster sales cycles and higher buyer engagement rates.

Getting Started with Professional FPV Services

Ready to transform your property marketing? The investment in professional cinematic drone videography pays dividends in faster sales, higher prices, and client satisfaction.

What to look for in FPV providers:

  • Portfolio demonstrating advanced techniques, not just basic aerial shots
  • Insurance and proper certifications for commercial operations
  • Equipment redundancy for shoot-day reliability
  • Post-production capabilities for polished final delivery

Your buyers are ready for cinematic experiences that showcase properties as lifestyle destinations, not just structures. The question is: will your listings stand out, or blend into the sea of basic drone footage?

Ready to revolutionize your property marketing? Explore our comprehensive FPV drone services and discover how TechInMotion360.org transforms ordinary listings into booking machines. Because in today's competitive market, basic just isn't enough.

0
    0
    Your Cart
    Your cart is emptyReturn to Shop

    Search For Products

    Product has been added to your cart