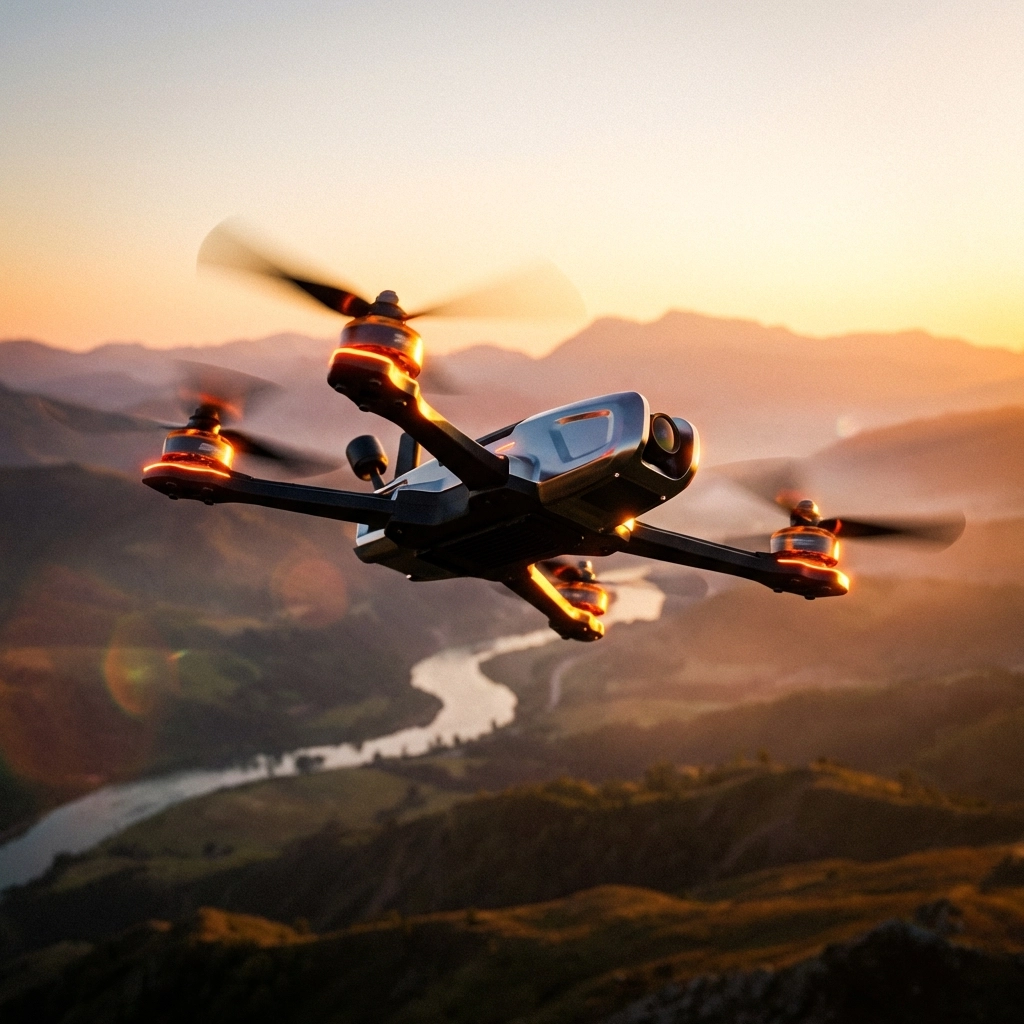
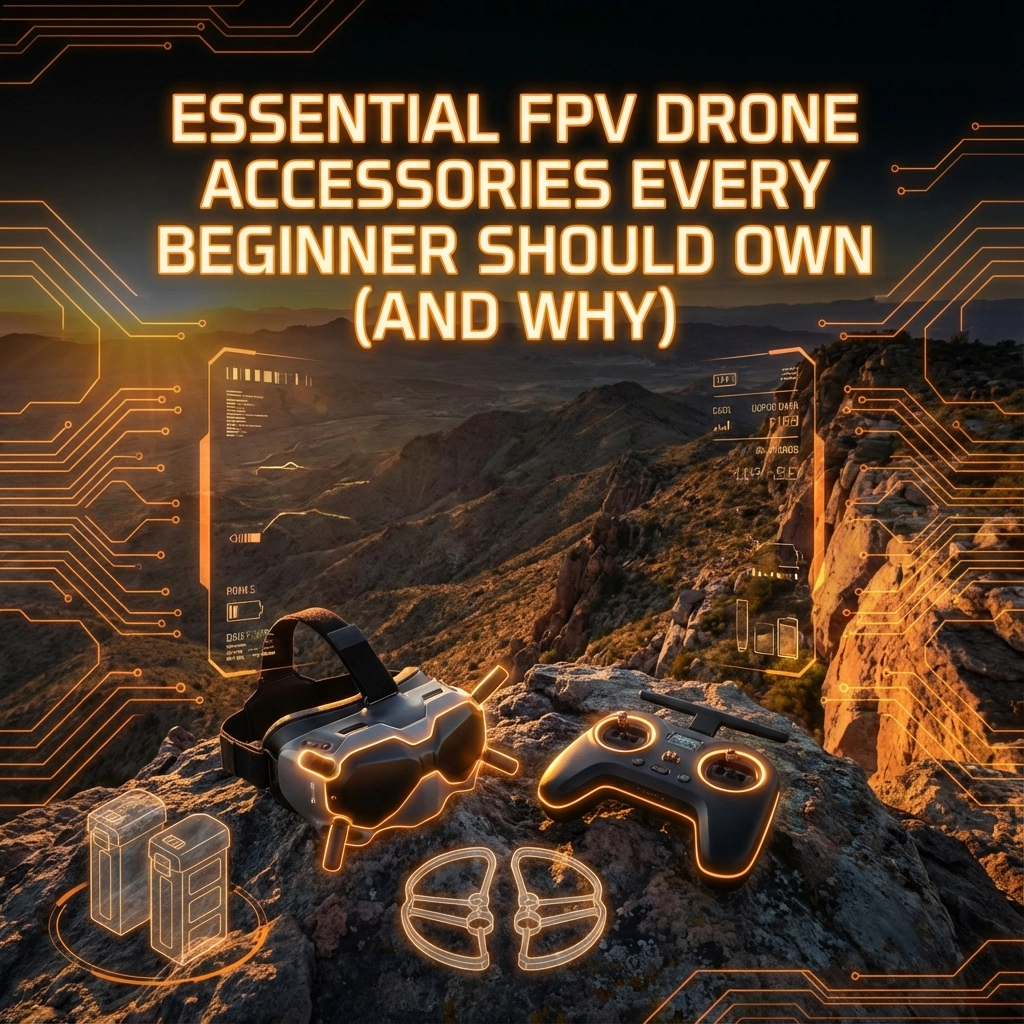
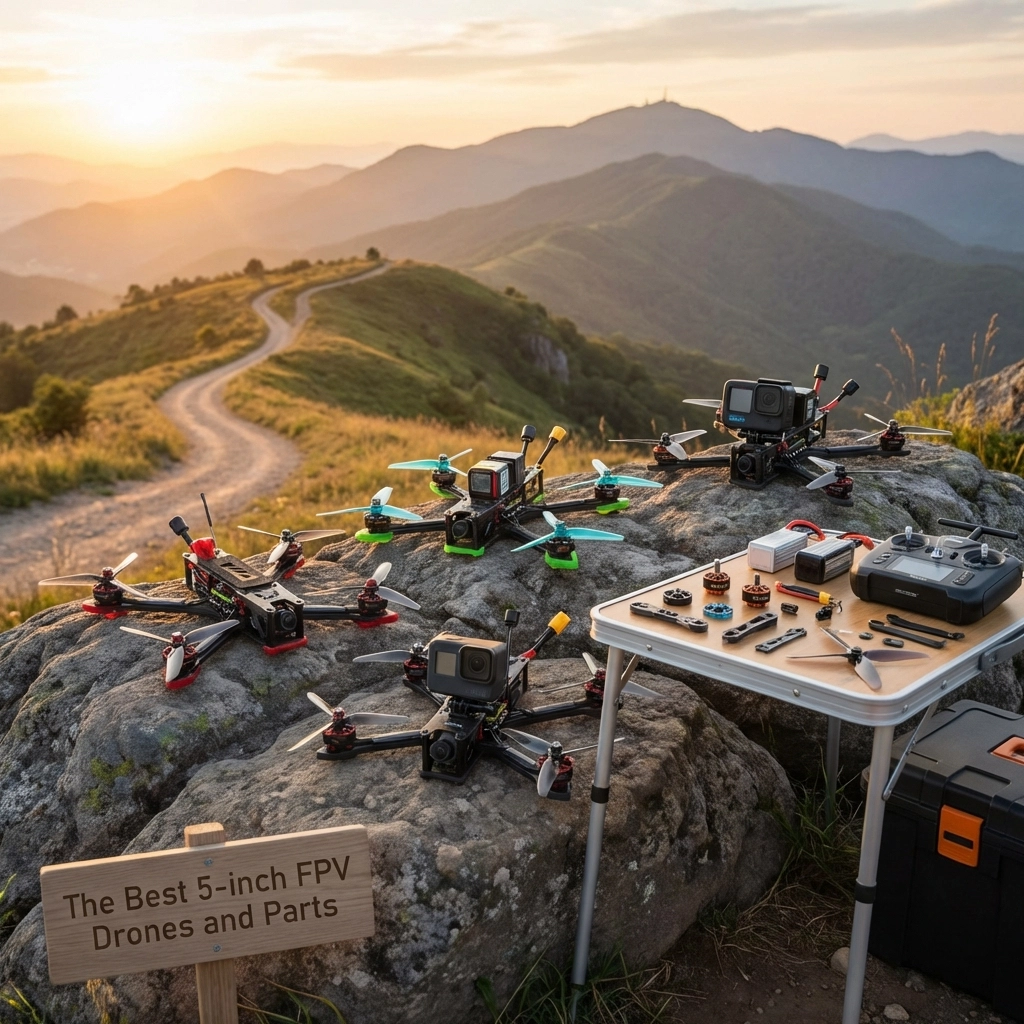
The Best 5-inch FPV Drones and Parts


Why 5-Inch FPV Drones Are the Sweet Spot

If you’re diving into the world of FPV drones, you’ve probably noticed that 5-inch quads dominate the scene. There’s a good reason for that: they hit the perfect balance between power, agility, and versatility.

Five-inch drones are large enough to carry quality cameras and punch through wind, yet nimble enough for tight freestyle maneuvers and racing. They’re the jack-of-all-trades in the FPV world, which is exactly why most pilots: from beginners to pros: build or buy in this class.

Whether you’re chasing cinematic footage, ripping through bandos, or just learning the ropes, a 5-inch setup gives you room to grow without outgrowing your gear. In this guide, we’ll move from prebuilt BNF options into frames, FC/ESC stacks, motors, propellers, batteries, accessories (with GPS and beeper), FPV camera/VTX/antennas, and the tools and wires that tie it all together.


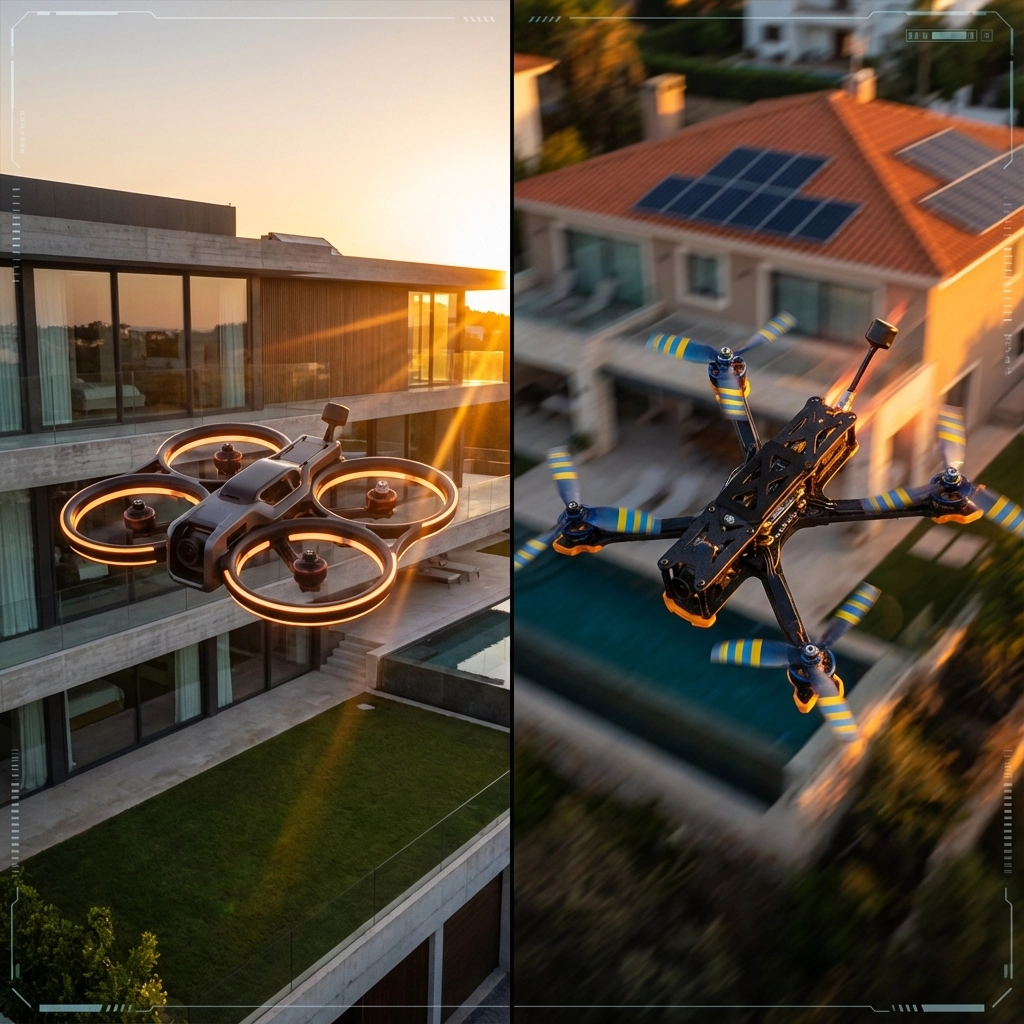
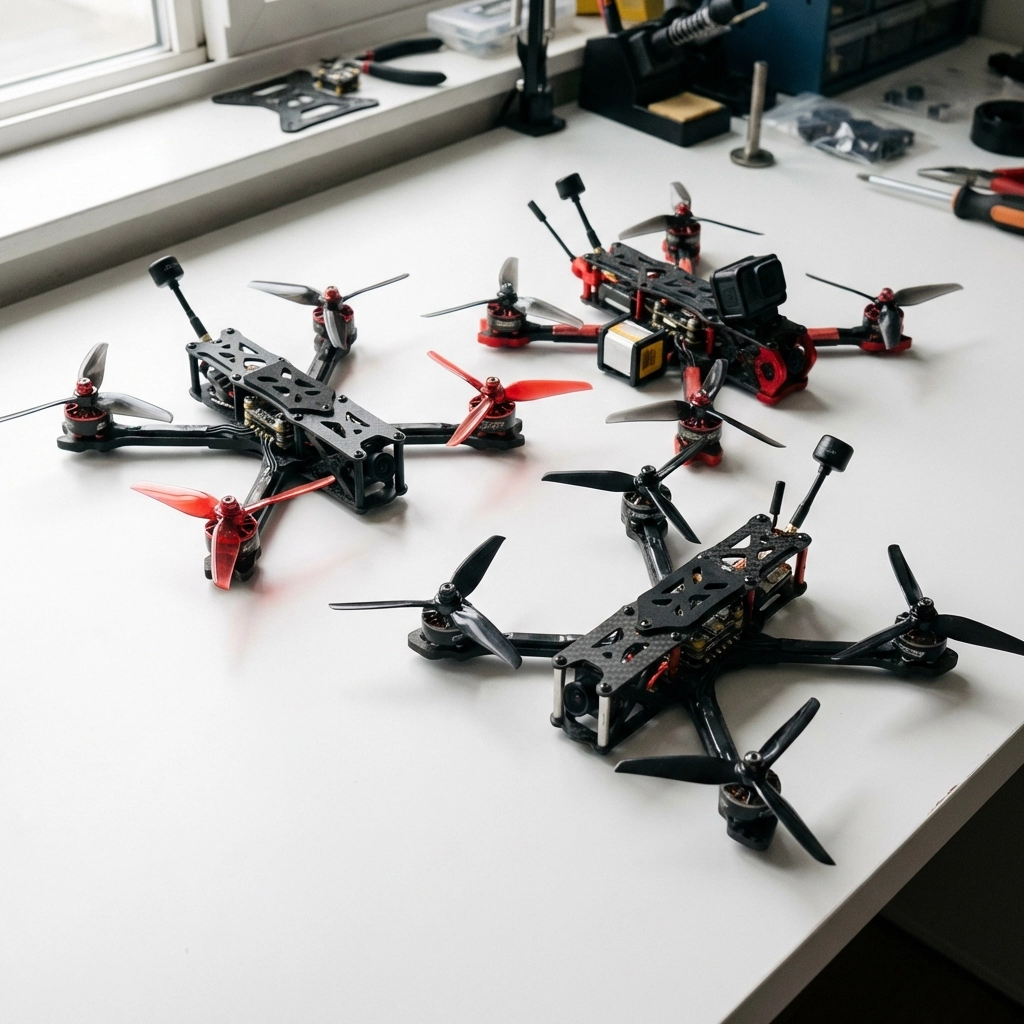
Prebuilt 5-inch FPV Drone (BNF)

Not everyone wants to build from scratch: and that’s totally fine. Bind-N-Fly (BNF) drones come fully assembled and tested. You just bind them to your radio and goggles, and you’re in the air.

image_1

Premium Performance Picks

For pilots who want top-tier flight characteristics right out of the box, look for BNF options featuring robust ESCs, reliable flight controllers, and powerful motors. Many premium models now ship with DJI O3 or O4 digital systems, giving you crystal-clear video transmission from day one.

These quads typically offer smooth, locked-in flight characteristics that inspire confidence whether you’re a beginner or seasoned ripper.

Budget-Friendly Options

If you’re just starting out or want a solid beater quad, there are excellent budget options featuring F7 processors and open frame designs for easy maintenance. These drones deliver responsive flight at a fraction of the premium price, making them ideal for learning without the financial stress of crashing expensive gear.
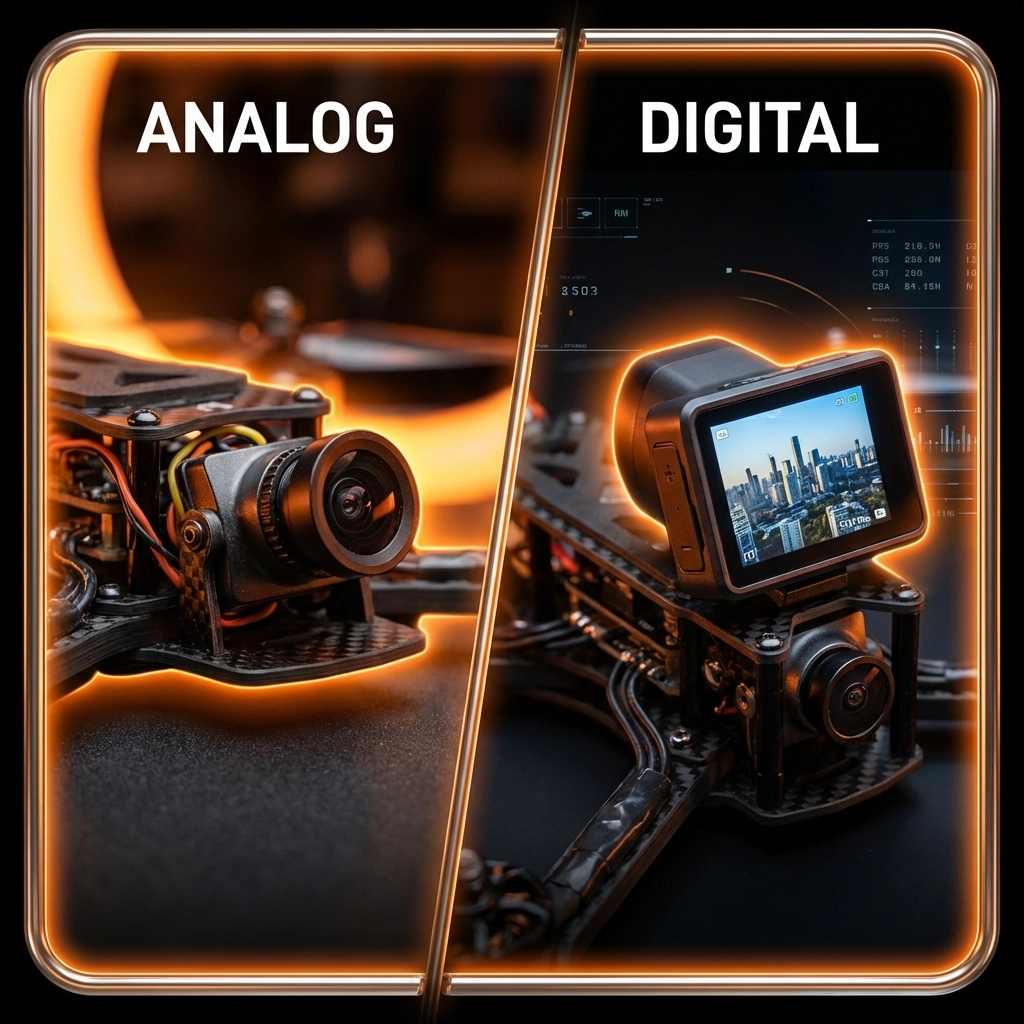
Analog vs Digital

Quick note: analog BNF models often provide better value since you avoid “prop in view” issues that sometimes plague digital camera placements. However, if you’re committed to digital long-term, starting with a digital BNF can save you upgrade costs later.
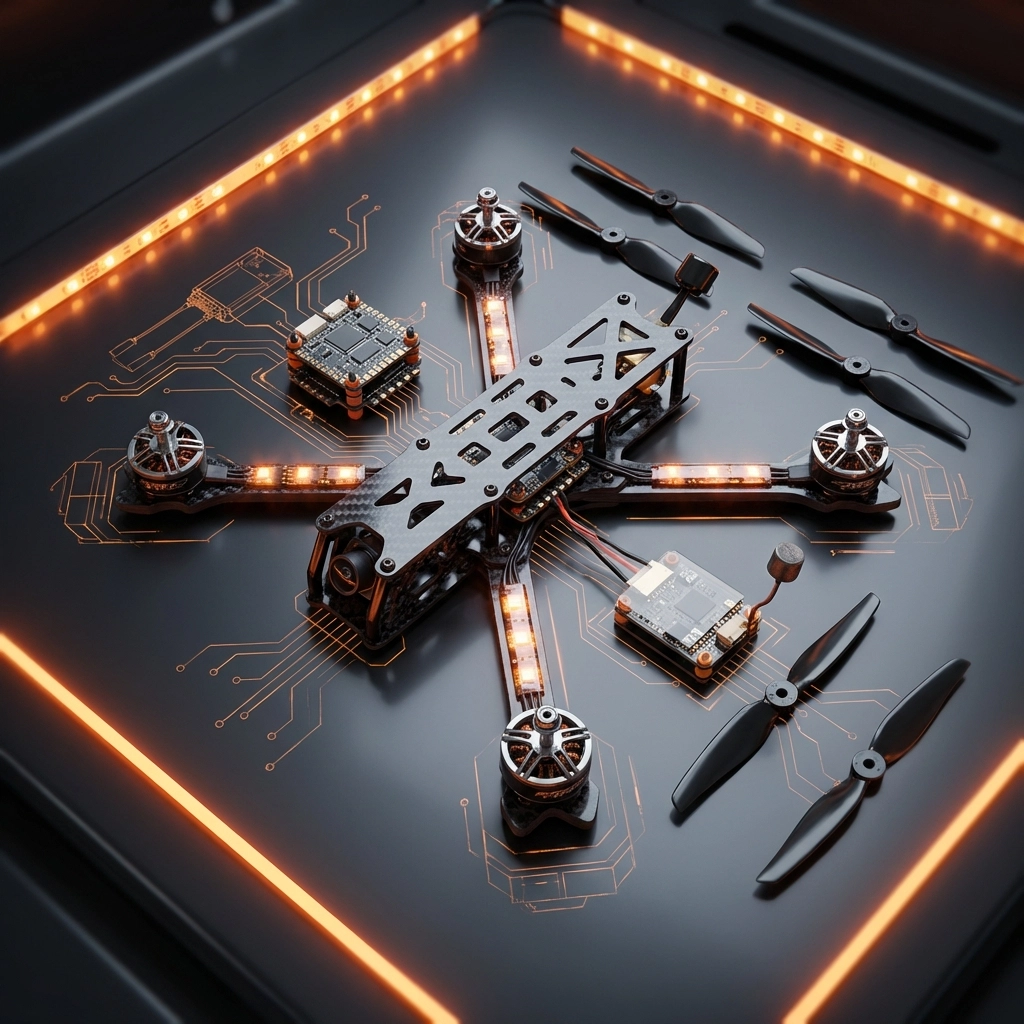

Frame

Your frame is literally what holds everything together. For 5-inch builds, you want carbon fiber construction that’s durable without adding unnecessary weight.
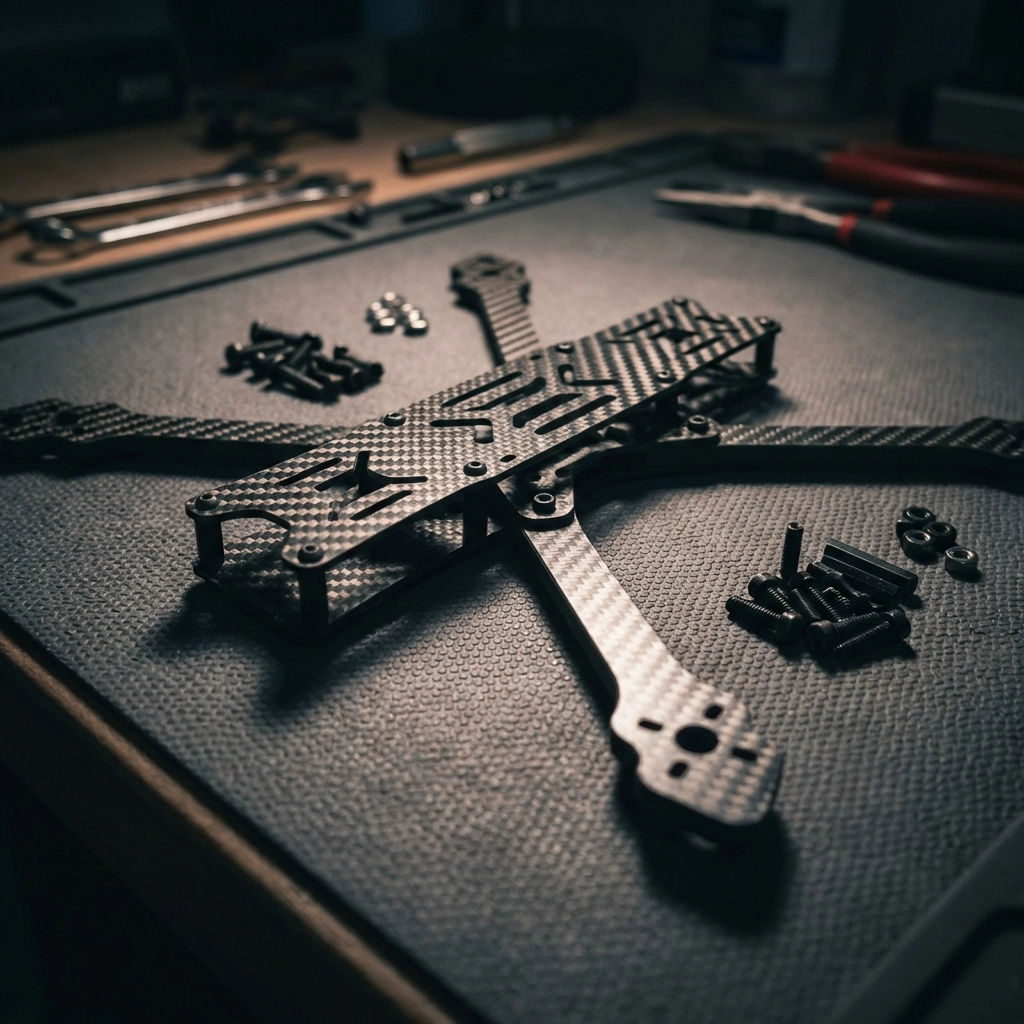
image_2

What to Look For

  • Carbon thickness: 4mm-5mm arms are standard for freestyle; thinner arms save weight but sacrifice durability
  • Mounting patterns: Ensure compatibility with your chosen stack and VTX
  • Wire management: Look for thoughtful routing channels and mounting options
  • Repairability: Can you replace individual arms, or do you need a whole new frame after a crash?

Popular Frame Styles

True-X frames offer balanced flight characteristics and are forgiving for beginners. Stretched-X frames push the rear motors back for better camera angles and slightly different handling. Deadcat frames keep props out of your camera view entirely.

Pick a frame that matches your flying style and accommodates your preferred video system: especially if you’re running DJI units that need specific mounting configurations.
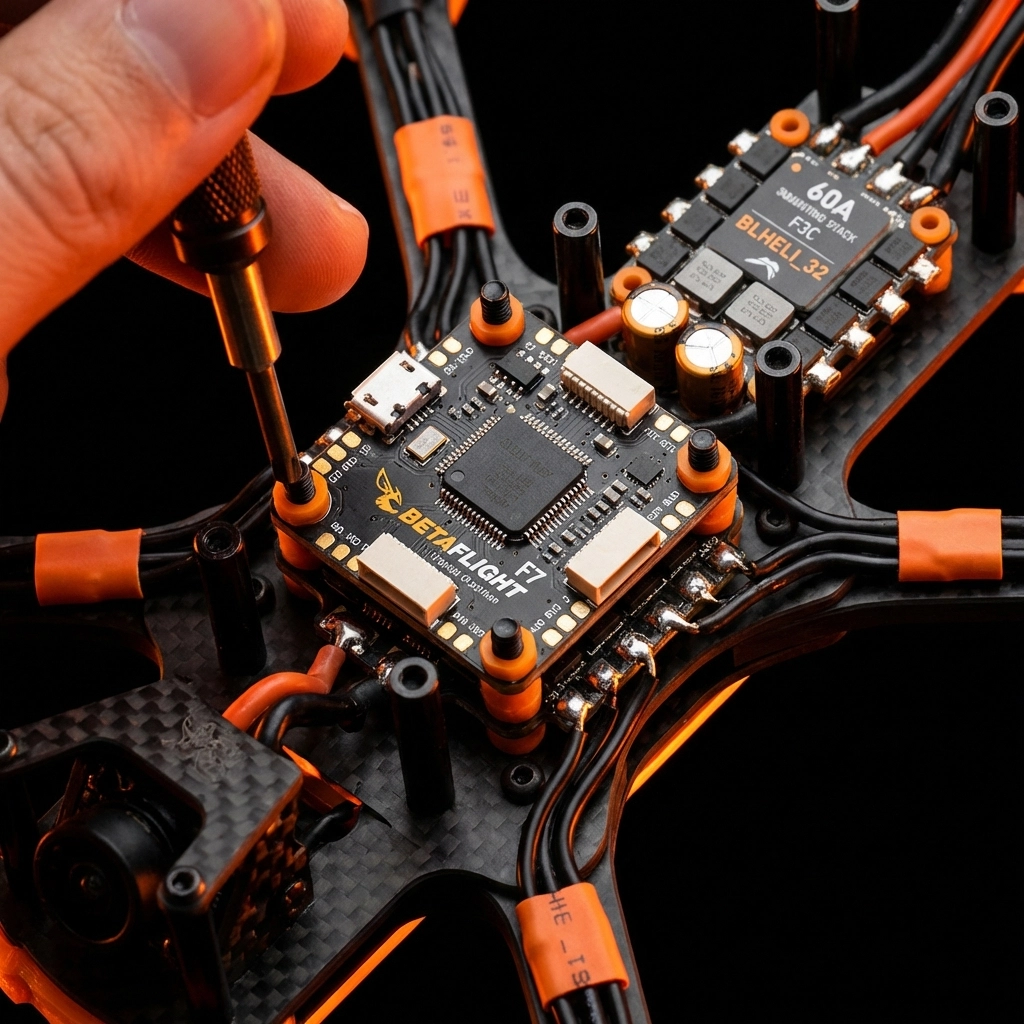

FC and ESC

The flight controller (FC) is your drone’s brain, while the electronic speed controller (ESC) manages motor power. Most builders opt for “stacks”: FC and ESC boards designed to mount together.

image_3

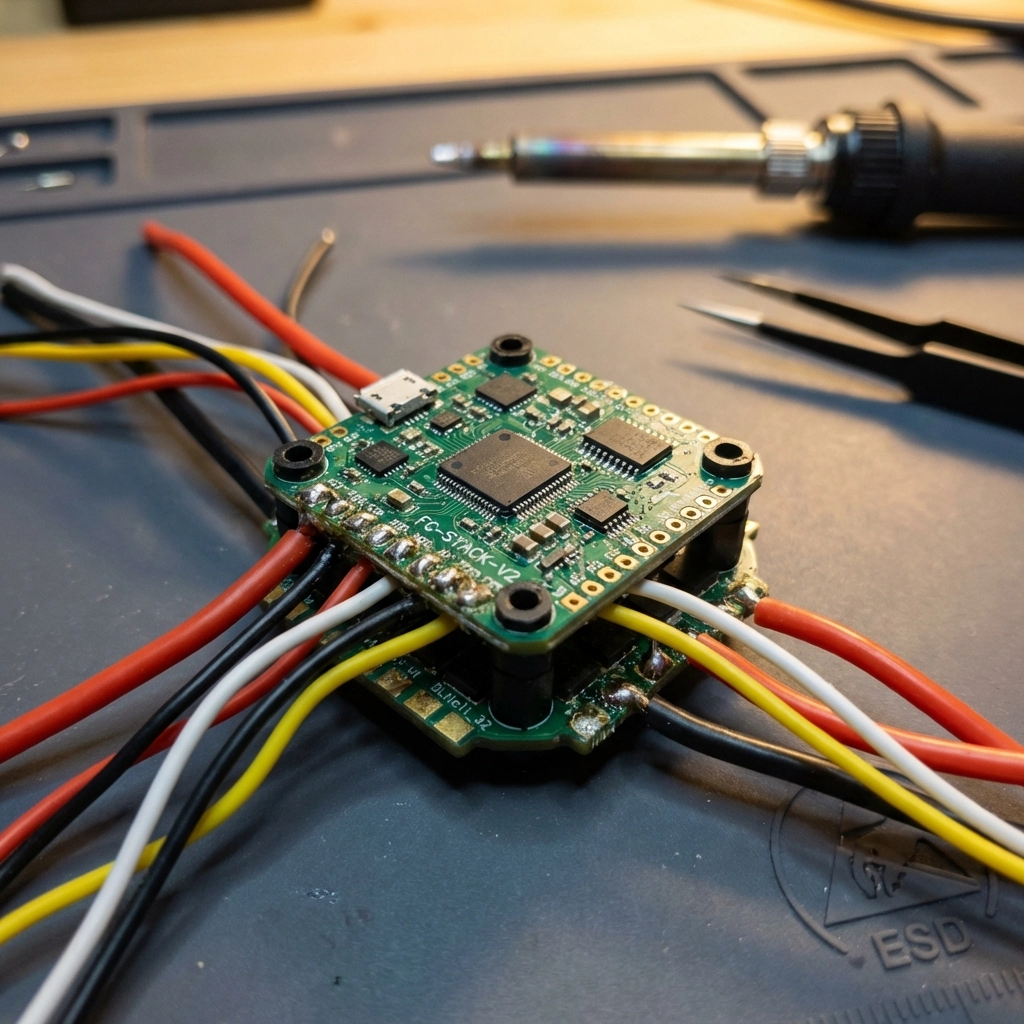
Flight Controller Considerations

  • Processor: F4 processors are budget-friendly; F7 and H7 offer faster processing and more features
  • Gyro quality: Better gyros mean smoother flight and easier tuning
  • Connectivity: Ensure compatibility with your radio protocol and GPS if desired
  • Betaflight support: Most modern FCs run Betaflight firmware: check for current compatibility

ESC Considerations

  • Amperage rating: 45A-55A continuous is standard for 5-inch builds
  • BLHeli_32 or AM32 firmware: Enables advanced features like bidirectional DShot
  • Quality MOSFETs: Cheap ESCs with weak components are the #1 cause of mid-flight failures

Investing in a quality stack saves headaches. The budget options that combine FC and ESC at competitive prices while maintaining solid build quality are worth considering for most builds.


Motors

Motors determine your drone’s power, efficiency, and flight feel. For 5-inch quads, you’re typically looking at 2306 or 2207 motor sizes.

KV Ratings Explained

  • 1700-1800KV: Best for 6S batteries; smoother power delivery, longer flight times
  • 2400-2550KV: Best for 4S batteries; snappier response, more affordable batteries

Most pilots are moving toward 6S setups for the efficiency gains and smoother throttle feel, but 4S remains popular for beginners due to lower battery costs.

What Makes a Good Motor

Look for quality bearings, strong magnets, and proven reliability. Motors take serious abuse in crashes, so repairability matters too. Some brands offer replacement bells and shafts, which can save you from buying entirely new motors after a bad hit.
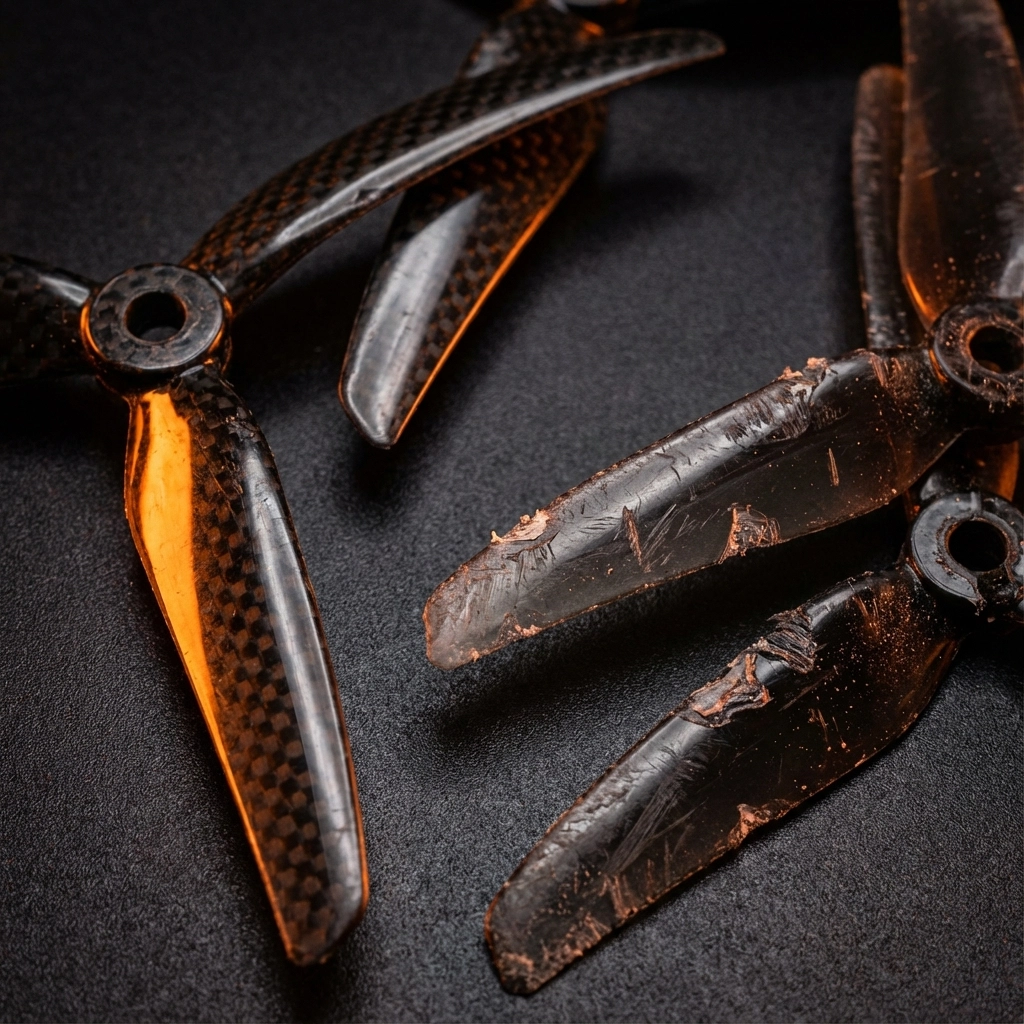

Propellers

Props are your connection to the air: and they’re consumables. You’ll break a lot of them, so buy in bulk.

Prop Styles by Use Case

  • Racing props: Aggressive pitch, lighter weight, maximum speed
  • Freestyle props: Balanced design, good grip, responsive feel
  • Cinematic props: Lower pitch, quieter, smoother footage

For 5-inch builds, you’re looking at props in the 5.1″ to 5.3″ range with varying blade counts (bi-blade for efficiency, tri-blade for grip). Start with tri-blade props: they’re forgiving and versatile.
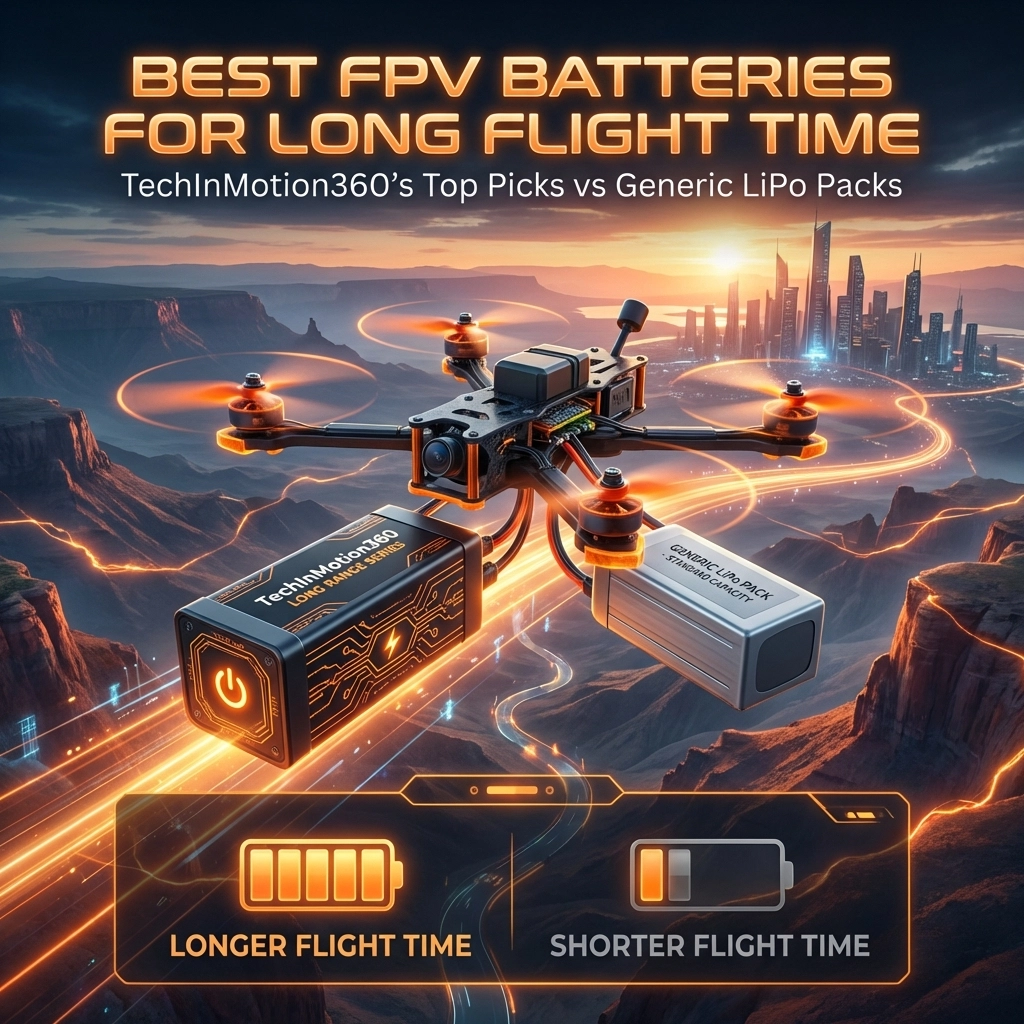
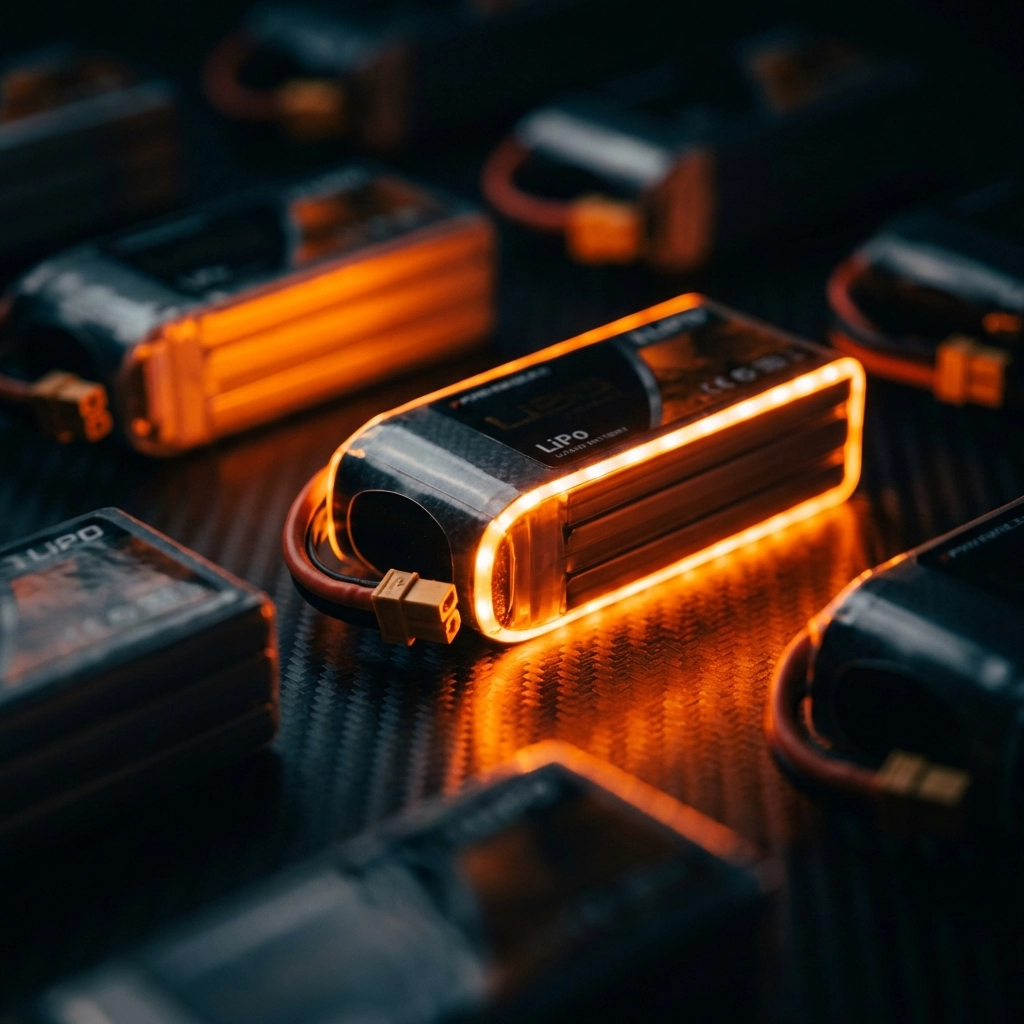
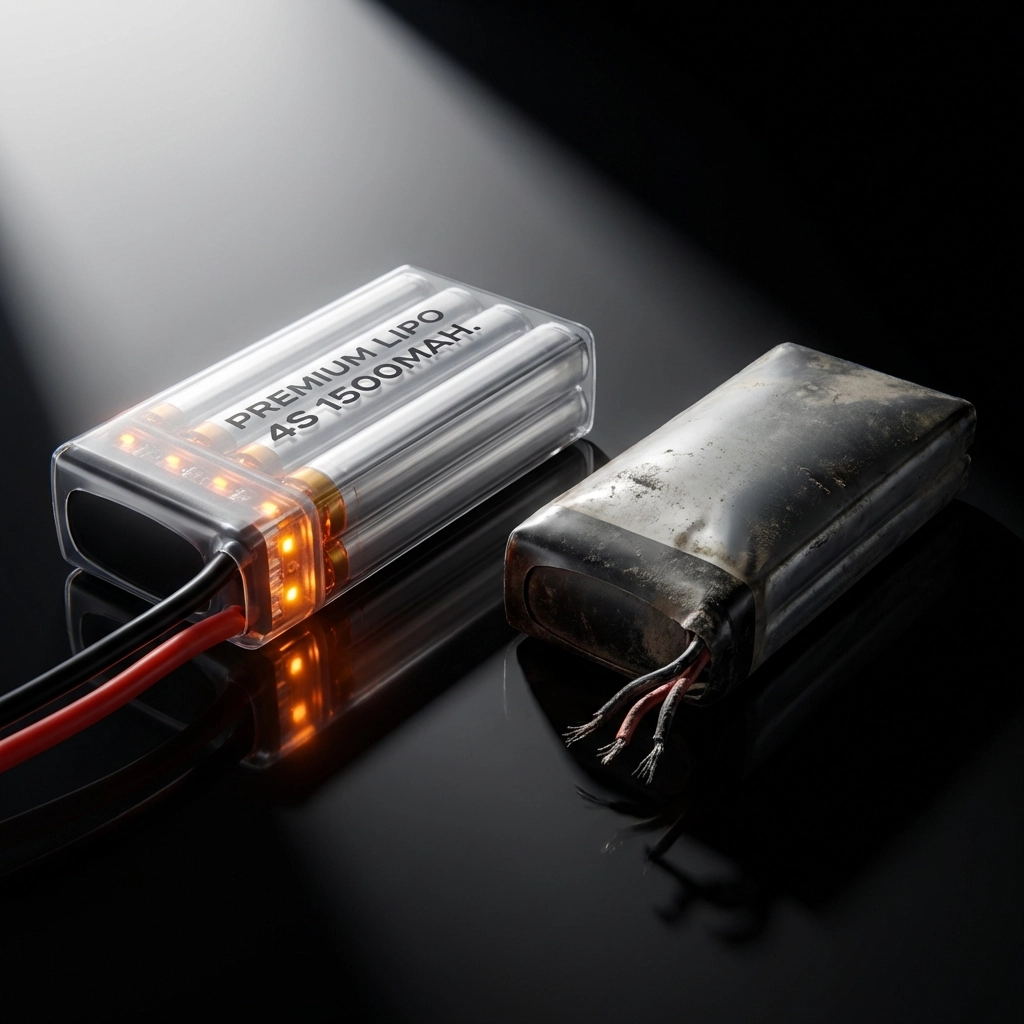
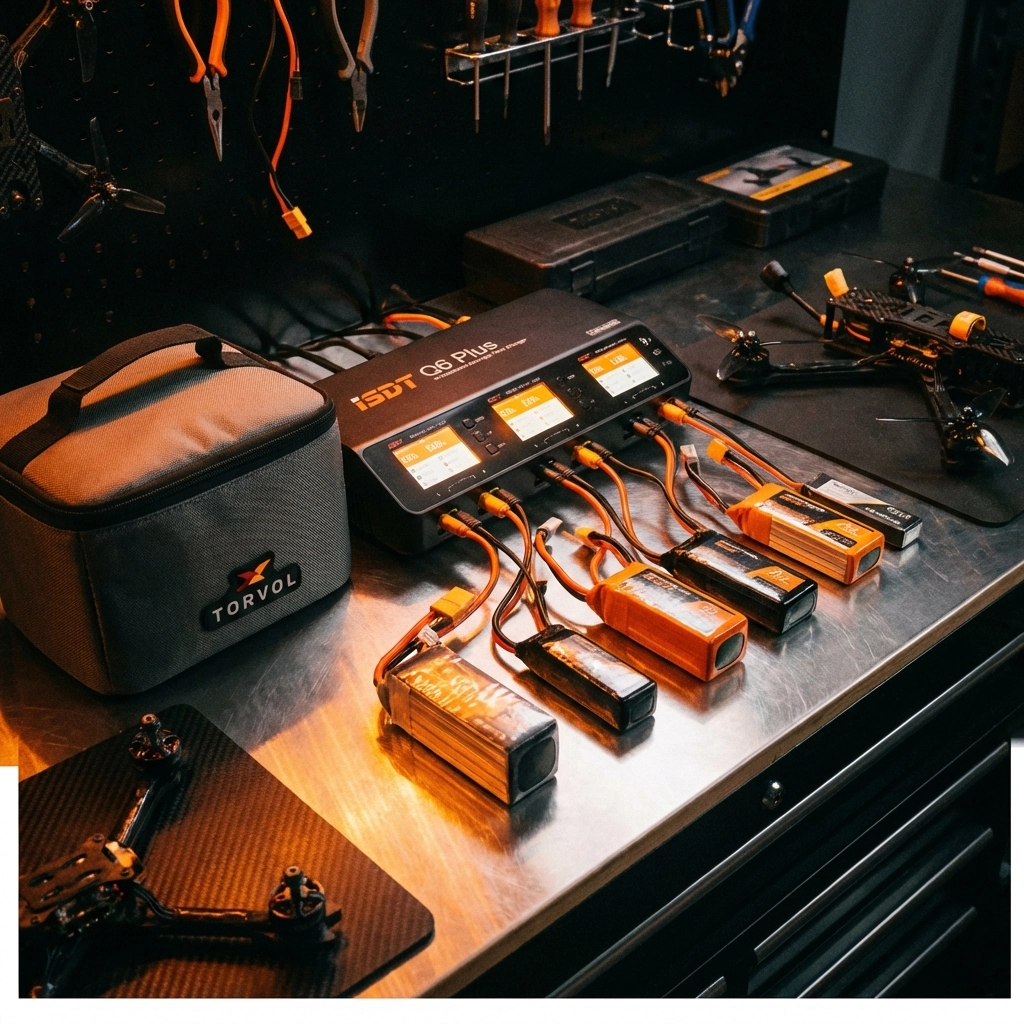

Batteries

Your battery choice dramatically affects flight time, power delivery, and overall weight.
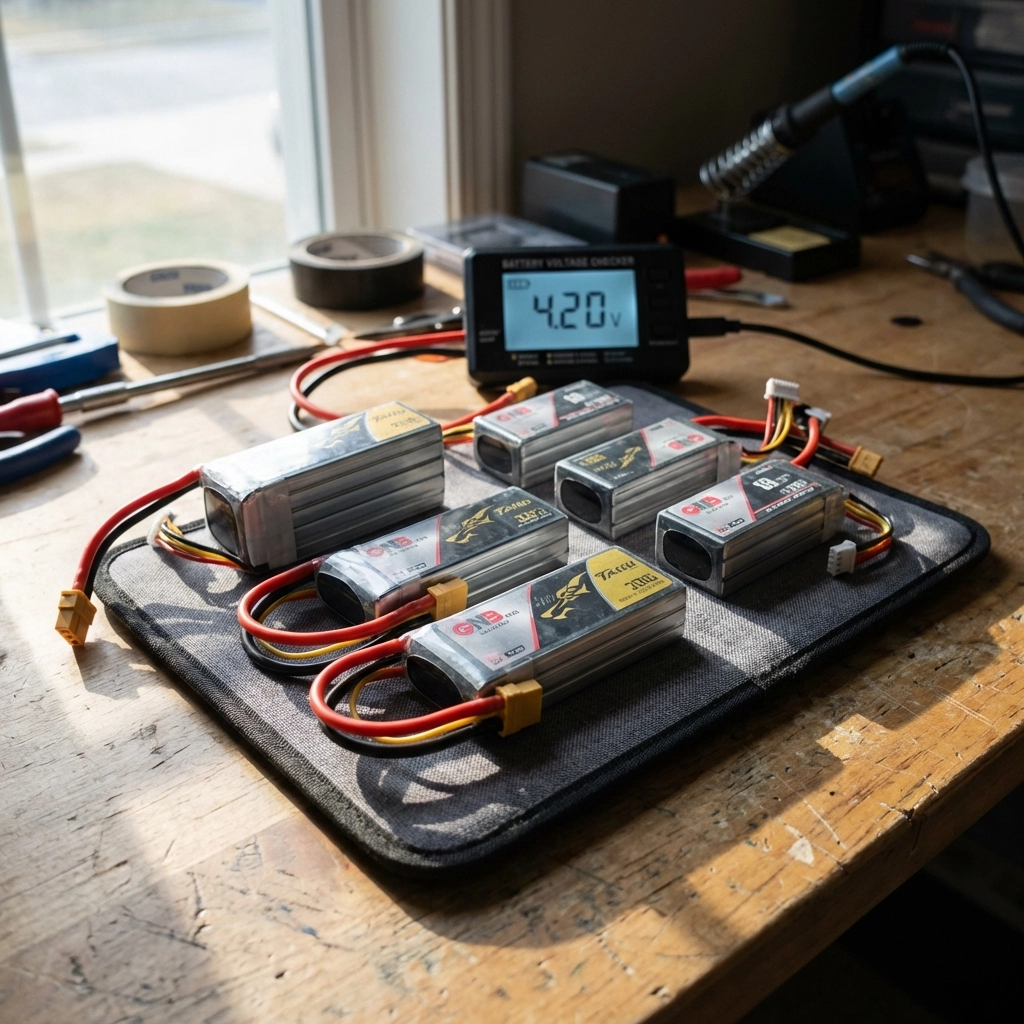
image_4

LiPo vs LiHV

Standard LiPo batteries are the default choice. LiHV (high-voltage) packs charge to 4.35V per cell instead of 4.2V, offering slightly more capacity but potentially shorter lifespan if not handled properly.

Capacity and C-Rating

  • 1300-1500mAh: Standard for freestyle and racing; good balance of weight and flight time
  • 1800-2200mAh: Extended flight times for cinematic work; heavier

C-rating indicates discharge capability. Higher quality packs maintain voltage better under load, giving you consistent power throughout your flight instead of sagging during hard maneuvers.

Invest in quality batteries: cheap packs with poor energy density and high voltage sag will make even the best drone feel sluggish.


Accessories

GPS

For Return-to-Home functionality and finding crashed quads.

Beeper

Absolutely essential for locating your drone after crashes.

  • Action camera mount: If you’re shooting with a GoPro or similar

FPV Camera, VTX, Antennas

Your FPV system is how you see the world from your drone’s perspective.

Digital vs Analog

Digital systems (DJI, Walksnail, HDZero) offer dramatically better image quality and range. Analog is cheaper, has lower latency, and remains popular for racing. For most new pilots, digital is worth the investment.

Antennas Matter

Don’t overlook antenna choice. Quality antennas with proper polarization (RHCP or LHCP: just match your goggles and VTX) significantly improve range and signal penetration.
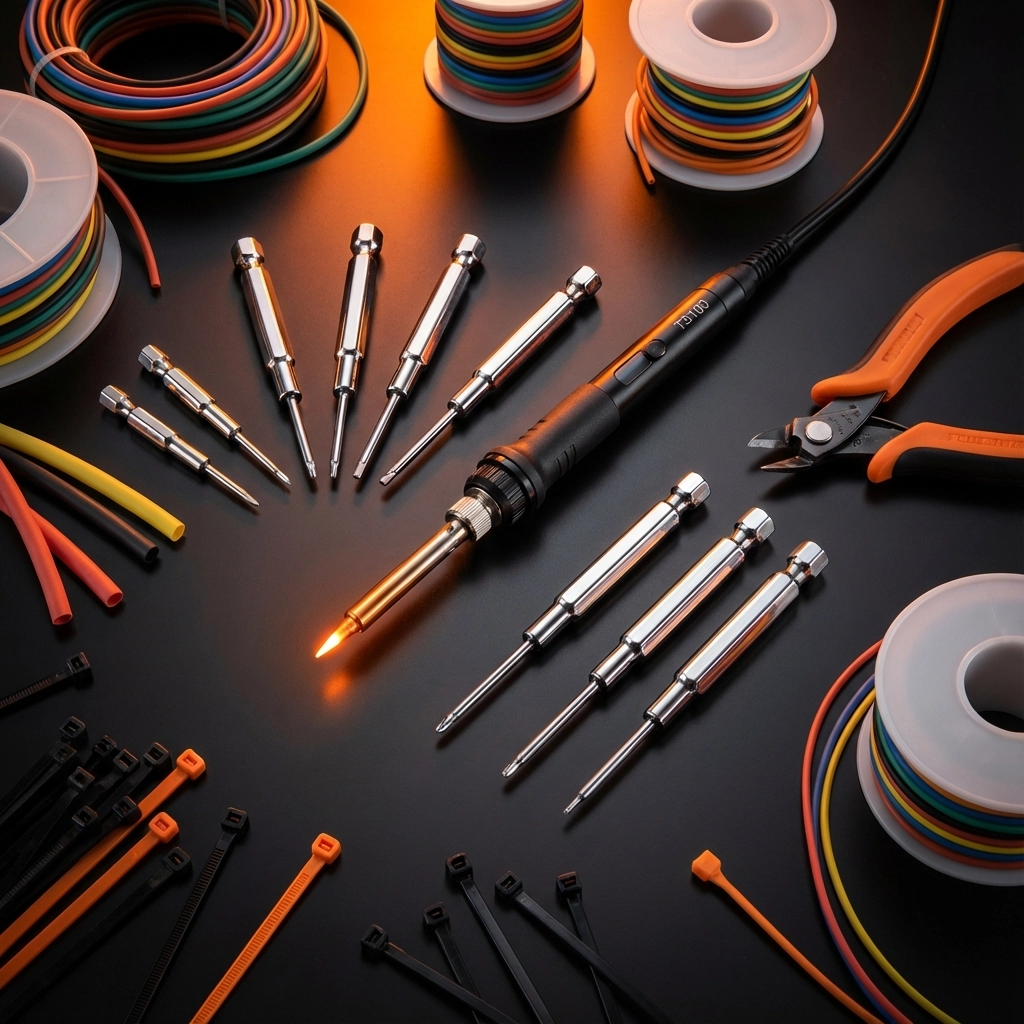

Tools and Wires

  • Hex drivers (1.5mm, 2mm, 2.5mm)
  • Soldering iron with fine tip
  • Quality solder and flux
  • Wire strippers
  • Heat shrink tubing
  • Zip ties and electrical tape
  • Multimeter for testing

Need Help With Your Build?

Building your first 5-inch FPV drone can feel overwhelming, but you don’t have to figure it out alone. TechInMotion360 offers FPV Drone Support Packages to help you through every step: from selecting compatible parts to troubleshooting your Betaflight configuration.

Whether you need help with performance tuning, power system upgrades, or basic maintenance and repair, we’ve got your back.

The 5-inch class is where FPV magic happens. Pick your parts wisely, build with patience, and get ready to experience flight like never before. 🚀

How to Choose the Best FPV Drone Parts Without Wasting Money (Compatibility Guide)

Let’s be honest, nothing stings quite like ordering a bunch of FPV drone parts, waiting a week for delivery, and then realizing half of them don’t work together. Been there. Done that. Learned the hard way so you don’t have to.

Building your own FPV drone is one of the most rewarding experiences in the hobby. You get exactly what you want, you understand your machine inside and out, and you save money compared to buying pre-built options. But here’s the catch: compatibility matters more than you think.

This guide is going to walk you through everything you need to know about choosing FPV drone parts that actually work together, without burning through your budget on returns, adapters, or parts that collect dust on your workbench.

Understanding the Core Components

Before we dive into compatibility, let’s make sure we’re on the same page about what you’re actually buying. Every FPV drone build requires these essential components:

  • Frame – The skeleton that holds everything together
  • Flight Controller (FC) – The brain of your drone
  • Electronic Speed Controller (ESC) – Controls motor speed
  • Motors – Provide thrust
  • Propellers – Generate lift
  • Video Transmitter (VTX) – Sends video to your goggles
  • FPV Camera – Captures the view
  • Radio Receiver (RX) – Receives commands from your controller
  • Battery – Powers the whole system

Each of these needs to play nice with the others. One wrong choice and you’re either rewiring connections, buying adapters, or starting over completely.

image_1

The Research-First Approach That Saves You Money

Here’s a technique that’s saved me hundreds of dollars: instead of picking parts at random, research pre-built or Bind-N-Fly drones in your target category first.

Want to build a 5-inch freestyle quad? Look at what the successful pre-builts are using. Document the specs. You’ll start to see patterns, most 5-inch freestyle builds use 2207 or 2306 motors rated between 1750-1850 KV with 5-inch propellers and 600mW to 2-watt video transmitters.

This approach reveals proven combinations that actually work together. You’re not guessing, you’re replicating success.

Check out what’s available in our drone components category to see the parts we’ve vetted for quality and compatibility.

The Flight Controller and ESC: Buy Them Together

This is where most beginners mess up, so pay attention.

The flight controller and ESC are the most critical compatibility pairing in your entire build. My recommendation? Never buy these separately. Instead, purchase them as a “stack” combo.

Why? Because:

  • Pre-matched stacks guarantee compatible connectors
  • You avoid the nightmare of repinning or soldering adapters
  • Mounting patterns are already matched
  • Firmware compatibility is sorted

Speaking of mounting patterns, most 5-inch frames accept either 20x20mm or 30x30mm mounting holes. Before you buy your stack, check your frame’s specifications. A 30×30 stack won’t fit in a 20×20 frame without adapters (and sometimes not at all).

image_2

Frame Selection: Size Matters More Than You Think

Your frame dictates almost everything else about your build. It determines:

  • What size propellers you can run
  • What mounting pattern your FC/ESC stack needs
  • What camera size you can fit
  • How much weight you can carry

For most pilots, a 5-inch frame offers the best balance of power, agility, and flight time. But if you’re looking for something more specialized, we carry AOS RC FPV drone frames including 3D printed options for custom builds.

Pro tip: Don’t cheap out on the frame. A quality frame survives crashes and protects your expensive electronics. A flimsy frame cracks on the first hard landing and takes your camera and VTX with it.

Motor and Propeller Compatibility

Motors and propellers work as a team. The wrong combination wastes battery, reduces flight time, and can even damage your motors.

Here’s the basic formula:

  • Motor size (like 2207 or 2306) indicates the stator width and height
  • KV rating determines how fast the motor spins per volt
  • Propeller size must match your frame and motor capabilities

For a standard 5-inch build:

  • 2207 or 2306 motors
  • 1750-1850 KV for 6S batteries
  • 2300-2600 KV for 4S batteries
  • 5-inch propellers (duh)

Higher KV means faster spinning but more current draw. Lower KV offers more torque and efficiency. Match your KV to your battery voltage and flying style.

image_3

The Video System Trap: Analog vs. Digital

This is where things get expensive if you’re not careful.

Critical rule: Your camera and video transmitter must use the same system. An analog camera will NOT work with a digital video transmitter. Period.

⚠️ FLAG FOR LINDY – LEGAL REVIEW REQUIRED:
The following section contains competitor brand comparisons (DJI, HDZero, Walksnail, Caddx) that require legal review before publishing. Please review and approve.

There are currently three main digital FPV systems on the market: DJI, HDZero, and Walksnail. Each uses proprietary cameras and transmitters that are NOT cross-compatible. A DJI camera won’t work with an HDZero receiver, and vice versa.

For analog systems, popular camera options include the Caddx Ratel 2 and similar models from various manufacturers.

END FLAG SECTION

If you’re just starting out, analog is cheaper and simpler. If you want the best video quality and can afford the investment, digital is the future. Just don’t mix and match systems.

One More Thing About Video Transmitters

NEVER power on your video transmitter without an antenna attached.

I’m putting this in its own section because I’ve seen too many pilots fry their VTX by forgetting this step. Operating without an antenna can destroy your transmitter instantly. That’s $30-100 down the drain in seconds.

Always double-check. Every. Single. Time.

Radio Receiver Compatibility

Your radio receiver needs to match your radio transmitter’s protocol. If you’re using an ExpressLRS transmitter, you need an ExpressLRS receiver. Same goes for Crossfire, FrSky, and other protocols.

This seems obvious, but you’d be surprised how many pilots order the wrong receiver because they didn’t check the protocol. Take 30 seconds to verify before you checkout.

When DIY Gets Overwhelming

Look, building your own FPV drone is awesome. But sometimes you want to fly, not troubleshoot compatibility issues.

If you’re feeling overwhelmed or just want a professional eye on your build, check out our FPV Drone Support Packages. We offer everything from quick troubleshooting calls to full performance tune-ups and crash recovery services.

And if you’d rather skip the build entirely and get something flight-ready, browse our DJI BNF/PNP FPV Drones collection.

image_4

Your Pre-Purchase Checklist

Before you hit that buy button, run through this list:

  1. ✅ Frame mounting pattern matches your FC/ESC stack
  2. ✅ Motor size and KV appropriate for your frame and battery
  3. ✅ Propeller size matches your frame
  4. ✅ Camera and VTX use the same video system
  5. ✅ Camera mount size fits your frame (or you have an adapter)
  6. ✅ Radio receiver matches your transmitter’s protocol
  7. ✅ Battery connector matches your ESC/PDB
  8. ✅ All connectors are compatible (or you’re prepared to solder)

Final Thoughts

Choosing FPV drone parts doesn’t have to be a minefield. Research proven combinations, buy your FC and ESC as a stack, verify your video system compatibility, and double-check everything before checkout.

The time you spend on research upfront saves you money, frustration, and wasted weekends waiting for replacement parts.

Ready to start your build? Head over to TechInMotion360’s shop to browse our curated selection of compatible parts and support packages. And if you get stuck, our services team is here to help.

Now get out there and build something awesome. 🚁

Best FPV Batteries for Long Flight Time: TechInMotion360's Top Picks vs Generic LiPo Packs

Let’s be real for a second, your FPV drone is only as good as the battery strapped to it. You could have the most dialed-in tune, the crispest camera setup, and motors that sing like angels, but if your battery is trash? You’re coming down early, watching voltage sag ruin your footage, or worse, dealing with a puffed pack that’s become a safety hazard.

I’ve seen too many pilots cheap out on batteries and pay for it later. Sometimes literally, when they have to replace damaged electronics. Sometimes figuratively, when they miss the shot because their pack couldn’t hold up under load.

So today, we’re breaking down what separates quality LiPo batteries from the generic packs flooding the market, and why the difference matters more than you might think.

Why Your Battery Choice Actually Matters

Here’s the thing about FPV batteries that nobody tells you when you’re starting out: they’re not all created equal. Two batteries with identical specs on paper can perform wildly differently in the air.

A quality battery delivers consistent power throughout your flight. It handles the amp demands when you punch out of a dive. It charges safely and maintains capacity over hundreds of cycles. A generic pack? It might do all those things… for a while. Then the voltage sag creeps in, the capacity drops, and suddenly that “1500mAh” battery is giving you 1100mAh on a good day.

image_1

The real cost of cheap batteries isn’t just the replacement cycle, it’s the performance you’re leaving on the table every single flight.

Understanding LiPo Battery Basics

Before we dive into comparisons, let’s make sure we’re speaking the same language.

Capacity (mAh): This is how much energy your battery can store. Racing and freestyle pilots typically run 1300-1500mAh packs for the power-to-weight balance. Cinematic flying? You’ll want 1800mAh or higher to maximize flight duration without sacrificing too much agility.

Discharge Rate (C Rating): This tells you how quickly the battery can deliver power. A 100C battery can theoretically discharge 100 times its capacity per hour. For most FPV applications, you want at least 75C for freestyle and 100C+ for racing.

Cell Count (S): Most modern FPV drones run 4S or 6S configurations. Higher voltage means more power potential, but also more weight and complexity.

Internal Resistance (IR): Lower is better. This measures how efficiently the battery can deliver power. High IR means wasted energy as heat and increased voltage sag.

TechInMotion360’s Top Picks: What We Recommend

Through years of testing and real-world flying, we’ve identified the battery characteristics that actually matter for different flying styles. When clients come to us for power system upgrades, battery selection is always part of the conversation.

For Long-Range and Cinematic Work

If you’re chasing extended flight times, think long-range cruising or cinematic real estate shots, the battery game changes completely. Li-Ion cells like the Molicel P30B have become the gold standard here. They offer superior energy density, meaning more flight time per gram of weight.

For 10-inch long-range builds, we typically recommend 6S configurations in the 8000-10000mAh range with 25-30C discharge rates. These aren’t going to win any races, but they’ll keep you in the air for 20+ minutes of smooth, controlled flight.

image_2

For Freestyle and Racing

This is where high-quality LiPo packs shine. You need batteries that can dump serious amps without flinching, and recover quickly when you let off the throttle. Look for:

  • True 100C+ discharge capability (not just marketing numbers)
  • Low internal resistance across all cells
  • Balanced cell voltages out of the box
  • Quality XT60 connectors with solid solder joints

The Molicel P28A and Sony VTC6 cells are excellent choices for builds where you need both punch and reasonable flight times.

Generic LiPo Packs: The Hidden Costs

Now let’s talk about those suspiciously cheap batteries you see online. You know the ones: $15 for a 1500mAh 100C pack that seems too good to be true.

Spoiler: It usually is.

The C Rating Problem

Generic manufacturers are notorious for inflating C ratings. That “100C” battery might actually deliver 40-50C before voltage sag makes it unusable. This isn’t just annoying: it’s potentially dangerous if your quad suddenly loses power mid-maneuver.

Inconsistent Cell Quality

Quality battery manufacturers test and match cells within each pack. Generic packs? They grab whatever’s available. This leads to unbalanced cells, where one cell works harder than the others and degrades faster. Eventually, you’re charging a time bomb.

The False Economy

Let’s do some quick math. A quality battery costs $35 and lasts 300 cycles. A generic pack costs $15 and lasts 75 cycles before it’s puffed or performing poorly.

Quality battery: $35 ÷ 300 = $0.12 per flight
Generic battery: $15 ÷ 75 = $0.20 per flight

You’re actually paying MORE per flight with cheap batteries: and getting worse performance the entire time.

image_3

Flight Time: Real-World Expectations

Let’s set some realistic expectations here, because I see a lot of pilots frustrated by flight times that don’t match their dreams.

Racing/Freestyle (5-inch, 4S-6S): 3-5 minutes of aggressive flying. This is normal. Accept it.

Cinematic Freestyle: 5-7 minutes with larger capacity packs and smoother flying style.

Long-Range Cruising: 15-25+ minutes with optimized builds and Li-Ion cells.

Cinewhoops: 4-8 minutes depending on prop size and battery capacity.

The key to maximizing flight time isn’t just buying bigger batteries: it’s optimizing your entire power system. Motor efficiency, prop selection, tune quality, and flying style all factor in. If you’re looking to squeeze more time out of your setup, our performance upgrade packages address all these elements together.

Charging Speed and Safety

Quality batteries aren’t just better in the air: they’re safer on the ground too.

Premium LiPo packs can typically handle 1C-2C charging rates safely. That means a 1500mAh battery can charge at 1.5-3 amps without excessive heat buildup or degradation. Some high-end packs even support 3C+ charging for quick turnarounds.

Generic packs? Pushing them past 1C is asking for trouble. The inconsistent cell quality means some cells heat up faster than others, accelerating wear and increasing puff risk.

Pro tip: Invest in a quality charger with cell-level monitoring. It’ll tell you immediately if something’s wrong with your pack before it becomes a fire hazard.

image_4

Making the Right Choice for Your Flying Style

Here’s my honest recommendation based on thousands of hours helping pilots optimize their setups:

If you’re racing or doing aggressive freestyle: Buy quality mid-capacity packs (1300-1550mAh) from reputable manufacturers. The performance difference is immediately noticeable.

If you’re shooting cinematic content: Invest in higher-capacity packs (1800mAh+) with proven discharge curves. Consistency matters when you’re getting paid for footage.

If you’re building for long-range: Consider Li-Ion configurations with quality cells. The upfront cost pays dividends in flight time.

If you’re just starting out: Buy quality packs from the beginning. Building bad habits around garbage batteries will cost you more in the long run.

The Bottom Line

Your battery is the heart of your quad. It determines how long you fly, how hard you can push, and ultimately, how safe your hobby stays. Cutting corners here doesn’t save money: it costs performance, reliability, and potentially your equipment.

Need help optimizing your power system or troubleshooting battery-related issues? Check out our advanced support packages or basic maintenance services. We’re here to help you fly longer, fly better, and fly safer.

Now get out there and send it( with batteries you can actually trust.)

Essential FPV Drone Accessories Every Beginner Should Own (and Why)

Starting your FPV drone journey feels like stepping into the future: and honestly, it is. But here's the reality: your first flight is just the beginning. The difference between a frustrating crash-and-quit experience and becoming the pilot you dreamed of isn't just practice. It's having the right drone accessories in your toolkit from day one.

After helping hundreds of beginners take flight, I've seen the same pattern: pilots who invest in essential fpv drone parts and accessories early on progress faster, crash less, and actually enjoy the learning process. Those who skip this step? They usually end up buying everything anyway: just at the worst possible moments.

Let's cut through the marketing hype and focus on what actually matters for your success.

The Foundation: Essential Building Tools

Think of FPV drone building like learning to play guitar. You wouldn't start without picks, strings, and a tuner, right? Same principle applies here.

Soldering Iron (Non-Negotiable)
The TS100 or TS80P soldering irons are game-changers for beginners. Unlike cheap hardware store options, these heat up in seconds, maintain consistent temperature, and won't destroy your expensive electronics. You'll use this for everything from connecting flight controllers to repairing crashed components.

Hex Driver Set
Your drone is held together by tiny hex screws (1.5mm, 2mm, 2.5mm). Get a quality ball-end hex driver set: the ball ends let you access screws at angles, which you'll appreciate when working in tight spaces.

image_1

Wire Management Arsenal

  • Wire cutters and strippers for clean connections
  • Heat shrink tubing in various sizes (3mm, 4mm, 6mm)
  • Zip ties for cable management
  • Electrical tape for temporary fixes

Digital Multimeter
This isn't optional equipment: it's crash prevention. A basic multimeter helps you check battery voltage, test continuity, and diagnose electrical issues before they destroy components.

Power Systems: The Heart of Flight

High-Quality LiPo Batteries
Your battery choice directly impacts flight time, performance, and safety. Start with name-brand 4S 1300-1500mAh batteries from manufacturers like Tattu or CNHL. Cheap batteries aren't just poor performers: they're fire hazards.

Battery count rule: Buy at least 3-4 batteries. One in the drone, one charging, one cooling down, one backup. This rotation keeps you flying longer and extends battery life.

Smart Charger
The ISDT Q6 Nano or similar smart chargers are worth every penny. They'll balance your cells, prevent overcharging, and give you detailed battery health data. Your $50 charger protects hundreds of dollars in batteries and potentially your house.

Storage and Transport
LiPo-safe charging bags aren't paranoia: they're smart risk management. Store batteries at 3.8V per cell for long-term health, and always transport them in hard cases with proper padding.

Propellers: Your Drone's Lifeline

Here's what every beginner learns the hard way: propellers break constantly. Not sometimes. Every single session, especially while learning.

image_2

Stock Up Smart
Buy propellers in bulk: we're talking 20-30 sets minimum. HQ Props offer excellent durability and performance, but also grab some cheaper options for practice sessions. Mix of materials:

  • Polycarbonate props for durability during learning
  • Carbon fiber props for performance once you've mastered basics

Prop Balancing
Unbalanced props cause vibrations that ruin video footage. A simple prop balancer (or even a hex driver through the center hole) helps you identify heavy spots that need sanding down.

Vision Systems: Seeing Through Your Drone's Eyes

FPV Goggles
This is where beginners often overspend or severely underspend. The sweet spot? DJI FPV Goggles V2 or Fatshark Attitude V6 for digital systems, or Skyzone Cobra X or Eachine EV800D for analog.

Digital offers crystal-clear footage with low latency, but analog is more forgiving for beginners and cheaper to repair when (not if) you crash.

Camera Protection
A $20 TPU camera mount protects your $100+ FPV camera. Print them yourself or order custom designs: they're consumable items that absorb crash impact.

Storage and Organization Solutions

Dedicated FPV Bag or Case
The Lowepro DroneGuard or similar padded cases organize everything and make transport safe. Compartments for batteries, tools, spare parts, and your drone prevent the "digging through a pile of parts" frustration.

Small Parts Organization
Tackle boxes or modular storage systems keep screws, standoffs, and small components organized. Nothing kills momentum like spending 20 minutes looking for a specific screw size.

image_3

Safety and Recovery Gear

Smoke Stopper
This $15 device can save hundreds in electronics. It limits current flow during first power-ups, preventing magic smoke release when something's wired wrong.

Buzzer and LED Strip
Crashed drones hide in the most impossible places. A loud buzzer activated by your transmitter's lost model alarm is a lifesaver. LED strips help with orientation and make retrieval easier.

Landing Pad
Protects your gimbal and camera from debris during takeoff and landing. Also provides a consistent reference point for practicing precise landings.

Advanced Accessories Worth Considering

Video Transmitter (VTX) Antenna Upgrade
Stock antennas are mediocre at best. Circular polarized antennas like TrueRC X-Air series dramatically improve range and signal quality. Just remember: never power on your VTX without an antenna attached: you'll destroy it instantly.

Transmitter Upgrades
Quality gimbals like Hall Effect sensors eliminate stick drift and improve precision. RadioMaster Boxer or FrSky Taranis series offer excellent upgrade paths as your skills develop.

What to Skip (For Now)

GPS Modules: Learn manual flying first
Expensive Action Cameras: Master FPV cameras before adding GoPros
Carbon Fiber Everything: Durability beats weight savings while learning
Racing-Specific Gear: Focus on smooth flying before speed

Building Your Starter Kit: Budget Breakdown

Essential Tier ($150-200):

  • Basic tool kit with soldering iron
  • 20 sets of propellers
  • 3-4 quality batteries
  • Smart charger
  • Storage bag

Intermediate Tier ($300-400):

  • Everything above plus quality FPV goggles
  • Upgraded antennas
  • Professional storage case
  • Safety equipment

Advanced Tier ($500+):

  • Premium goggles and transmitter
  • Carbon fiber accessories
  • Professional tool upgrades

Your Next Steps

The FPV community thrives on shared knowledge and mutual support. Every expert was once a beginner who made these same accessory decisions. The difference? They learned from others' experience instead of repeating expensive mistakes.

Ready to build your complete setup? Check out our curated drone components collection where we've assembled everything mentioned in this guide. No guesswork, no compatibility issues: just the gear that works.

Remember: the goal isn't to buy everything at once. Start with essentials, fly regularly, and expand your toolkit as your skills and interests develop. Every accessory should solve a real problem you're experiencing, not just look cool on the shelf.

Your journey into cinematic FPV flight starts with proper preparation. These accessories aren't just purchases; they're investments in countless hours of incredible flights ahead.

The sky isn't the limit anymore. It's your new playground.

Cinewhoop vs Traditional FPV: Which Is Better for Your Real Estate Fly-Throughs?

You're standing outside a million-dollar listing, drone in hand, ready to capture footage that'll make potential buyers feel like they're already home. But here's the question that's probably keeping you up at night: should you be flying a Cinewhoop or a traditional FPV drone?

The answer isn't just about specs and speed: it's about understanding what real estate clients actually want and which drone delivers those cinematic shots that turn listings into sold signs.

Understanding the Two Contenders

Cinewhoops are the smooth operators of the FPV world. Think of them as the luxury sedans: they've got propeller guards (called ducts), prioritize stability over speed, and are designed specifically for capturing buttery-smooth cinematic drone videography. They typically cruise at 30-60 km/h and can safely navigate tight spaces without turning your client's chandelier into confetti.

Traditional FPV drones (usually 5-inch freestyle quads) are the sports cars. They're built for speed, agility, and those jaw-dropping acrobatic moves you see on YouTube. They can hit much higher speeds but lack the propeller guards and stability features that make Cinewhoops so appealing for professional work.

image_1

What Real Estate Videography Actually Demands

Before we crown a winner, let's talk about what aerial real estate marketing actually requires. Your clients aren't looking for barrel rolls and power loops: they want footage that makes viewers imagine Sunday morning coffee in that kitchen or hosting dinner parties on that deck.

Real estate fly-throughs need:

  • Smooth, stable footage that doesn't make viewers seasick
  • Safety around people and property (because insurance claims are nobody's friend)
  • Precise control in tight spaces for those dramatic hallway reveals
  • Professional image quality that screams "premium listing"
  • Reliability because you can't ask the homeowner to move out again for a reshoot

Why Cinewhoops Dominate Real Estate Work

Here's where Cinewhoops really shine for fpv drone services in the real estate space.

Safety First, Always
Those propeller guards aren't just for show: they're your insurance policy. When you're flying through a $2 million home with original hardwood floors and custom millwork, the last thing you want is an unprotected prop slicing through someone's family heirloom. Cinewhoops let you get close to architectural details without the anxiety.

Cinematic Stability
Cinewhoops are engineered for smooth, controlled movements. While traditional FPV drones excel at rapid direction changes, Cinewhoops deliver the kind of floating, ethereal movement that makes potential buyers think "I could live here." That slow reveal as you glide through the front door? Pure Cinewhoop magic.

Indoor Navigation Masters
Real estate isn't just about exterior shots anymore. Today's buyers want to experience the flow of a home, and that means navigating hallways, staircases, and rooms with varying ceiling heights. Cinewhoops' compact size and protected props make them ideal for these tight-space operations.

image_2

Where Traditional FPV Still Has Its Place

Don't count out traditional FPV drones entirely. They bring some serious advantages to specific real estate scenarios.

Speed and Efficiency
When you're shooting large commercial properties or expansive estates, traditional FPV drones can cover more ground faster. Their agility makes them perfect for those sweeping establishing shots that show the full scope of a property.

Dynamic Outdoor Sequences
For properties with significant outdoor features: think vineyards, horse farms, or waterfront estates: traditional FPV drones can capture more dynamic footage. They can quickly transition from ground-level shots to high aerial views, creating more engaging sequences.

Wind Resistance
Traditional FPV drones typically handle windy conditions better than Cinewhoops. If you're shooting coastal properties or high-rise buildings where wind is a factor, the extra power and streamlined design of traditional FPV can be crucial.

Matching Drone Type to Property Type

Urban Condos and Townhomes: Cinewhoop wins hands down. These properties require precise indoor navigation and smooth transitions between small spaces.

Suburban Single-Family Homes: Cinewhoop again. The combination of indoor/outdoor filming and need for safety around families makes this a no-brainer.

Luxury Estates: This is where it gets interesting. You might actually want both: Cinewhoop for the intimate interior tours and traditional FPV for those dramatic establishing shots of the entire property.

Commercial Properties: Traditional FPV often takes the lead here. Large warehouses, office buildings, and retail spaces benefit from the speed and dynamic range of traditional quads.

Vacant Land and Development Sites: Traditional FPV is your go-to. You need to cover large areas quickly and show topography and access points efficiently.

image_3

The Technical Reality Check

Let's talk about the elephant in the room: flight time. Cinewhoops typically get shorter flight times due to the extra drag and weight of those propeller guards. You're looking at maybe 3-5 minutes of filming time per battery versus 5-7 minutes with traditional FPV.

But here's the thing: real estate shoots are rarely about marathon flying sessions. They're about precise, planned shots. Most professional real estate videographers plan their shots in advance and execute them efficiently. The shorter flight time becomes less of an issue when you know exactly what you're trying to capture.

Cost and Investment Considerations

Cinewhoops generally cost less to get into than high-performance traditional FPV setups. They're also less likely to result in expensive crashes during your learning phase. When you're building a business around fpv drone services, minimizing risk while maximizing quality output is crucial.

Traditional FPV drones might require more investment in spare parts and repairs, especially as you're learning. But they also offer more versatility if you plan to expand beyond real estate into other types of aerial videography.

Making the Choice for Your Business

If you're just starting in real estate videography, a quality Cinewhoop is probably your best first investment. It'll handle 90% of your real estate needs while keeping you (and your clients' properties) safe as you build your skills.

For established operators looking to expand capabilities, adding a traditional FPV drone to complement your Cinewhoop setup gives you the flexibility to handle any property type that comes your way.

Ready to Elevate Your Real Estate Game?

The drone you choose isn't just about specs: it's about building a reputation for delivering the kind of footage that turns browsers into buyers. Whether you're team Cinewhoop or ready to master both platforms, the key is understanding that great aerial real estate marketing comes from knowing your tools and using them strategically.

Ready to gear up with the right equipment for your real estate videography business? Check out our selection of professional FPV drones and components designed specifically for commercial applications. From beginner-friendly Cinewhoops to advanced FPV setups, we've got the gear you need to make every listing look like a million bucks.

Because at the end of the day, the best drone is the one that helps you capture the shot that sells the house.

0
    0
    Your Cart
    Your cart is emptyReturn to Shop

    Search For Products

    Product has been added to your cart