ELRS vs Crossfire 2026: The Definitive Guide to Link Reliability for Professional FPV Pilots

ExpressLRS/ELRS and TBS Crossfire are trademarks of their respective owners. TechInMotion360.org is an independent service provider and references these brands for educational and compatibility purposes only.

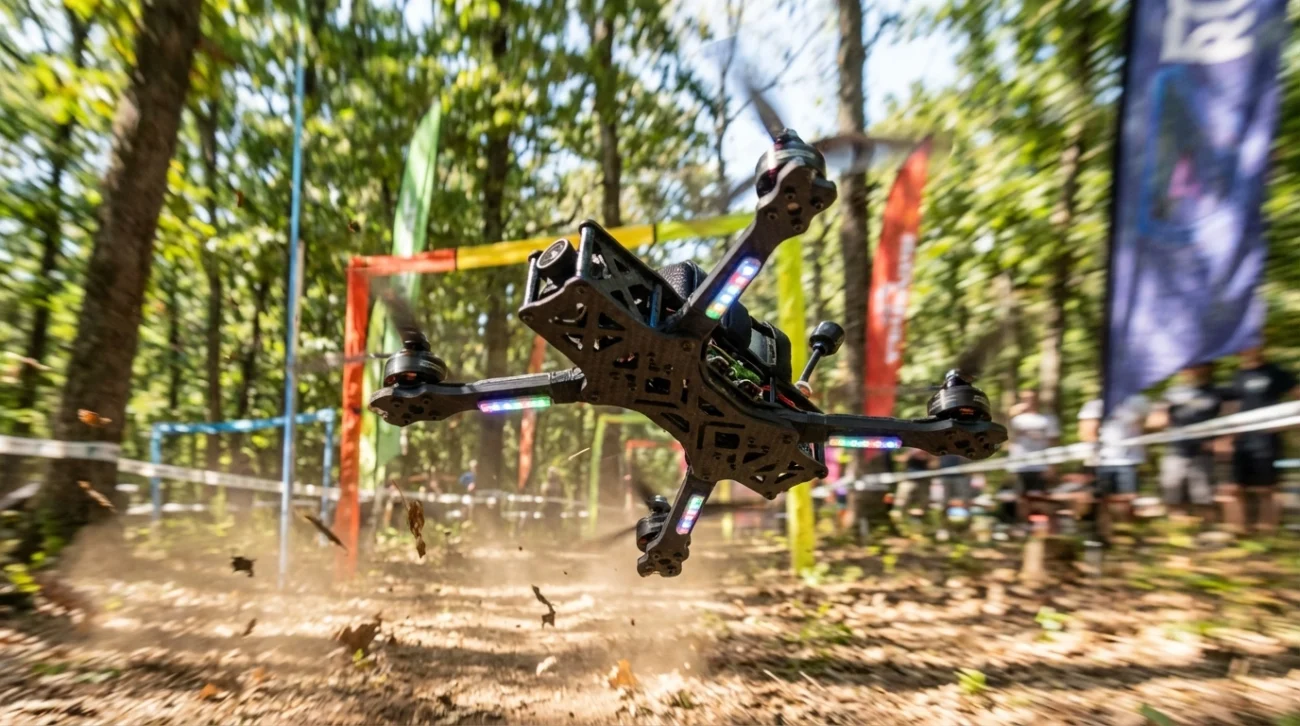
There’s a moment every professional FPV pilot dreads. You’re deep into a cinematic long-range shot, the client is watching the feed, and suddenly: your signal starts to stutter. In that split second, the difference between a flawless take and a crashed quad comes down to one thing: your radio link.

In 2026, the debate between ExpressLRS (ELRS) and TBS Crossfire continues to dominate hangar conversations and online forums alike. But here’s the thing: both protocols have evolved significantly, and the “right” choice isn’t as clear-cut as it was a few years ago.

This guide breaks down everything you need to know about link reliability for professional applications. No fanboy wars. No hype. Just the facts that matter when your reputation (and expensive gear) is on the line.

The Stakes Have Never Been Higher

Professional FPV work in 2026 looks nothing like it did even three years ago. We’re flying through luxury estates, capturing live events, threading needles in industrial inspections, and pushing the boundaries of what’s cinematically possible.

With stakes this high, your control link isn’t just a spec on a product page: it’s the invisible thread keeping everything together. A failsafe during a real estate walkthrough doesn’t just ruin a shot; it can damage property, hurt your reputation, and cost you future contracts.

That’s why understanding the nuances between ELRS and Crossfire matters more than ever.

Professional FPV pilot controlling a drone at golden hour, illustrating link reliability in action.

Understanding the Core Technologies

Before we dive into comparisons, let’s establish what we’re actually comparing.

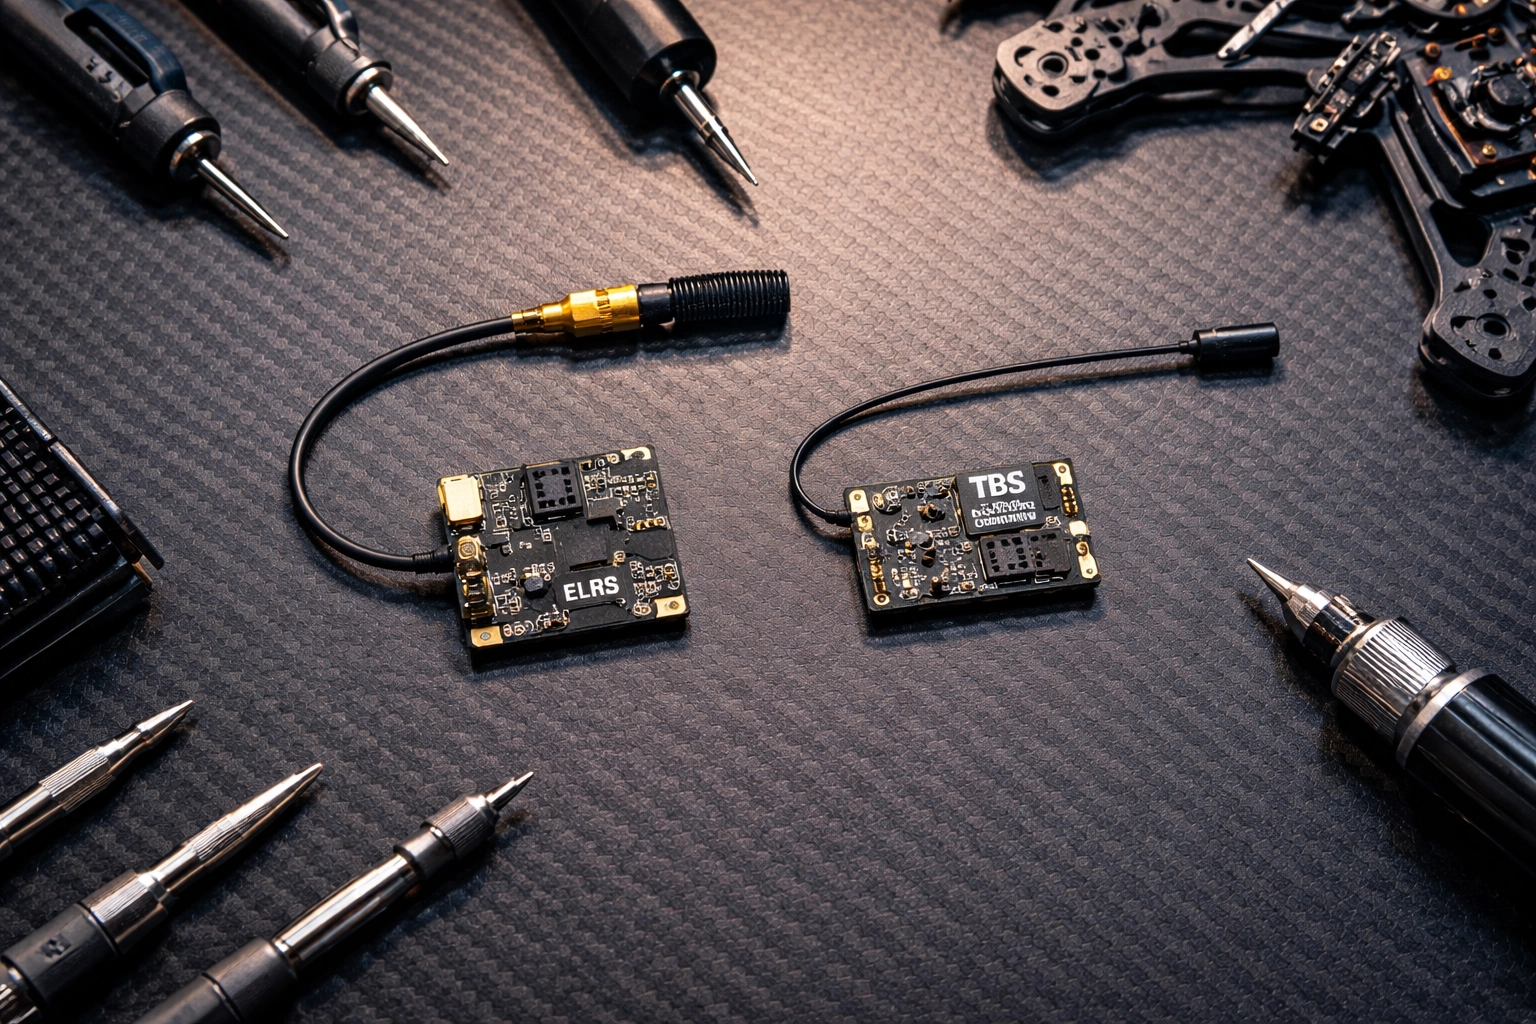
ExpressLRS (ELRS) is an open-source radio control link that has taken the FPV community by storm. Available in both 2.4 GHz and 900 MHz variants, it’s built on LoRa modulation and has become known for its impressive latency figures and budget-friendly pricing.

TBS Crossfire is the established professional standard from Team BlackSheep. Operating on 900 MHz, it’s been the go-to choice for long-range pilots and professionals for years. It’s a closed ecosystem with premium pricing but offers features specifically designed for mission-critical applications.

Both systems use similar underlying technology, but their implementation philosophies couldn’t be more different.

Latency and Update Rates: The Speed Game

Let’s talk numbers, because this is where ELRS really flexes.

The 2.4 GHz version of ELRS can achieve update rates up to 500 Hz with estimated latency as low as ~3–5 milliseconds under ideal conditions. That’s seriously fast. The 900 MHz variant runs at up to 200 Hz, which is still incredibly responsive for long-range work.

Crossfire, by comparison, tops out at 150 Hz. At this rate, it switches from LoRa to FSK modulation, which affects range performance compared to its lower update rate modes.

What does this mean practically?

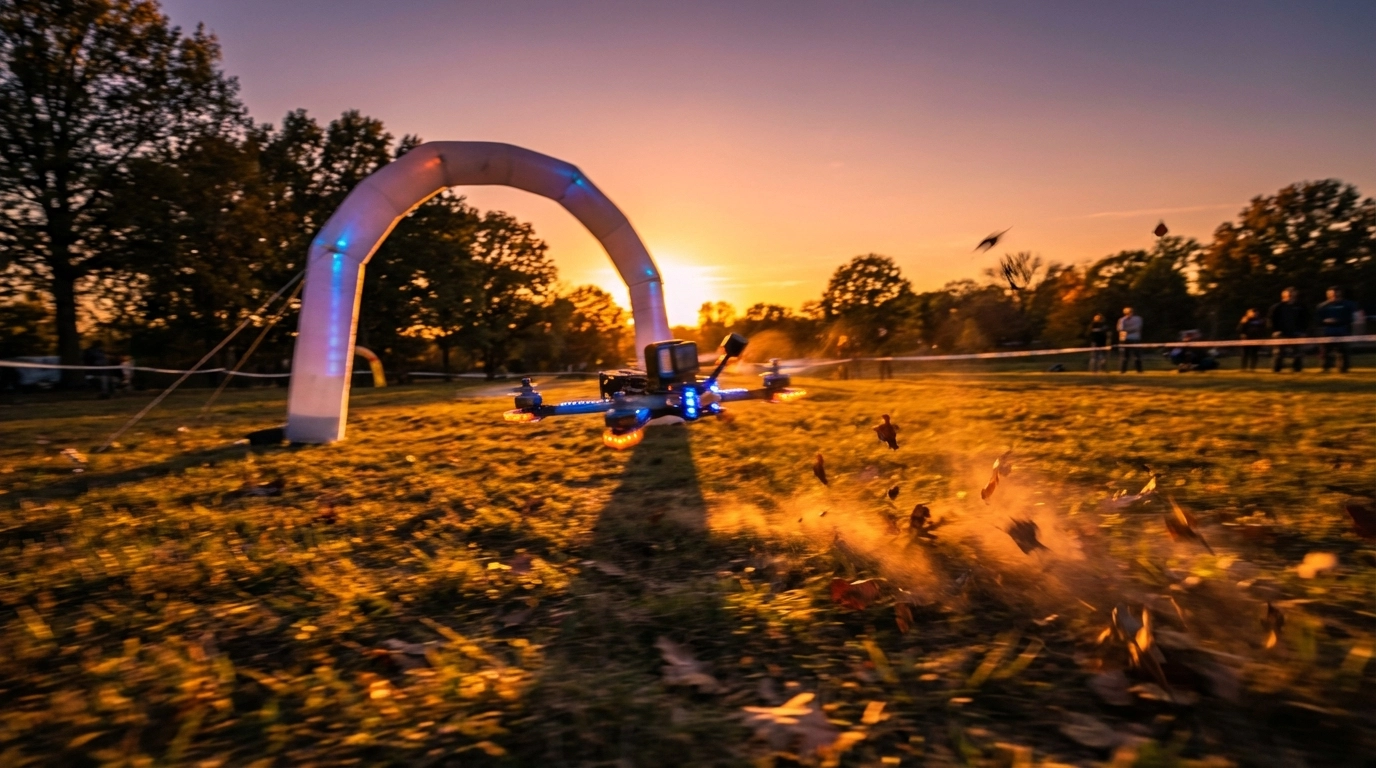
For acrobatic freestyle or tight indoor cinewhoops, that extra responsiveness from ELRS can make your sticks feel more connected to the quad. For smooth cinematic long-range work, both protocols offer more than enough speed: you likely won’t notice the difference in the final footage.

Side-by-side comparison of ELRS and Crossfire receivers on a workbench for FPV drone setup.

Range and Penetration: Going the Distance

Here’s where things get interesting.

At equal power levels (25 mW), ELRS generally achieves longer range thanks to its efficient packet structure. It’s doing more with less, which is impressive engineering.

However, Crossfire supports up to 2 watts (2000 mW) of transmission power. That’s a massive difference when you need to punch through obstacles or maintain solid links at extreme distances. Under ideal conditions and with proper antenna configuration, some pilots report ranges up to ~20–30 kilometers or more.

RF compliance note: Always verify and comply with your local RF power limits and licensing requirements (FCC, CE, etc.) before increasing output power.

For most professional work: real estate shoots, event coverage, commercial inspections: you’re rarely pushing beyond a few kilometers. But when you need that extra headroom, Crossfire’s raw power output provides a significant safety margin.

The Elephant in the Room: Security and Jam Resistance

This is the conversation many pilots skip, but it matters enormously for professional applications.

Crossfire offers data encryption and jam resistance. It’s currently the only hobby-level protocol with these features built in. Your control data is encrypted, and the system is designed to resist interference from other RF sources.

ELRS communication is not encrypted or jam-resistant. The data transmitted over the air has no special security measures. For hobbyist flying, this is rarely a concern. For professional work in crowded RF environments? It’s worth serious consideration.

There are anecdotal reports from some pilots of ELRS 2.4 GHz systems experiencing failsafes at large events with significant crowd density, while other pilots report stable performance with Crossfire in similar environments. When you’re flying over a concert crowd or at a busy commercial property, even the possibility of RF congestion affecting link stability is worth factoring into your risk assessment.

If you’re regularly flying in challenging RF environments, this security aspect deserves careful thought. For more controlled environments, it may be less of a concern: but it’s something every professional should factor into their decision.

FPV drone flying at high speed through industrial environment, showcasing range and penetration.

Cost and Ecosystem Considerations

Let’s be real: budget matters, even for professionals.

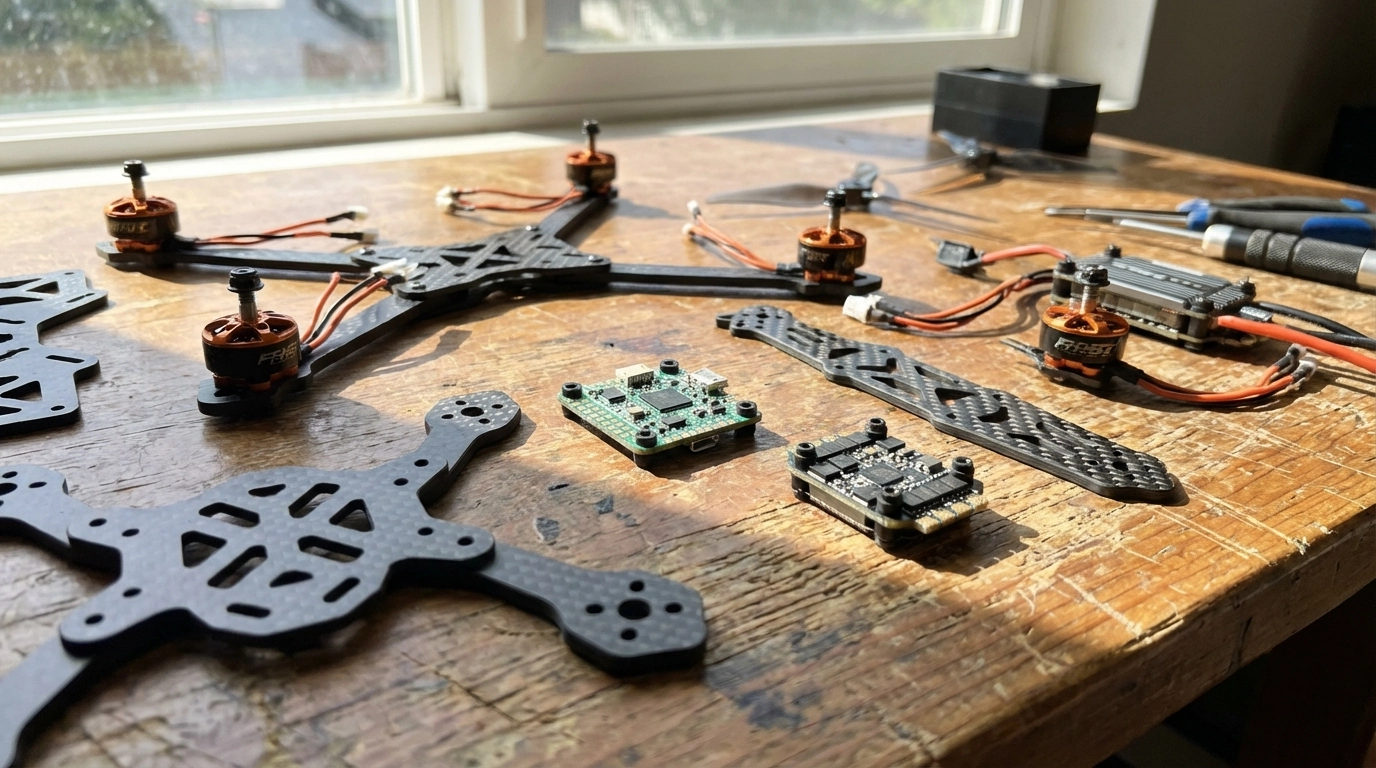
ELRS is significantly cheaper. As an open-source system, receivers are affordable, and you have compatibility across multiple transmitter brands including Radiomaster, Jumper, and others. You can build out a complete system for a fraction of Crossfire’s cost.

Crossfire commands premium pricing across the board. Receivers, transmitter modules, and accessories all cost more. However, you’re paying for build quality, long-term reliability, and deep integration within the TBS ecosystem (Tango 2, Fusion, Nano receivers).

There’s also the convenience factor. ELRS offers WiFi-based firmware updates, making it easy to stay current. Both systems support telemetry, LUA-based configuration, and dynamic power control: the essential features professionals need for situational awareness and compliance.

Which protocol offers the best value?

“Value” in the ELRS vs Crossfire 2026 debate isn’t just the sticker price—it’s what you spend (and risk) to get a link you trust when the shot matters.

ELRS is usually the best value for most pilots (dollars-to-performance).
If your priority is modern features, strong performance, and scaling multiple quads without blowing the budget, ELRS tends to win on cost efficiency. Receivers are widely available at lower prices, and the open ecosystem gives you more hardware choices across radios and brands.

Crossfire is often the best value when reliability features are the product.
If your work regularly puts you in messy RF environments and you’re paying for confidence, Crossfire’s premium can make sense—because the “value” is stability headroom and a mature, mission-focused ecosystem. For pilots who can’t afford a failsafe moment (client pressure, complex locations), that margin can be worth more than the upfront cost.

Quick way to decide:

  • If you’re building/maintaining multiple rigs, or want maximum performance per dollar: ELRS is typically the best value.
  • If one failed take could cost more than the price difference in gear: Crossfire can be the better value.

If you’re ready to upgrade link reliability (either direction), start with our radios and receivers options here:
TechInMotion360 Radios & Receivers

Making the Right Choice for Your Operation

After weighing all the factors, here’s how I’d break it down for professional pilots:

Choose Crossfire if:

  • You regularly fly in crowded RF environments (events, urban areas, industrial sites)
  • Long-range exploration or stability-critical missions are your bread and butter
  • Encryption and jam resistance are non-negotiable for your clients
  • You value proven, mature firmware over cutting-edge features
  • Premium pricing fits your business model

Choose ELRS if:

  • You primarily fly in controlled environments with predictable RF conditions
  • Ultra-low latency is crucial for your flying style
  • Budget efficiency matters for scaling your fleet
  • You enjoy the flexibility of open-source and community-driven development
  • The 900 MHz variant (which offers better stability than 2.4 GHz in crowded spaces) meets your needs

Cinewhoop drone hovering above a crowded outdoor festival, emphasizing reliable RF link in dense environments.

The Professional’s Perspective

Here’s the truth that transcends any protocol debate: your link is only as reliable as your overall system.

Antenna placement, receiver positioning, proper failsafe configuration, and regular equipment checks matter just as much as which protocol you choose. We’ve seen Crossfire setups fail due to poor antenna orientation, and we’ve seen ELRS rigs perform flawlessly in demanding conditions because they were built and configured properly.

If you’re struggling with link reliability or want to optimize your current setup, our Advanced Support Performance Tune & Troubleshoot package can help you dial everything in for maximum reliability.

And before any flight: regardless of your control link: make sure you’re running through proper pre-flight procedures. Check out our Pre-Flight Checklist and Safety Tips to ensure you’re starting every session on the right foot.

Looking Forward

The gap between ELRS and Crossfire has narrowed significantly in 2026, and that’s great news for pilots. Competition drives innovation, and both ecosystems continue to improve.

For TechInMotion360, we believe the future belongs to pilots who understand their tools deeply and choose based on their specific mission requirements: not forum hype or brand loyalty.

Whether you’re Team Crossfire or Team ELRS, what matters most is that you fly with confidence, knowing your link will hold when it counts.

The sky’s waiting. Choose your link wisely, configure it properly, and go create something incredible.


Have questions about optimizing your control link setup? Reach out to our team at TechInMotion360.org for personalized guidance.

FPV Racing Drones vs DJI FPV: Which One Actually Wins for Speed and Control?

Let’s cut right to it. You’re here because you want to go fast. Really fast. And you’re wondering whether to grab a DJI FPV off the shelf or dive into the world of custom-built FPV racing drones with support from a team that actually knows what they’re doing.

I’m going to break down exactly what you’re getting with each option, the real performance differences, the control you’ll have, the customization possibilities, and ultimately, the value for your money. By the end, you’ll know exactly which path makes sense for your goals.

The DJI FPV: A Solid Entry Point with Clear Limitations

DJI changed the game when they released the DJI FPV. For the first time, someone could unbox a drone, strap on goggles, and experience immersive first-person flight without spending weeks learning to solder and configure. That’s genuinely impressive.

The DJI FPV’s manufacturer-claimed maximum is approximately 87 mph (140 kph) in Manual (M) mode, and it offers three flight modes that gradually introduce pilots to more aggressive flying (source: DJI FPV User Manual, EN PDF). The goggles are crisp, the transmission is reliable, and the whole package just works out of the box.

But here’s where things get interesting for anyone serious about FPV racing or professional cinematic work.

image_1

DJI FPV Trade-offs for Advanced Users

Speed ceiling exists. At a manufacturer-claimed ~87 mph in M mode, you’re fast, but many optimized 5-inch racing builds have been tested around or above ~100 mph in favorable conditions (examples: DJI FPV User Manual, Oscar Liang, SpeedyBee Mario 5 review). In competitive racing, that difference can matter.

Tuning flexibility is narrower. DJI’s flight controller is tuned for broad usability. You don’t get the same depth of access to PID tuning, custom rates, filtering, and firmware options that open racing stacks provide.

Repair costs can be higher. Crash a DJI FPV and you’ll typically source proprietary parts. The arms aren’t designed for quick swaps, so a hard crash may mean ordering OEM components and waiting on shipping or service.

Customization is limited within the OEM ecosystem. Swapping motors, frames, or non-DJI camera systems isn’t supported the way it is on open, modular racing platforms.

Custom FPV Racing Builds: Where Serious Pilots Live

Here’s the truth that experienced FPV pilots know: the real performance, the real control, and the real value comes from custom-built racing drones tailored to exactly how you fly.

When you build or upgrade a custom FPV rig, every single component serves your specific needs. Racing gates in tight indoor courses? You configure for that. Chasing cars through desert terrain? Different setup entirely. Cinematic real estate work that demands smooth, controlled movements? That’s another configuration altogether.

This is where TechInMotion360’s performance upgrade packages become game-changers for pilots who want to level up without the guesswork.

image_2

The Speed Advantage

Custom racing quads built with quality components can exceed ~100 mph in optimized builds and favorable conditions; some dedicated setups reach higher speeds (see examples: Oscar Liang, SpeedyBee Mario 5 review). The difference often comes down to:

  • Motor selection: You choose KV ratings optimized for your battery voltage and prop size
  • Frame weight: Carbon fiber frames purpose-built for racing shed unnecessary grams
  • Power systems: Custom power system upgrades let you run configurations that maximize thrust-to-weight ratios

When milliseconds separate winners from everyone else, these details matter enormously.

The Control Advantage

This is where custom builds tend to stand out for advanced users.

With a custom setup, you’re tuning your flight controller to match your exact preferences. Betaflight, KISS, or other firmware options give you granular control over:

  • PID values for different flight characteristics
  • Rate curves that match your stick movements
  • Filters optimized for your specific motor and prop combination
  • Failsafe behaviors tailored to your flying environment

DJI provides three modes; open racing stacks offer much deeper adjustability.

For pilots struggling with configuration, TechInMotion360’s advanced performance tune and troubleshooting support walks you through optimizing your setup for peak performance.

Real-World Performance Comparison

Feature DJI FPV Custom Racing Build
Top Speed ~87 mph ~100+ mph (build-dependent)
Flight Controller Tuning Limited presets Widely customizable
Camera Options Fixed DJI camera (OEM) Many compatible FPV cameras
Repair Time Days to weeks (service/parts availability) Often minutes with spare parts
Upgrade Path Limited within OEM ecosystem Extensive (component-level)
Racing League Eligible Some classes Most classes (varies by rules)
Long-term Cost Typically higher (proprietary parts) Typically lower (standard components)

Footnote: Specifications are approximate; DJI figures reflect manufacturer-claimed data for DJI FPV in Manual (M) mode under ideal conditions. Custom build performance varies by configuration, tune, weight, battery, props, and environment.

image_3

The Value Equation Most People Miss

Here’s something that surprises newer pilots: custom builds often cost less over time.

Yes, the initial learning curve is steeper. Yes, you’ll spend time understanding components and configurations. But consider this:

Crash a DJI FPV arm: You’re ordering proprietary parts, waiting for shipping, and potentially sending the whole unit in for repair. Cost? Often approximately $200-400+ (estimate; varies by damage, parts, labor, taxes, and shipping).

Crash a custom racing quad arm: You grab an approximately $15 replacement arm from your parts bin, swap it in about 10 minutes, and you’re back in the air.

Multiply that across a year of aggressive flying and the math gets obvious real fast.

For pilots who want professional support maintaining their custom rigs, TechInMotion360’s basic maintenance and repair services keep you flying without the frustration of diagnosing problems alone.

Who Should Choose DJI FPV?

Let’s be fair here. DJI FPV makes sense for specific situations:

  • Complete beginners who want immediate gratification without learning curve
  • Casual flyers who won’t push performance limits
  • Content creators who prioritize convenience over maximum performance
  • Pilots who genuinely don’t want to learn the technical side

There’s no shame in wanting something that just works. DJI delivers that experience reliably.

Who Should Choose Custom FPV Builds?

Custom builds supported by expert services like TechInMotion360 make sense when:

  • Speed matters and you want every possible advantage
  • Racing competitively in leagues that allow (or require) custom builds
  • Professional work demands specific performance characteristics
  • Long-term investment matters more than immediate convenience
  • Learning the craft appeals to you as part of the journey

If you’re nodding along to these points, you already know which direction you’re headed.

image_4

Getting Started with Custom FPV Racing

The biggest barrier to custom builds has always been knowledge and support. Building your first quad can feel overwhelming when you’re staring at component lists and wiring diagrams.

This is exactly why having expert support matters so much.

TechInMotion360’s annual remote support plan gives you year-round access to experienced pilots who can guide you through builds, troubleshoot problems, and help you optimize performance. It’s like having a mentor on speed dial.

For specific upgrades, their control and range enhancement packages and video camera system upgrades let you level up individual components without replacing your entire setup.

The Bottom Line

DJI FPV is a capable machine that opened FPV flying to millions of new pilots. That’s worth celebrating.

But if you prioritize speed, tuning control, customization, and repairability, well-built custom FPV rigs often provide meaningful advantages for advanced users (based on typical configurations and use cases).

The choice comes down to your goals. If FPV is something you’ll do occasionally on weekends and convenience ranks highest, DJI can be a great fit. If you’re chasing podiums, building a career, or want deeper control over your rig, a custom path may be the better long-term fit.

Ready to build something that actually matches your ambitions? Explore TechInMotion360’s full range of FPV support services and start flying the way you were meant to fly.

Performance disclaimer: All performance figures (e.g., speed, repair time) are estimates based on manufacturer claims, documented examples, typical builds, and controlled test conditions. Actual results vary with configuration, weight, tuning, battery health, prop selection, environment, and pilot skill.

Educational purpose disclaimer: This article is for educational and informational purposes only. TechInMotion360.org is not affiliated with or endorsed by DJI. Always follow local laws, regulations, and safe operating practices.

Complete FPV Kits vs Building Your Own: What Actually Saves You Time and Money

So you’ve decided to get into FPV drones. Awesome choice. But now you’re staring down two very different paths: grab a complete kit that’s ready to fly, or source every single component yourself and build from scratch.

Both options have their place. But which one actually makes sense for your situation, your budget, and your sanity? Let’s break it down with real numbers, real time estimates, and zero fluff.

The DIY Dream vs. The DIY Reality

Building your own FPV drone sounds incredible on paper. You get to handpick every component, customize everything to your exact specifications, and learn the system inside and out. There’s a certain pride that comes with flying something you assembled from bare parts.

But here’s what nobody tells you upfront: the hidden costs add up fast, and the time investment can be brutal: especially if you’re new to the hobby.

When you build from scratch, you’re not just buying parts. You’re buying the education that comes with figuring out which parts actually work together. And that education often comes in the form of expensive mistakes.

image_1

Breaking Down the Real Costs

Let’s get into the numbers. A typical DIY FPV build requires:

  • Frame: $30–$80
  • Flight controller: $40–$100
  • ESC (Electronic Speed Controller): $40–$80
  • Motors (4x): $60–$120
  • Propellers: $10–$25
  • Camera: $25–$60
  • Video transmitter: $30–$70
  • Receiver: $25–$50
  • Antennas: $15–$40
  • Wiring, hardware, zip ties: $20–$40

That’s roughly $295–$665 just for the drone itself. Now add goggles ($150–$600), a radio transmitter ($80–$300), batteries ($25–$50 each, and you’ll want at least 4), and a charger ($40–$100).

Your “budget build” just became a $700–$1,500+ investment. And we haven’t even factored in the tools you might need: soldering iron, hex drivers, multimeter, heat shrink, and more.

With a complete kit from TechInMotion360’s DJI BNF/PNP collection, you’re getting matched components that are tested to work together, often at a comparable or better price point: minus the headaches.

The Time Factor: Hours vs. Weeks

Here’s where complete kits really shine. A beginner building their first FPV drone from scratch should budget:

  • Research time: 10–20 hours (watching tutorials, reading forums, comparing parts)
  • Ordering and waiting: 1–3 weeks (especially if ordering from multiple suppliers)
  • Assembly time: 4–10 hours (assuming everything goes right)
  • Troubleshooting: 2–10+ hours (because something always goes wrong the first time)

We’re talking potentially 40+ hours before you even take your first flight. And that’s being optimistic.

Complete kits? Unbox, charge, bind, fly. Most people are in the air within an hour or two. That’s not an exaggeration: it’s the whole point of a curated kit.

image_2

The Compatibility Nightmare

This is the thing that catches most DIY builders off guard. FPV components aren’t universally compatible. You need to verify:

  • Firmware compatibility between flight controller and ESC
  • Voltage requirements across all components
  • Physical mounting dimensions
  • Protocol matching between receiver and transmitter
  • Camera and VTX voltage compatibility

Get any of these wrong, and you’re looking at components that won’t communicate, won’t fit, or worse: magic smoke when you plug in the battery. That $40 flight controller you scored on sale? Useless if it doesn’t play nice with your ESC firmware.

TechInMotion360’s complete kits eliminate this entirely. Every component is selected to work together out of the box. No guesswork, no forum deep-dives trying to figure out why your OSD isn’t showing up.

The Learning Curve Consideration

“But I want to learn how everything works!”

Fair point. Understanding your drone’s systems makes you a better pilot and gives you the ability to repair and upgrade confidently. There’s genuine value in that knowledge.

Here’s the thing though: you can still learn all of this with a complete kit. The difference is you’re learning while flying instead of learning while troubleshooting why nothing works.

When something eventually breaks (and it will: that’s FPV), you’ll have hands-on repair experience. And when you’re ready to upgrade, services like the FPV Drone Performance Upgrade Package or Power System Upgrades let you level up with confidence.

The Support Difference

Building from scratch means you’re on your own. When something doesn’t work, you’re hitting Reddit, Facebook groups, and manufacturer support (good luck with that last one). You might get helpful advice. You might get conflicting opinions. You’ll definitely spend hours searching.

Complete kits from TechInMotion360 come with something DIY builds don’t: actual support from people who know the exact configuration you’re flying.

The Annual Remote Support Plan gives you a full year of expert assistance. Got a weird issue? Someone who knows your setup can help diagnose it. Need performance tuning? The Advanced Support Package has you covered.

That’s not a luxury: it’s a massive time-saver that actually accelerates your learning.

image_3

When DIY Actually Makes Sense

Let’s be fair. There are situations where building from scratch is the right call:

  • You’re an experienced builder who already knows component compatibility inside and out
  • You have very specific requirements that no pre-built kit addresses
  • You genuinely enjoy the building process as much as flying
  • You have the tools, time, and troubleshooting patience already

For these pilots, DIY is rewarding. The process is part of the hobby for them.

But if you’re trying to fly as soon as possible, minimize frustration, and avoid expensive compatibility mistakes? Complete kits win every time.

The Real Cost of “Saving Money”

Here’s the math nobody does upfront:

That DIY build that’s “$100 cheaper” on paper? Add in the wrong ESC you bought because the listing was confusing ($45). The frame that didn’t fit your motors ($35). The camera you fried because of a voltage mismatch ($50). The two weeks of evenings spent troubleshooting instead of flying.

Suddenly your savings evaporated: and you lost time you’re never getting back.

Complete kits from TechInMotion360 aren’t just about convenience. They’re about predictable outcomes. You know what you’re getting, you know it works, and you know someone has your back if something goes sideways.

Making the Right Choice

If you’re new to FPV, the answer is pretty clear: start with a complete kit. Get flying, build your skills, and learn the systems through actual flight experience. When you’re ready to go deeper, upgrade paths and maintenance support are waiting.

If you’re experienced and want a custom build, go for it. You know the risks, you have the skills, and you’re prepared for the process.

For everyone else? Save your time, protect your budget, and start your FPV journey with components that actually work together. Your future self: the one who’s out flying instead of debugging firmware: will thank you.

image_4

Ready to Start Flying?

Check out TechInMotion360’s complete FPV drone options and find a kit that matches your goals. And if you ever need help along the way, troubleshooting support is just a click away.

The sky’s waiting. Let’s get you there the smart way.

Carbon Fiber Frames vs Cheap Alternatives: Why Your Frame Choice Makes or Breaks Your FPV Drone

Let me paint you a picture. You’ve just spent three months learning to fly FPV, dropped serious cash on a decent camera, quality motors, and a flight controller that rivals a small computer. Then you slapped all of it onto a $15 frame you found on some random marketplace because “a frame is just a frame, right?”

Wrong. So very wrong.

That budget frame is about to become the weakest link in your entire setup. And when it fails, not if, when, it’s taking everything else down with it. I’ve seen it happen dozens of times, and it never gets easier to watch someone learn this lesson the hard way.

The Hidden Cost of “Saving Money” on Frames

Here’s the thing about cheap frames that nobody tells you upfront: they’re not actually cheap. Not when you factor in replacement parts, crashed components, and the sheer frustration of dealing with subpar materials.

Budget frames typically use lower-grade carbon fiber, or worse, carbon fiber mixed with fiberglass to cut costs. The result? A frame that looks decent on paper but crumbles under real-world stress. That first hard landing? Crack. That tree branch you clipped during a proximity run? Shattered arm. That slightly rough landing on asphalt? Split bottom plate.

image_1

Quality carbon fiber frames, like the ones we work with at TechInMotion360, use properly layered, high-density carbon that’s designed to handle the abuse FPV flying dishes out. The difference isn’t just marketing speak, it’s physics.

Understanding Carbon Fiber Quality

Not all carbon fiber is created equal. This is probably the most important thing you’ll learn from this entire post, so pay attention.

Cheap carbon fiber characteristics:

  • Thin, inconsistent layering
  • Lower carbon-to-resin ratio
  • Brittle failure modes (shatters instead of flexing)
  • Rough, unfinished edges that can cut wires
  • Poor vibration dampening

Quality carbon fiber characteristics:

  • Multiple precisely-layered sheets
  • Higher carbon content for strength-to-weight optimization
  • Controlled flex before failure
  • Chamfered, smooth edges
  • Better vibration characteristics for cleaner footage and stable flight

The research backs this up: carbon fiber’s advantages include being lighter, stronger, less dense, and stiffer with more responsive handling characteristics. Quality frames resist corrosion and don’t experience the fatigue issues that plague cheaper alternatives over time.

The Crash Test Reality

Let’s talk about what actually happens when you crash, because you will crash. Everyone does. It’s part of flying FPV.

With a quality carbon fiber frame, a moderate crash typically results in:

  • Minor scratches or scuffs
  • Maybe a bent prop (easily replaced)
  • Your electronics staying safely mounted
  • Getting back in the air within minutes

With a budget frame, that same crash often means:

  • Cracked or broken arms
  • Motor mounts that snap clean off
  • Standoffs pulling through weakened material
  • A pile of expensive components scattered across the ground

image_2

I’ve personally seen pilots go through four or five cheap frames in the time a quality frame would still be flying strong. When you add up those replacement costs, plus the time spent rebuilding, plus any collateral damage to other components… that “savings” evaporates pretty quickly.

Weight vs. Durability: Finding the Sweet Spot

Here’s where it gets interesting. You’d think lighter always equals better in the FPV world, but that’s an oversimplification.

Research comparing similar-priced frames showed an aluminum frame at 216 grams versus a carbon fiber frame at 240 grams. That 24-gram difference? Barely noticeable in flight. What IS noticeable is how each material handles stress.

Quality carbon fiber frames hit the sweet spot: they’re light enough for agile flight characteristics while being strong enough to survive your learning curve. Cheap frames often sacrifice structural integrity for weight savings, giving you a drone that flies great until its first real impact.

The goal isn’t the lightest possible frame, it’s the best strength-to-weight ratio you can achieve. That’s where premium carbon fiber shines.

Flight Characteristics You Can Actually Feel

Beyond durability, your frame choice directly impacts how your drone flies. This isn’t placebo effect stuff, it’s measurable.

Vibration tuning becomes a real factor with material choice. Your flight controller is typically calibrated assuming certain vibration characteristics. Cheaper frames with inconsistent carbon quality or poor design create noise in your system that:

  • Degrades your video footage
  • Makes tuning more difficult
  • Can trigger unwanted flight controller responses
  • Reduces overall flight smoothness

A well-designed carbon fiber frame acts as a stable platform for all your components. Everything stays where it should, vibrations get dampened appropriately, and your flight controller can do its job without fighting bad data.

image_3

The Long-Term Investment Perspective

Let me break down the real math here:

Scenario A: Budget Frame Approach

  • Initial frame cost: $15-25
  • Average lifespan before replacement: 2-3 months of regular flying
  • Collateral damage from frame failures: $50-150 per incident
  • Annual frame costs: $60-100+ just in frames
  • Total first-year cost: $150-300+ including damaged components

Scenario B: Quality Frame Investment

  • Initial frame cost: $45-85
  • Average lifespan: 12+ months of regular flying
  • Collateral damage: Minimal (frame protects components)
  • Annual frame costs: $45-85
  • Total first-year cost: $45-85

The numbers don’t lie. Spending more upfront on a quality frame actually saves you money over time. Plus, you get better flight characteristics, cleaner footage, and way less frustration.

When Your Frame Does Need Attention

Even the best frames eventually need maintenance or upgrades. That’s just reality. The difference is how often and how extensive that maintenance needs to be.

If you’re running a quality setup and something does go wrong, our Basic Maintenance & Repair service can get you back in the air quickly. For more complex issues or if you want to optimize your build further, our Advanced Support Package covers performance tuning and troubleshooting.

The point is: with a quality frame, maintenance is occasional and manageable. With a cheap frame, it’s constant and expensive.

Making the Right Choice

So what should you actually look for when choosing a frame? Here’s my checklist:

Material specs: Look for 3K or higher carbon weave, multiple layers, and published thickness specifications. If a seller can’t tell you the exact carbon specs, that’s a red flag.

Design features: Quality frames have chamfered edges, proper hardware, and thoughtful component mounting options. Check for reinforced motor mounts and adequate standoff spacing.

Reputation: Frames from established manufacturers with community feedback beat anonymous marketplace options every time.

Warranty/support: Does the manufacturer stand behind their product? Quality frame makers typically do.

image_4

The Bottom Line

Your frame is literally the foundation of your entire FPV drone. Everything else, your expensive camera, your tuned motors, your flight controller, all of it depends on that frame to keep it safe, stable, and flying.

Cheaping out on your frame is like building a house on sand. Sure, it might look fine at first, but it’s only a matter of time before everything comes crashing down.

Invest in a quality carbon fiber frame from the start. Your wallet will thank you. Your components will thank you. And you’ll spend way more time flying and way less time rebuilding.

Ready to upgrade your setup or need help choosing the right components? Check out our Performance Upgrade Package or browse our full range of FPV drone support services to get flying with confidence.


Have questions about frame selection or need help with your current build? Drop by the TechInMotion360 blog for more guides and tips.

0
    0
    Your Cart
    Your cart is emptyReturn to Shop

    Search For Products

    Product has been added to your cart